Hiding disk partition in Windows 7 helps to prevent private information from being seen by others. Well, how to hide disk partition Windows 7? In this article, I will show you how to hide a partition in Windows 7 with 2 free methods, and you can choose the best one in accordance with actual demands.
For many Windows 7 users, saving important or confidential information on their PC or laptop is a common operation. Well then, how to prevent this kind of information from being seen by others? The best way is to use MiniTool Partition Wizard Free Edition to hide the partition which saves private information.
Hide Partition Windows 7 with MiniTool Partition Wizard
MiniTool Partition Wizard Free Edition is a professional partition magic, which can help you complete different kinds of partition operations like create partition, format partition, extend partition, resize partition and split partition.
Besides, it also provides many advanced functions that Disk management doesn’t offer like hide partition, copy partition, convert MBR to GPT, align partition, check file system, wipe disk and so on. All of these operations are very simple. Now, let’s see how to hide a partition in Windows 7 with MiniTool Partition Wizard.
Step 1. To hide partition Windows 7, you need to download MiniTool Partition Wizard Free Edition by clicking the following button. Then install it on your computer and launch it to get the main interface.
MiniTool Partition Wizard FreeClick to Download100%Clean & Safe
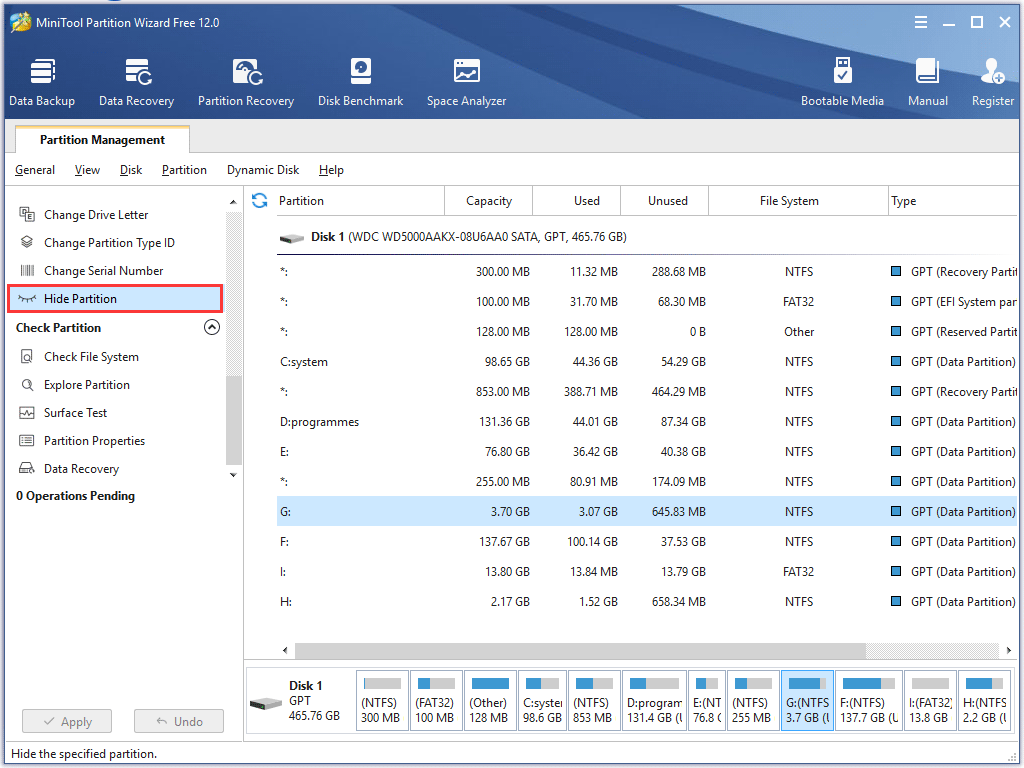
Step 2. Select the partition that you want to hide and choose Hide partition from the left action panel.

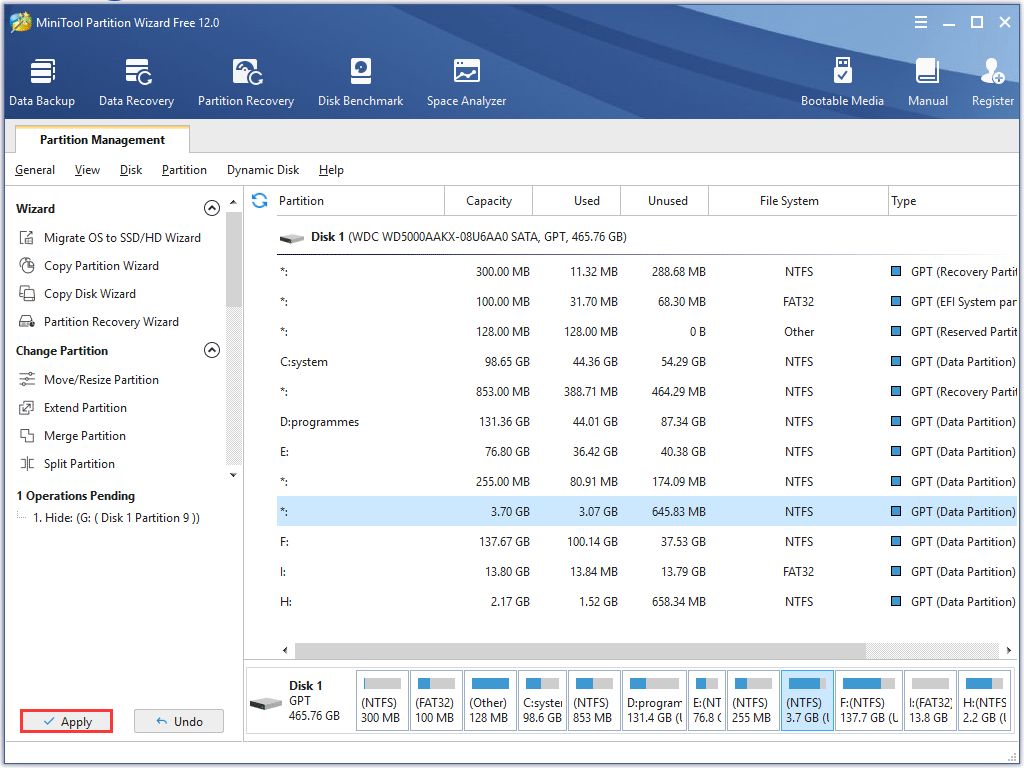
Step 3. The following page is a preview. You just need to click Apply on the upper left corner to allow the final change. After click Apply button, you can see the selected partition becomes hidden partition.


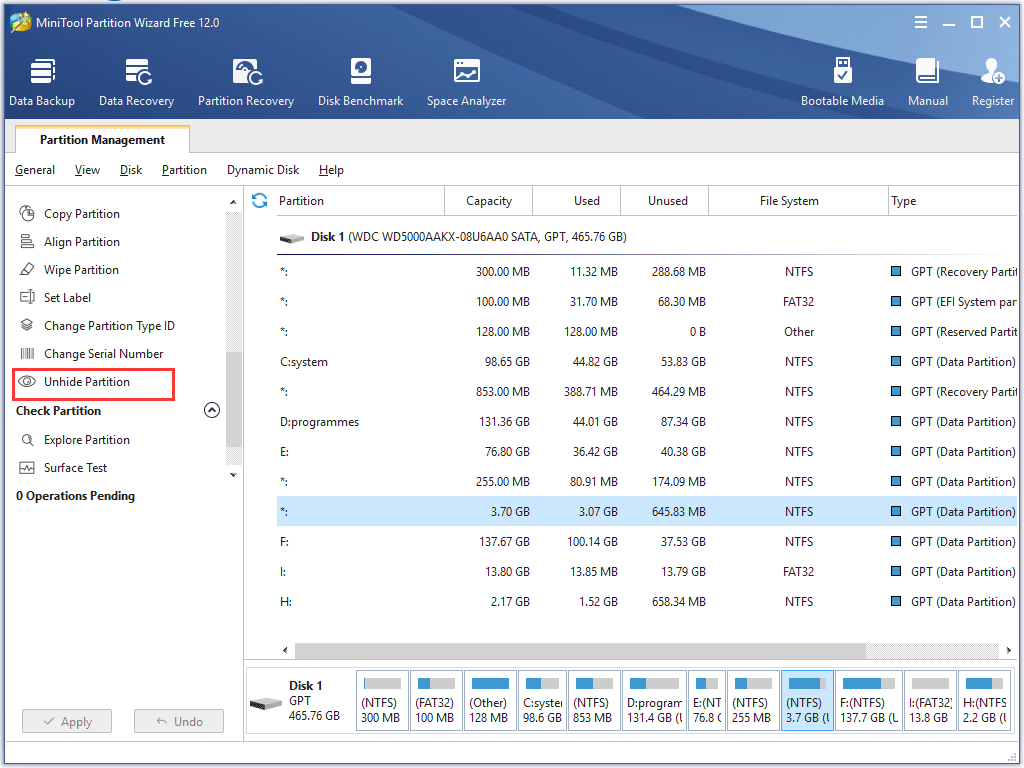
This is the whole process about how to hide disk partition Windows 7 with MiniTool Partition Wizard. After you hide partition Windows 7 successfully, the hidden partition will be invisible in Windows Explorer, and it is also impossible to make it visible in disk management utility.
Hide Disk Partition Windows 7 with Disk Management Utility
Although Disk Management provides limited functions on disk and partition management, it also allows you to hide hard drive Windows 7. You just need to remove its drive letter and the partition can be inaccessible.
For users who don’t want to resort to a third-party software, they can use Disk Management to hide partition Windows 7.
Step 1. Click the Windows 7 Start menu, type diskmgmt.msc in the search box and hit Enter to open Disk Management.
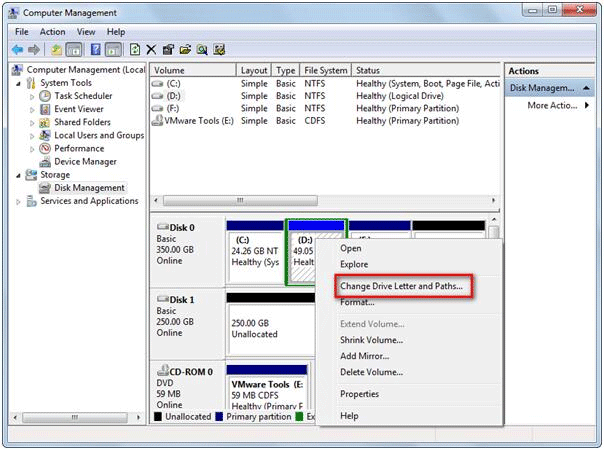
Step 2. Here, to hide a partition, you should right-click the target partition and choose Change Drive Letter and Paths from the popup menu to remove the drive letter. Once its drive letter is removed, all people including the administrator will be unable to see it in Windows Explorer.

The steps to hide disk partition Windows 7 with Disk Management are very simple as well. However, the defect is to reallocate a drive letter for the partition in disk management will make it visible again, so this is not enough to protect private information.
In this case, if your computer saves private or confidential information, you’d better hide hard drive Windows 7 with MiniTool Partition Wizard Free Edition.
MiniTool Partition Wizard FreeClick to Download100%Clean & Safe
Conclusion
After learning how to hide a hard drive Windows 7, you can see how simple it is to hide partition Windows 7. If you have private or confidential files stored on your partition, don’t forget to hide the partition with MiniTool Partition Wizard or Disk Management.
If you have any question about how to hide a partition in Windows 7 or if you would like to learn about MiniTool Partition Wizard, you can leave a message on the following comment zone and we will reply as soon as possible. If you need any help when using MiniTool software, you can contact us via [email protected].

User Comments :