GLFW Error 65542 in Minecraft
Lots of Minecraft players encountered the error “GLFW error 65542: WGL: The driver does not appear to support OpenGL” when they start the Minecraft launcher. Why does the error appear? How to fix the error? Keep reading.
MiniTool Partition Wizard FreeClick to Download100%Clean & Safe
Fix 1: Update the Video Card Driver
When you receive GLFW error 65542, you might notice that a suggestion follows the error and it reads “please make sure you have up-to-date drivers …”.

Therefore, to fix GLFW error 65542, you can try updating your video card driver first, and the steps are displayed below.
Step 1: Right-click the Windows icon on the taskbar and then choose the Device Manager option from the pop-up menu.
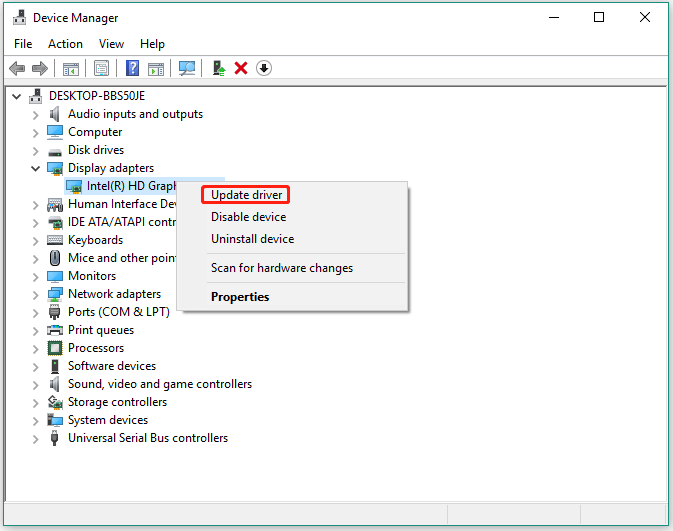
Step 2: Once you are inside Device Manager, find and expand the Display adapters entry.
Step 3: Right-click the item listed below Display adapters and then choose the Update driver option.
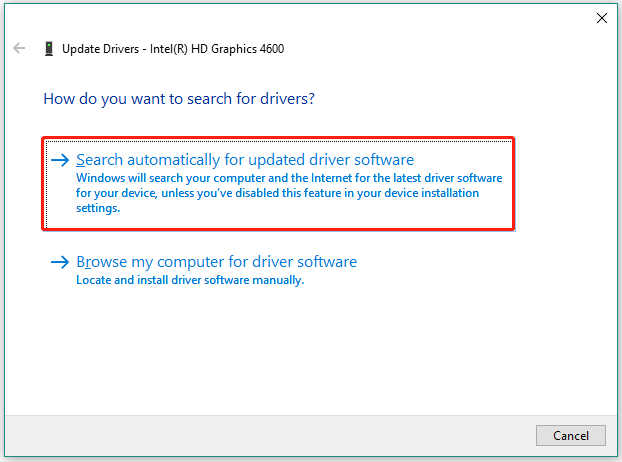
Step 4: On the “How do you want to search for drivers” window, choose the Search automatically for updated driver software option.
Step 5: Wait patiently until the scanning process comes to an end.
Step 6: View the result once you get it.
If you see the message saying “The best drivers for your device are already installed”, it means the video card driver is not the culprit, and you should try other solutions.
If you see the driver software, you should install it according to the on-screen instructions. Once you finish the driver installation, you can restart Minecraft and see if the error message “GLFW error 65542: WGL: The driver does not appear to support OpenGL” will appear.
Fix 2: Uninstall the DisplayLink Graphics Driver
The DisplayLink Graphics Driver conflicts with the Java-powered version of Minecraft. Therefore, you should remove the software if you are actively using it.
For how to uninstall the software, here are the steps:
- Press Windows + R at the same time to launch the Run dialog box.
- Type cpl into the box and then hit the Enter key.
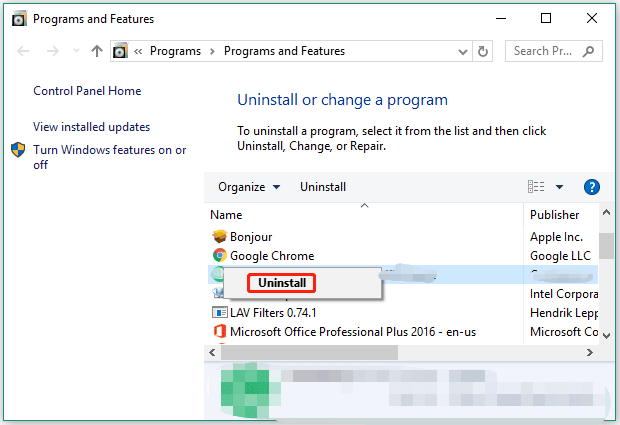
- Once you are inside the Programs and Features window, find and right-click the software in the list and choose the Uninstall
- Follow the on-screen instructions to complete the uninstallation.
Fix 3: Add the OpenGL.DLL File to File Explorer
Aside from driver issues, missing files like opengl32.dll or opengl64.dll can also trigger GLFW error 65542. So, go to the path C: Program Files Java *JRE VERSION* bin to check if the file is still here (“JRE VERSION* represents the version of JRE). If the file is missing, you can manually get the file back through the following steps:
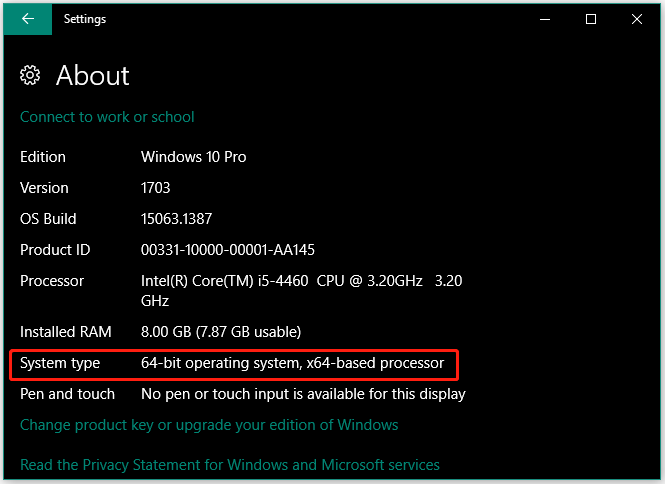
Step 1: Check your system type.
Right-click the Windows icon on the taskbar, choose the Settings option, choose the System option, choose the About option, and read the information following System type.
You might be interested in How to Upgrade 32 Bit to 64 Bit in Win10/8/7 without Data Loss.
Step 2: Download Opengl.dll file from a trusted source. Alternatively, you can copy the Dll file from your friends’ computer and paste it into your computer.
Step 3: Once the file is downloaded, navigate to the save location and extract the zip file to a folder.
Step 4: Open the extracted folder and double-click the 32 bit or 64 bit folder based on your system type.
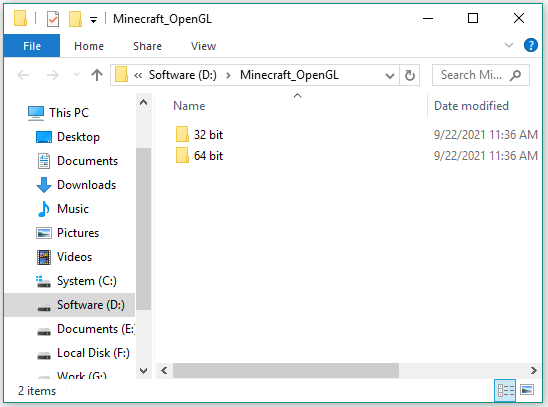
Step 5: Once you see the opengl.32dll file, right-click it and then choose the Copy or Cut option.
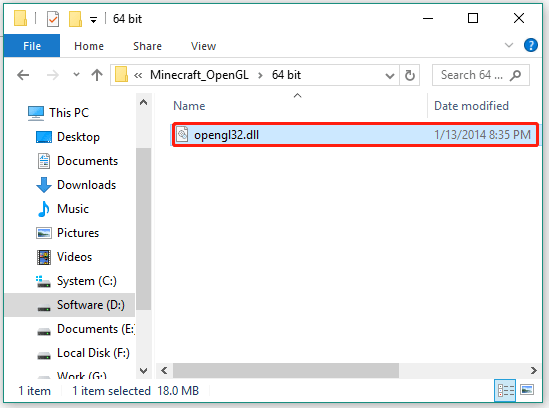
Step 6: Go to the path again: C:Program FilesJava*JRE Version*bin and paste the opengl32.dll file.
Step 7: When the UAC (User Account Control) window appears, click the Yes button to grant admin access.
Step 8: Once the file is added to File Explorer, restart your computer.
When the computer boots, check if you have gotten Minecraft out of the error.
You might be interested in Recover Missing Files On Windows 10.
Fix 4: Update Your Operating System
If none of the above fixing methods helps you get rid of GLFW Error 65542, you can try the last tactic — update your operating system.
Here is how to update Windows 10:
- Press Windows + X and then choose the Settings option from the menu.
- Choose the Update & security
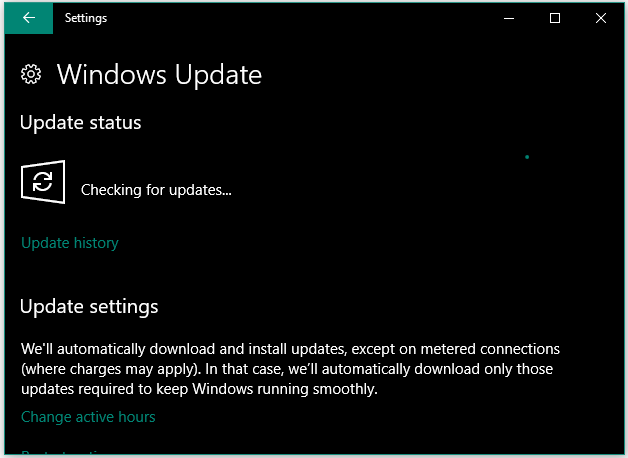
- Click the Check for update button on the right side of the window.
- Wait a while for Windows to check and install the latest updates for you.
- Restart your computer.
Then, check if the error gets solved.

User Comments :