Do you use GIMP to edit pictures? Have you encountered the GIMP Eraser not working issue? In most cases, the cause of this issue is your incorrect operations. This post from MiniTool Partition Wizard shows you how to avoid this issue.
GIMP Eraser Not Working
GIMP, short for GNU Image Manipulation Program, is a free and open source bitmap image editor for image photo retouching and editing, free drawing, resizing, cropping, photo montage, image format conversion and other professional tasks. This software is available on Linux, Windows, and macOS. Many people use it as a free alternative to Photoshop.
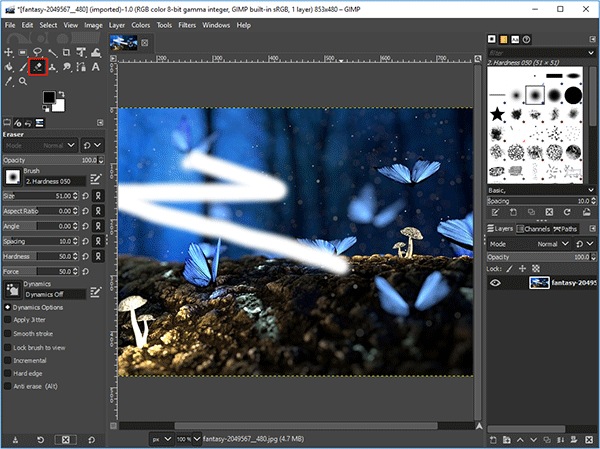
In the GIMP, there is an Eraser Tool, which can erase the picture to background or transparency. However, some people report that they have encountered the GIMP Eraser not working issue. The symptoms of this issue include:
- If you choose the Eraser Tool, when the mouse is placed over the image, the mouse icon is grayed out.
- You want to make GIMP erase to transparent but it erases to white, black, or other colors.

[Proved] Is GIMP Safe & How to Download/Use GIMP Safely?
How to Fix the GIMP Eraser Not Working Issue
In general, the GIMP Eraser not working issue is usually caused by incorrect operations. If you have also encountered this issue, you can troubleshoot it through the following measures.
Fix 1. Select a Brush Type
A reddit user reports that he can select the Eraser tool, but when he clicks on the image, the mouse is grayed out and it doesn’t do anything. Later he finds the reason is that he deselected the brush type.
If you are also in this case, please click the brush icon next to the Eraser icon and then select a brush type.
Fix 2. Add an Alpha Channel
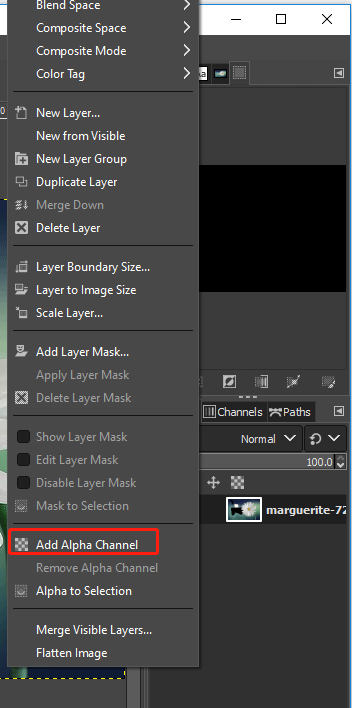
Some people can’t make GIMP erase to transparent. The main reason is that they don’t add an Alpha channel to the layer. Only if the alpha channel is added, can the GIMP erase to transparent. Otherwise, the GIMP will erase to the background (white, black, or some else colors).
To fix this issue, you just need to right-click on the layer that you want to erase (in the right-panel) and then choose Add Alpha Channel.

Fix 3. Select the Correct Layer
The eraser will only work on the layer you have selected. If you are editing multiple layers at the same time, please make sure you have selected you have selected the correct layer.
Fix 4. Cancel the Active Selection
Do you have an active selection within GIMP? If so, the eraser is only going to erase whatever is inside of that selection. In this case, you can try canceling the active selection by clicking Select > None.
Fix 5. Unlock Pixels
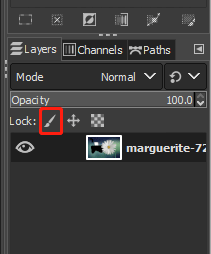
One of the reasons why the GIMP can’t erase to transparent is that you have locked pixels. To solve this problem, you can unlock it. The Lock Pixels icon is in the right panel of the software.

Fix 6. Change the Eraser Settings
To avoid the GIMP Eraser not working issue, you should also make sure the Eraser settings are proper. For example:
- Set the Opacity of the Eraser to 100%.
- Set the Hardness of the Eraser to 100%. Otherwise the size of the space your eraser erases will be reduce.
- Disable the anti erase feature.


User Comments :