Some users reported that they encountered the “file not found or no read permission” error when trying to create a compressed (zipped) folder on Windows 10. Why does this error occur? How to fix this issue? This post of MiniTool Partition Wizard will give you answers.
Since upgrading to Windows 10, I have not been able to create a zipped folder using the explorer options "Send to >" "Compressed (zipped) folder". The error given is "File not found or no read permission".
--from Microsoft Community
When you get the error, you will get the detailed error message saying as follows:
Compressed (zipped) Folders Error
File not found or no read permission.
There are several possible causes of file not found or no read permission zip error. For instance, your user account does not have sufficient permission for this operation. Besides, it’s possible that one of the files in that folder is locked by a program. If you don’t have write permissions to create a compressed folder or read permissions, you may get the file not found or no read permission error.
How to Fix File Not Found or No Read Permission Error
When you face the “file not found or no read permission while zipping” error, the first thing you can do is to reboot your PC. If there are any minor issues on your computer, a quick reboot can solve the issues easily. After rebooting, if the error still exists, you can refer to the following methods below.
Method 1. Create a New User Account
You can try fixing the “file not found or no read permission while zipping” error by creating a new user account. Follow the detailed steps below.
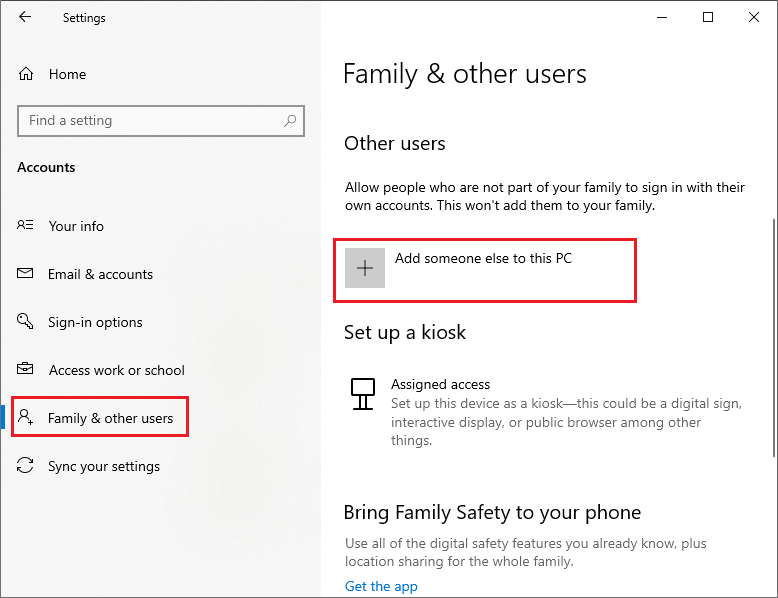
Step 1. Go to Settings > Accounts > Family & other users. Then click Add someone else to this PC under the Other users section.
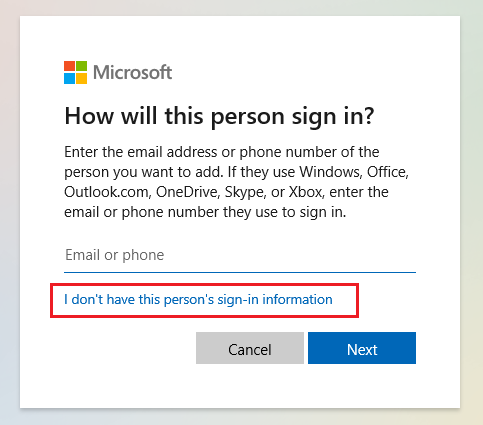
Step 2. In the prompted window, click I don’t have this person’s sign-in information.
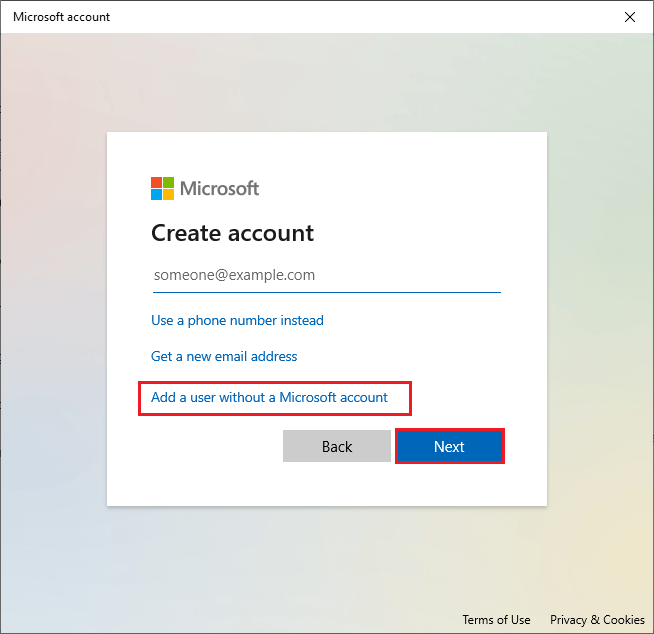
Step 3. Then click Add a user without a Microsoft account in the next window.
Step 4. Then you can follow the on-screen wizard to complete the new user account creation. Once done, click Change account type to set your account to administrator type
Step 5. Sign in to the newly created user account and check if the error disappears.
Method 2. Change the Permissions
To get rid of the file not found or no read permission zip error, you can follow the steps below to get special permissions to the contents of the ZIP file.
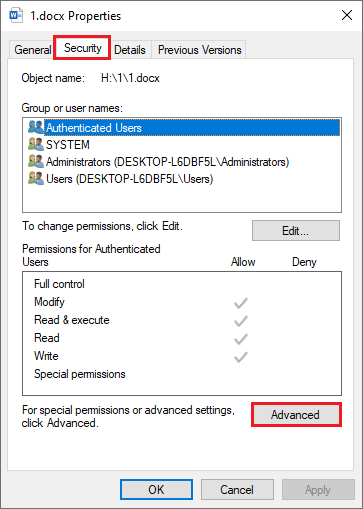
Step 1. Right-click the folder or file that you want to compress and select Properties.
Step 2. In the pop-up window, click the Security tab. Then click the Advanced button.
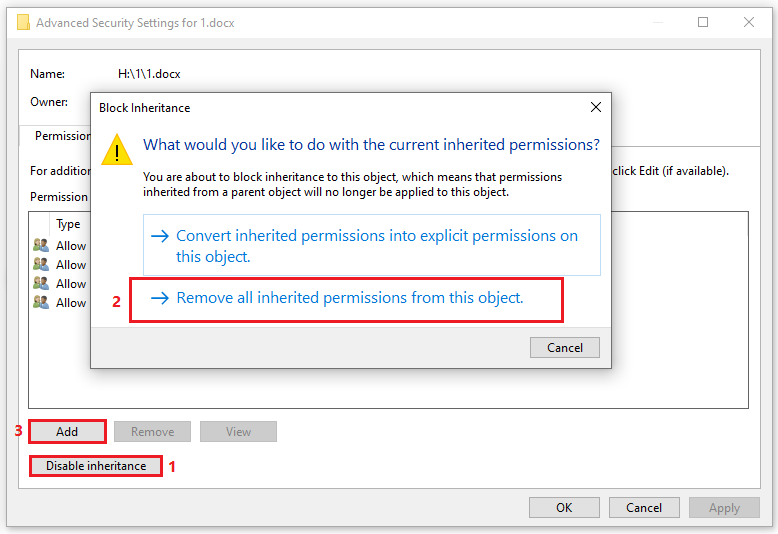
Step 3. In the next window, click Disable inheritance. Then select Remove all inherited permissions from this object. Then click Add to add permissions.
Step 4. In the pop-up window, click Select a principal.
Step 5. Then type administrator in the Enter the object name to select box. Click Check Names to add the administrator account. Click OK.
Step 6. Then select Show advanced permissions and check Full control. Click OK.
Step 7. Then click Apply and OK sequentially. Then you can check if the issue is solved.
If you already have a ZIP folder, you can refer to the above steps to change the zip folder permissions.
Method 3. Use Third-party Software
Besides, you can use third-party compression software (e.g., 7-Zip and WinRAR) to compress your folders or files. You can choose one as you like.
Wrapping Things Up
In this post, we have learned several fixes to the file not found or no read permission error. You can feel free to have a try on them. Having any suggestions or better ideas? You can tell us in the comment zone below.

User Comments :