Fallout 3 Won’t Launch on Windows 10
Fallout 3 is an action role-playing open world game created by Bethesda and released to the world on multiple platforms back in 2008. It is one of the most successful games of not only its time but also its genre. Even today, 10 years later, there are still many people who like it.
However, a lot of gamers report that Fallout 3 won’t launch on Windows 10. Fallout 3 can be installed and launched on Windows 10 but it crashes right after the player clicks on New while starting a new game, right before the intro scene plays.
The Fallout 3 won’t launch Windows 10 issue includes the following reasons:
- The incompatibility between Fallout 3 and Windows 10: Fallout 3 was released in 2008 and centered to run around Windows Vista’s architecture, while Windows 10 was released in 2015. Therefore, this game has many incompatibilities with the Windows 10’s Architecture.
- The lack of GFW Live: Fallout 3 uses Games for Windows Live, which is preinstalled and integrated into the OS of the older versions of Windows. However, Windows 10 doesn’t have this software and you need to install it by yourself.
- Outdated drivers: Sometimes the outdated graphics card drivers raise many issues while launching games on Windows.
- A glitch with the game’s configuration: If you have updated Windows 10, the game’s configuration may be malfunctioning and therefore the game tries to run on the integrated graphics from Intel. Due to this, the game is prevented from launching.
After you have figured out the reasons of the Fallout 3 not launching issue, you can solve the problem accordingly.
Fix 1. Run Fallout 3 in Compatibility Mode or Run It as Administrator
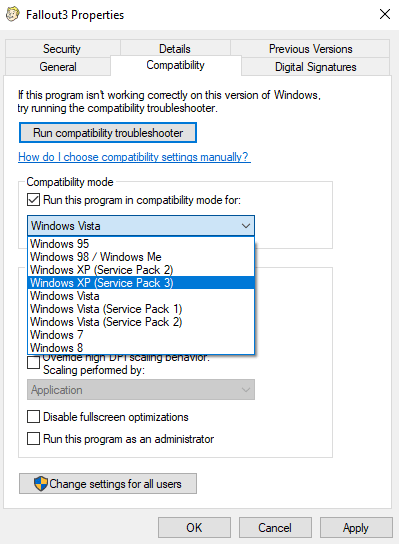
Running Fallout 3 in compatibility mode is the most effective way to solve the Fallout 3 won’t launch Windows 10 issue due to incompatibility. Please refer to the following steps to run it in compatibility mode:
Step 1: Navigate to C:Program Files (x86)SteamsteamappscommonFallout 3 goty (this may be the default location).
Step 2: Right-click on the Fallout 3 executable file and select Properties.
Step 3: Skip to Compatibility tab and check the box next to Run this program in compatibility mode for. Then, expand the drop-down menu to choose a Windows XP system. Next, click OK button to save changes.
Step 4: Run this game to see whether the problem is solved.
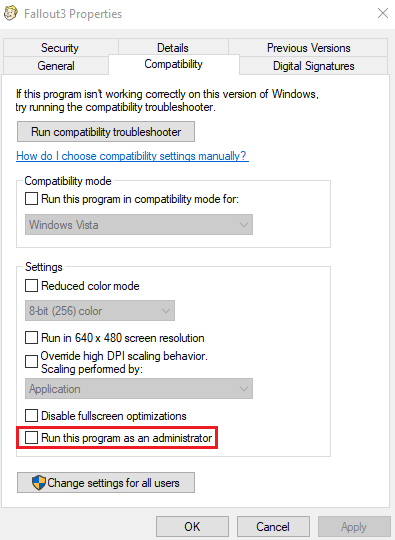
Some games will write temporary files to the C drive, which requires administrator privileges. In addition, running Fallout 3 as administrator can solve many problems relating to this game. As for how to run it as administrator, please refer to the following steps:
Step 1: Refer to the above steps to open the Fallout3 Properties window and skip to the Compatibility tab again.
Step 2: Tick the Run this program as an administrator box. After that, select the Apply and then the OK button. Then, run this game to see whether the problem is solved.
Fix 2. Install Games for Windows Live
Step 1: click here to download an executable file named gfwlivesetup, which is the installer of the Games for Windows Live.
Step 2: Run the executable and GFWL will install the needed files, allowing Fallout 3 to work. Apart from this, there is no additional work to do.
Fix 3. Update the Graphics Card Driver
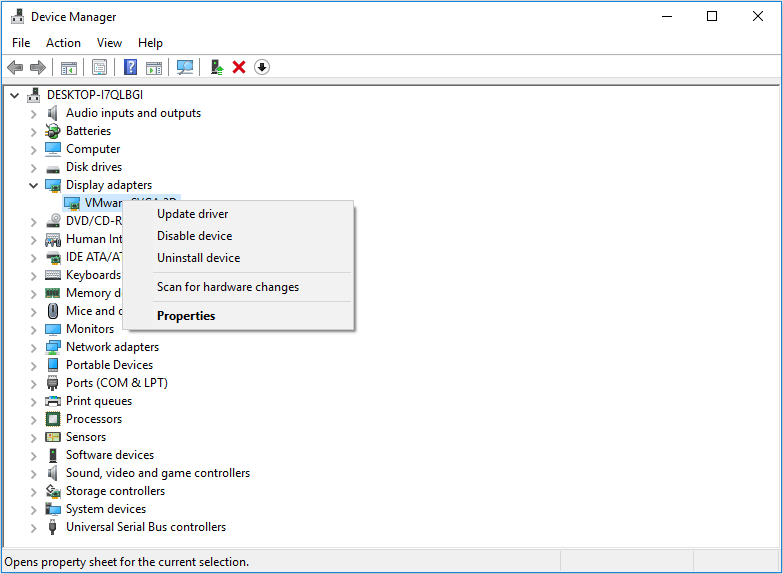
Step 1: Press “Windows + X” keys and choose Device Manager from the pop-up menu to open it.
Step 2: Expand the Display adapters directory and right-click on the graphics card driver to choose Update driver. Then, choose Search automatically for updated driver software.
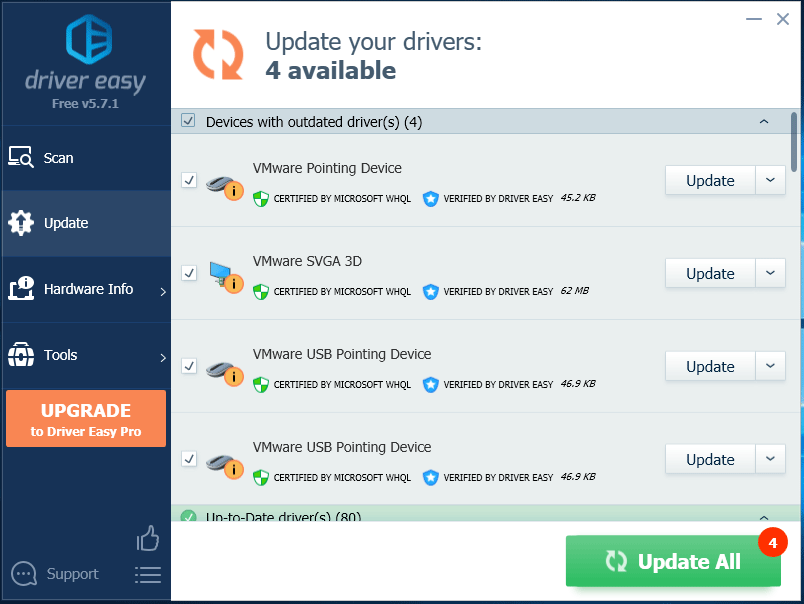
If the above method failed, you can use a professional third-party program to update drivers. Driver Easy Pro can detect all outdated drivers and update them with just one click. Here is the guide:
Step 1: Install Driver Easy and launch it. Click the Scan Now button.

Step 2: After the scanning process is completed, click the Update All button to download and install the latest drivers for all devices with outdated drivers.
Fix 4. Edit the Falloutprefs.ini File
In many cases, problems Windows 10 users face while trying to play Fallout 3 can be fixed by editing a config file belonging to Fallout 3, falloutprefs.ini. Please refer to the following steps to edit this file:
Step 1: Open the File Explorer and search for falloutprefs.ini file. Find the file in the searching results and then right-click on it to choose Open file location.
Step 2: After locating the falloutprefs.ini file, open it and double-click on it to open it in a new instance of Notepad.
Step 3: Find bUseThreadedAI=0 and change the value from 0 to 1. If you don’t see bUseThreadedAI=0 in the contents of the file, you just need to add bUseThreadedAI=1 in a new line within the file. Then, type iNumHWThreads=2 in a new line within the file.
Step 4: Press Ctrl + S to save the changes and close the instance of Notepad.
Step 5: Run Fallout 3 as administrator to see whether the problem is solved. If Fallout 3 still doesn’t work, you can go back into the falloutprefs.ini file to change iNumHWThreads=2 to iNumHWThreads=1. Then, save changes and restart Fallout 3 to see whether it can work normally.

![[Fixed] Dragon Age Inquisition Won't Launch on Windows 10](https://images.minitool.com/partitionwizard.com/images/uploads/2019/10/dragon-age-inquisition-wont-launch-thumbnail.jpg)


User Comments :