In this post, MiniTool will offer a brief introduction about the built-in administrator account in Windows 10 and guide you to enable administrator account. Just keep reading to get the details.
About Built-in Administrator Account
When you try to install Windows 10 on your computer, you should notice that Windows setup prompts you to create a user account at the end of the installation. This account is given the administrator user status and almost all the administrative privileges.
But do you know that another elevated administrator account will be created during the installation?
This account has far more privileges than the regular administrator account mentioned before, and your computer can easily run into problems if you use it often. Thus, for security, this built-in administrator account is hidden by default and you cannot use it unless it is enabled.
However, you might need to use this built-in administrator account when you troubleshoot certain problems on your computer. If you are certain you need to use it, it’s time to enable administrator account.
You can access this account via Command Prompt, Group Policy, and Local Users and Groups. Let’s have a closer look at the detailed steps to enable administrator account Windows 10.
Method 1: Enable Admin Account in Command Prompt
Using Command Prompt is the simplest and widely-used method to activate administrator account.
Step 1: Type cmd in the Search bar.
Step 2: Right-click Command Prompt from the search results and select Run as administrator.
Step 3: Now type the command net user administrator /active:yes and press Enter to enable the built-in administrator account.
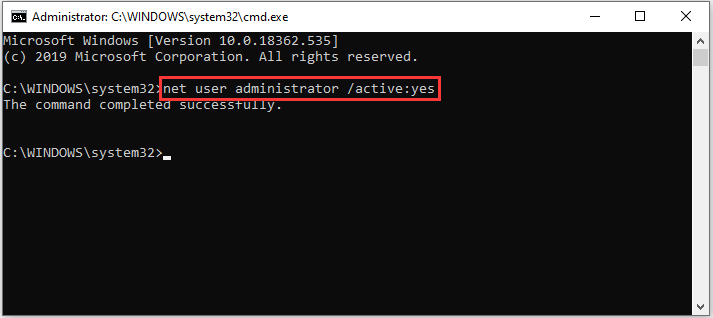
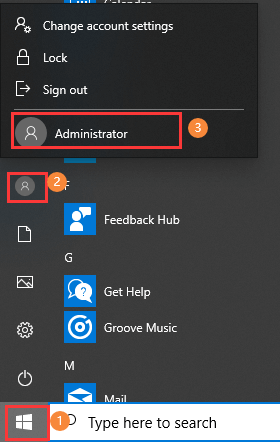
Once it’s done, you can click the Start button and click your user account name. In the pop-up list, the hidden administrator account will be displayed. You can access this account simply by clicking it.
Method 2: Enable Admin Account in Group Policy
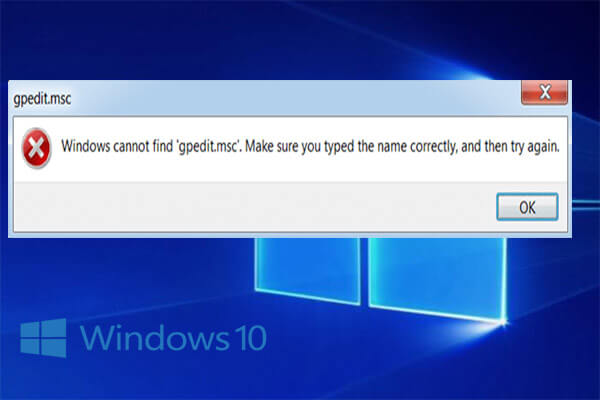
Alternatively, you can activate administrator account in Group Policy. But note that Group Policy is not available in Windows 10 Home edition.
Step 1: Press Windows + R to invoke Run window.
Step 2: Type gpedit.msc and press Enter to open Local Group Editor.
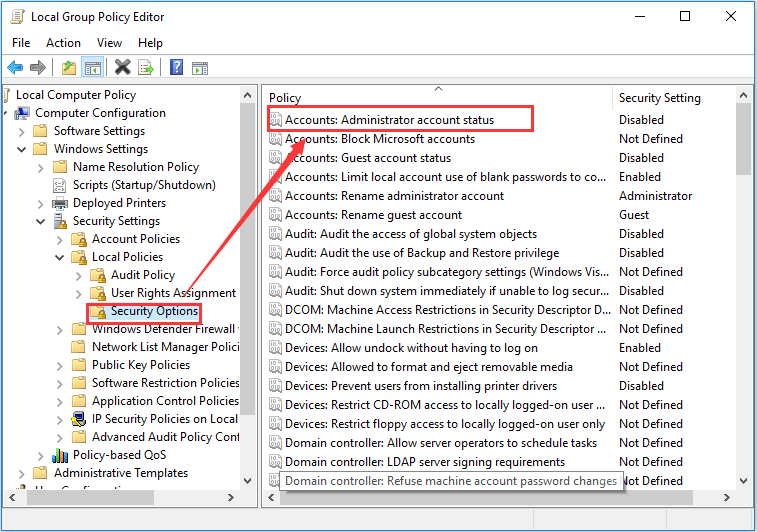
Step 3: Navigate to Computer Configuration > Windows Settings > Security Settings > Local Policies > Security Options.
Step 4: Double-click the policy of Accounts: Administrator account status in the right pane. You can see the policy is disabled by default.
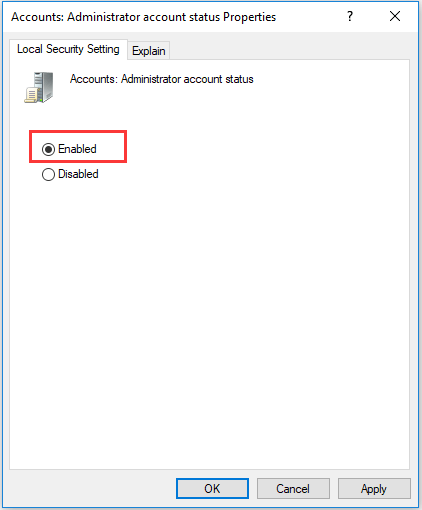
Step 5: You will get the Properties window of this policy. Now, check Enabled and click Apply and OK to save the change.
Method 3: Enable Admin Account in Local Users and Groups
You can also enable administrator account in Local Users and Groups, and here are the detailed steps.
Step 1: In Run window, type compmgmt.msc and click OK to open Computer Management.
Step 2: Under System Tool, double-click Local Users and Groups to expand it.
Step 3: Highlight Users and you can see all the user account names on your computer. The Administrator account is listed here with arrow mark indicating that the account is disabled.
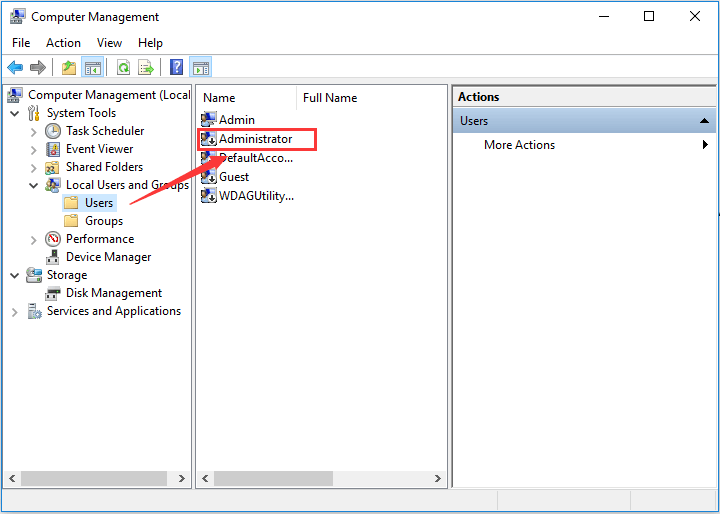
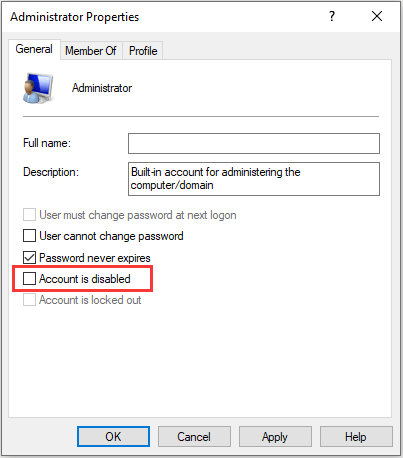
Step 4: Now, right-click this account and choose Properties to get the following window. Under General tab, uncheck Account is disabled option, and click Apply and OK to enable administrator account.
That’s all about how to enable and disable administrator account in your Windows 10 computer. Hope the methods introduced in this post can be helpful for you.


User Comments :