Converting dynamic disk by Disk Management or diskpart always gives rise to data loss. Try this professional dynamic disk converter – MiniTool Partition Wizard. It can also manage the dynamic disk without data loss.
Professional Dynamic Disk Partition Manager
A disk usually can be managed by three ways which are diskpart, Disk Management, and a piece of third-party software. Due to the complexity of diskpart and inflexibility of Disk Management, many users prefer to use third-party software. Now, we will introduce MiniTool Partition Wizard which is a professional partition magic and also a powerful dynamic disk partition manager.
Although Disk Management tool can help to convert a basic disk to dynamic and can also perform several simple operations on the dynamic disk, such as creating volume and deleting volume, it can’t satisfy the further demands of some users.
Sometimes, Disk Management may lead to data loss when doing dynamic disk operations. Therefore, the professional dynamic disk converter is safer and more flexible.
How to Create Volume with MiniTool Partition Wizard
And here, we will introduce how to use the professional dynamic disk partition manager to create a volume. First of all, you should purchase the software and install it to continue.
Step 1: Launch the software and enter the main interface.
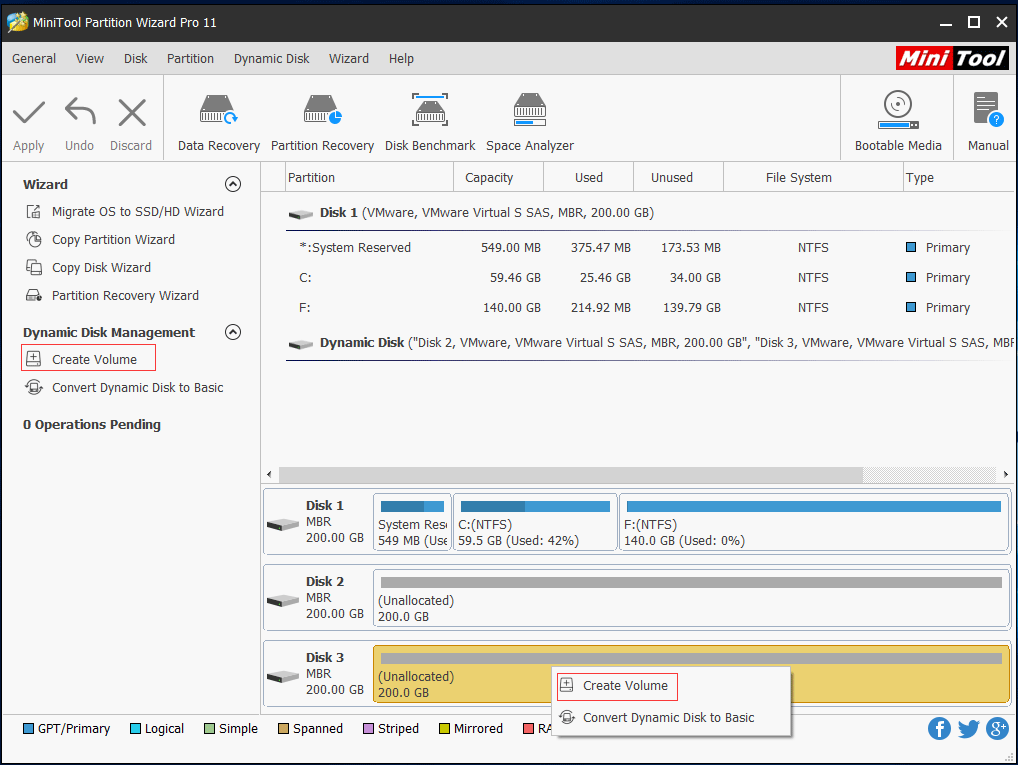
Step 2: Select a dynamic disk and choose the Create Volume from the left pane or context menu.
Step 3: There are five types of volumes. And here, we are taking how to create a Simple Volume as an example. Choose Simple and click Next to continue.
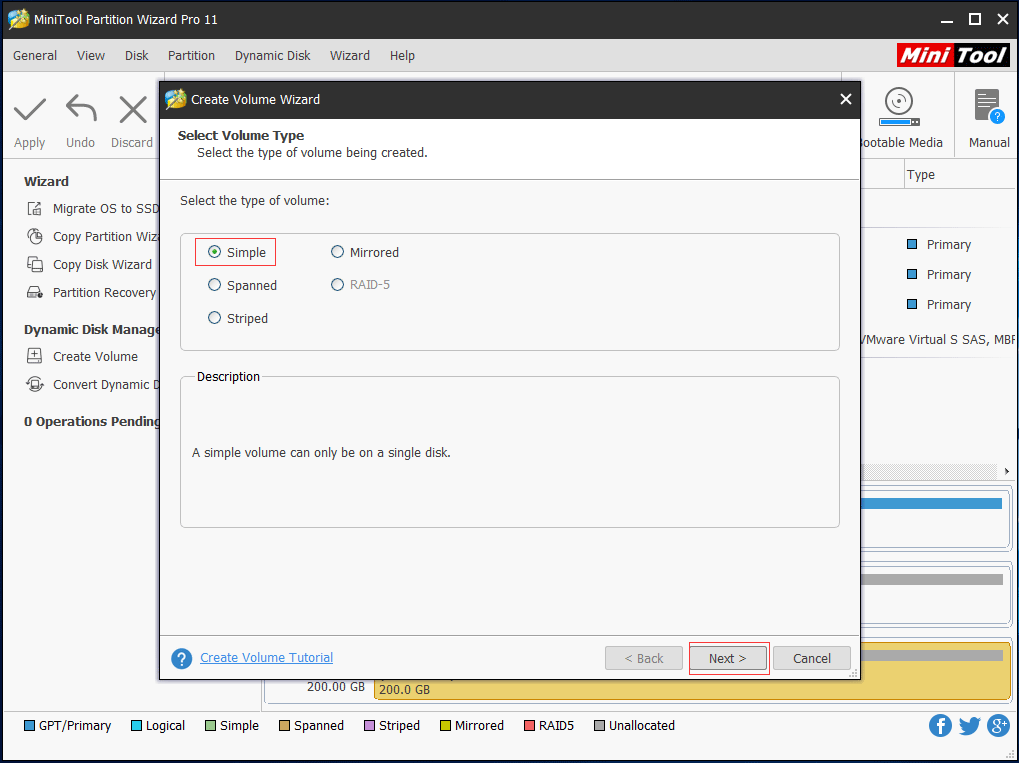
And to create volumes, there is something that should pay attention to.
- To create a Simple Volume, a single dynamic disk is okay.
- To create Spanned Volumes, at least two dynamic disks are required, and at most 32 dynamic disks are allowed.
- To create Striped Volumes, at least two dynamic disks are required, and at most 32 dynamic disks are allowed.
- To create Mirrored Volumes, two dynamic disks are required.
- Raid-5 Volume only can be created in Windows Server systems.
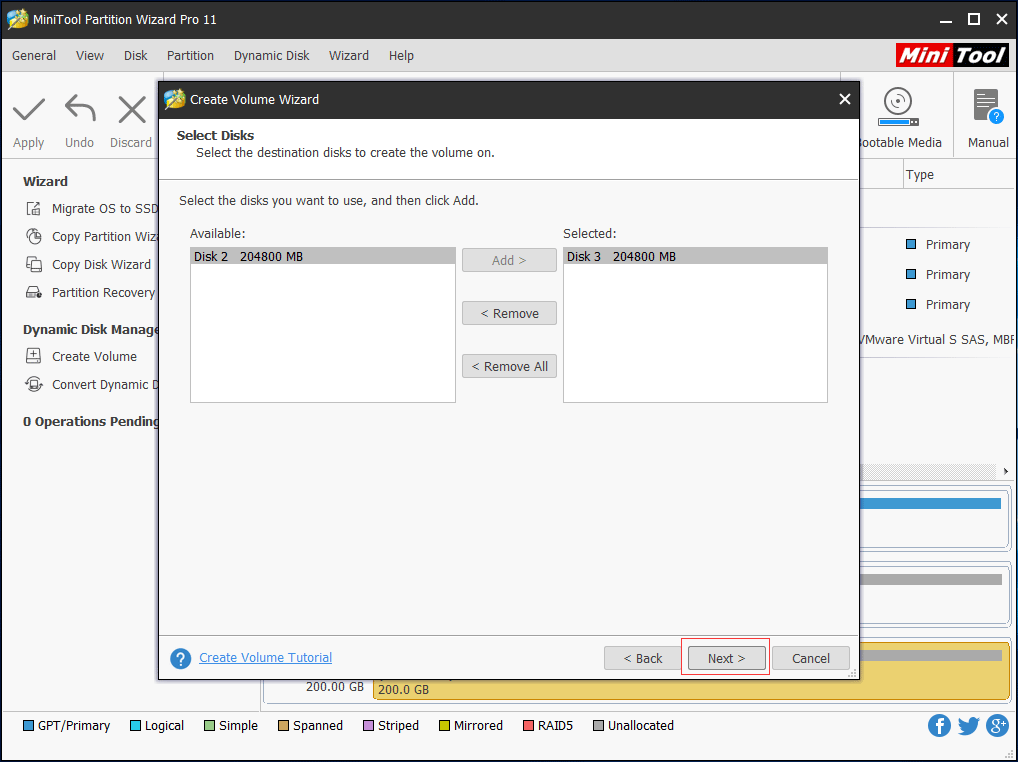
Step 3: Select the destination disk you want to use and click Add. Then click Next to continue.
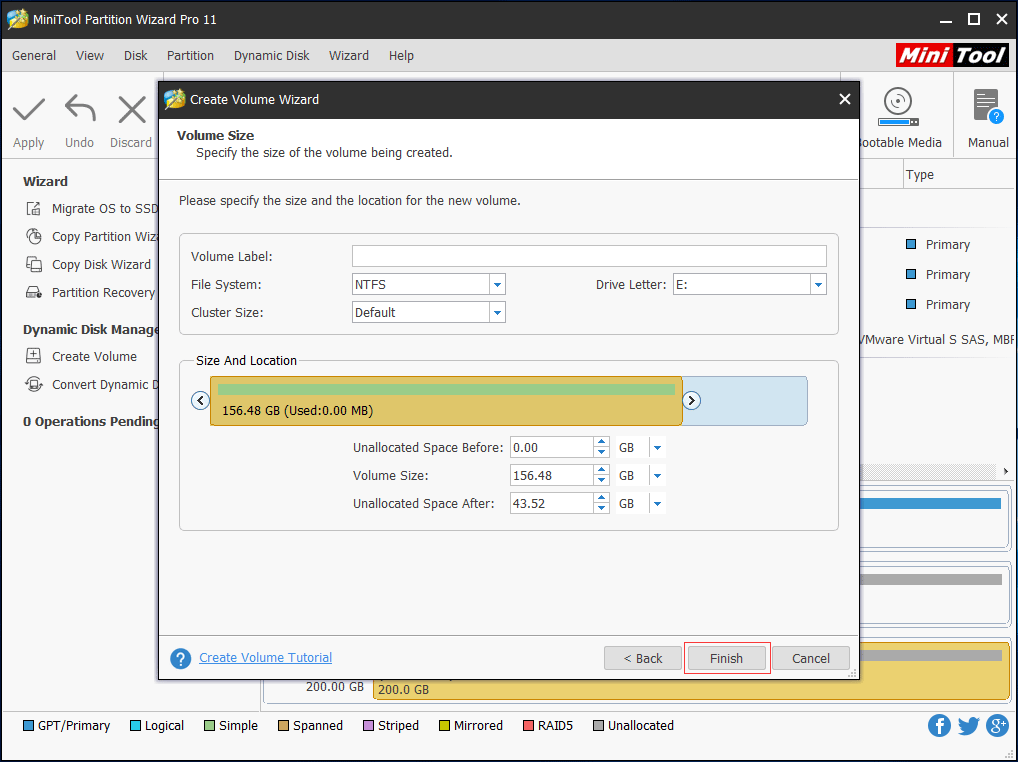
Step 4: Set relevant parameters including Volume Label, File System, Driver Letter, and Cluster Size. You can drag the handle to decide the Size/Location for newly created volume, and can also type a specific number. Then click Finish button to continue.
Step 5: At last, click Apply and restart the computer to finish the pending operations.
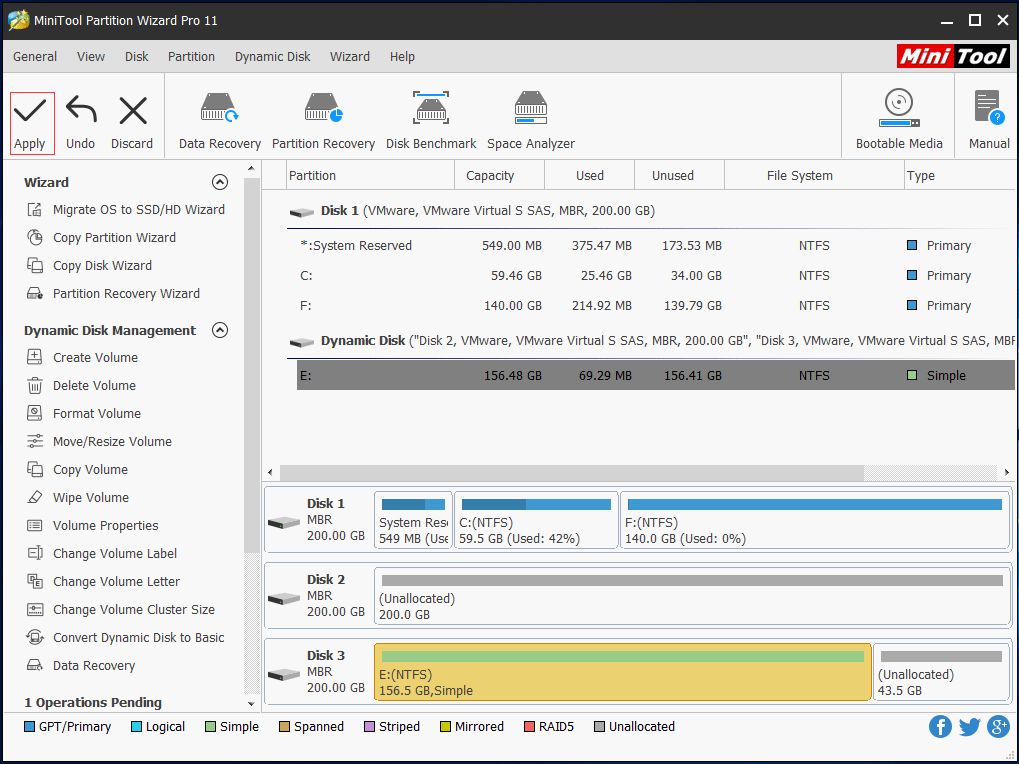
Now, you have successfully created a volume with the dynamic disk partition manager.
How to Convert Dynamic Disk to Basic Disk
And one important thing you need to know is that if you want to convert dynamic disk to basic disk with Disk Management tool or diskpart, you will lose all of your data since the first thing you need to do is to delete all volume on the dynamic disk.
Therefore, in order to convert dynamic disk to basic disk, you can try this professional dynamic disk converter and it would not bring any damage to your original data.
Next, we will introduce how to convert dynamic disk to basic disk with this dynamic disk partition manager.
Step 1: Launch the software and enter the main interface.
Step 2: Choose a disk that needs to convert. Then choose Convert Dynamic Disk to Basic Disk from the left pane or context menu.
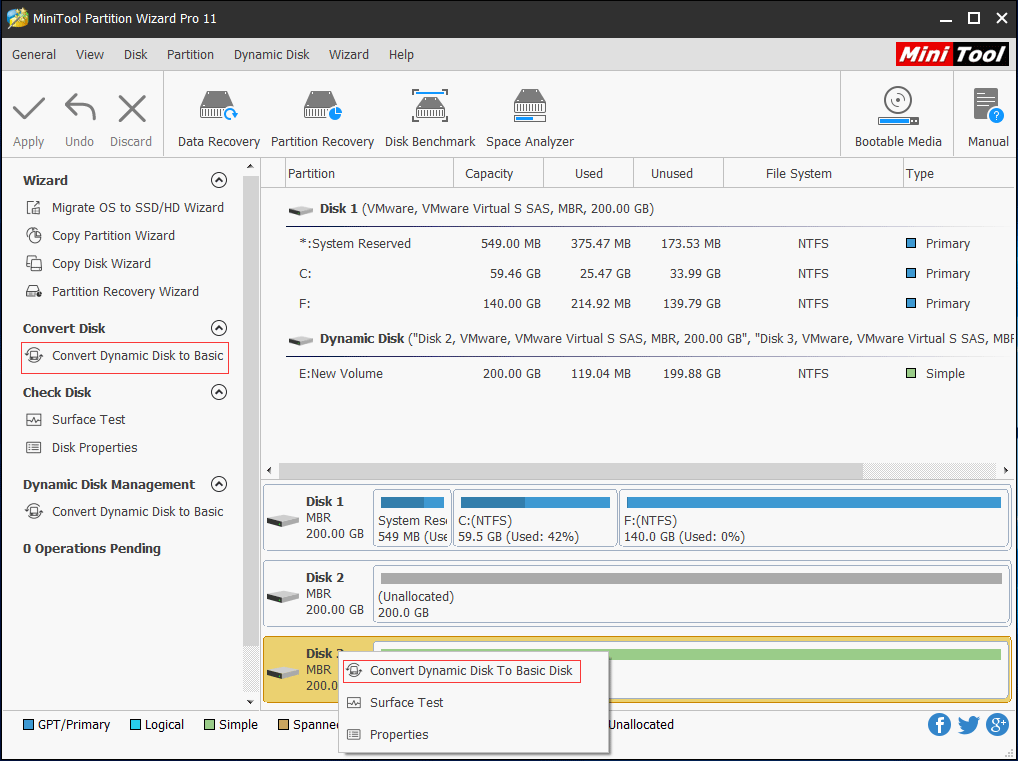
Step 3: Click Apply button to confirm all pending operations.
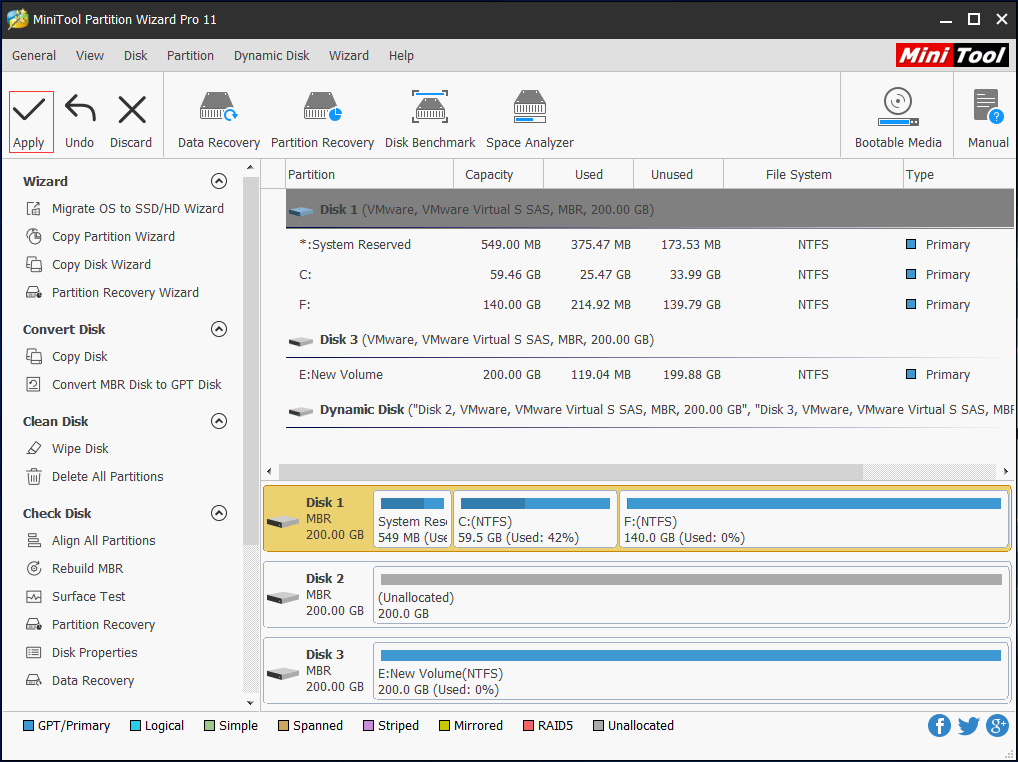
After that, you can successfully convert the dynamic disk to basic disk without data loss. And the operation methods are very easy. If you want to convert dynamic disk to basic, purchase MiniTool Partition Wizard and have a try.
Bottom Line
MiniTool Partition Wizard is a professional dynamic disk partition manager and dynamic disk converter. Compared with diskpart or Disk Management, the dynamic disk manager won’t cause data loss.
Now it’s your turn to have a try. If you have got a better trick, welcome to share it in the comment zone. For any questions related to MiniTool Partition Wizard, you can contact us via [email protected].

User Comments :