Reasons for Division 2 Crashing
It’s really annoying that Division 2 keeps crashing when you install or try to play the game on Windows 10. Why do you encounter this problem? Here are some possible reasons:
- Missing or corrupted game files
- Incompatibility problems
- Inadequate page file size
- Outdated or faulty graphics card driver
You might not sure which one you’re facing, but you can try the following methods one by one to solve the problem.
Method 1: Verify the Game Files
If there are any missing or corrupted game files, you will encounter Division 2 crashing on PC. So, you need to verify and repair them. You may play Division 2 on different platforms, and here are two examples below.
Verify Game Files in Steam
If you’re using Steam to play video games, you can try the following steps to fix your faulty game files.
Step 1: Launch Steam.
Step 2: Select LIBRARY tab. Then right-click Division 2 from the game lists, and click Properties.
Step 3: In the pop-up window, click LOCAL FILES tab and choose VERIFY INTEGRITY OF GAME CACHE.
Step 4: Wait patiently when Steam is verifying the game files. Once it’s completed, click CLOSE.
Verify Game Files in Epic Game Launcher
If you play the game in Epic Game Launcher, you need to:
Step 1: In Epic Game Launcher, click Library.
Step 2: Select the Settings icon of Division 2.
Step 3: In the pop-up Settings window, click Verify to start verifying the games files for Division 2. Then follow the onscreen instructions to finish the process.
Once the games files are repaired, you can launch the game and check if Division 2 crashing has been solved.
Method 2: Change Compatibility Settings
Division 2 crashing issue could also occur when some program settings are not compatible with Windows operating system. To solve the problem, you may need to change some compatibility settings for the game.
Step 1: Navigate to the location where your Division 2 is installed.
Step 2: Right-click the file TheDivision.exe in the installation folder and then select Properties.
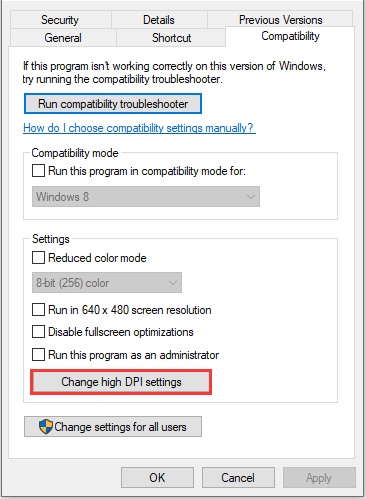
Step 3: In the pop-up window, switch to Compatibility tab and click Change high DPI settings.
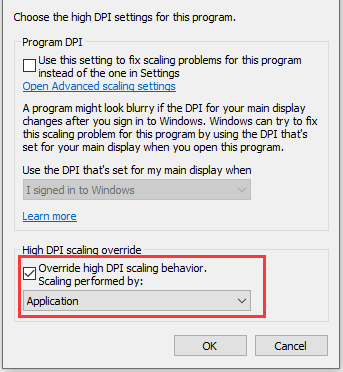
Step 4: In the following window, check Override high DPI scaling behavior and select Application for Scaling performed by: option. Then click OK.
Step 5: When you go back to Properties window, check Disable fullscreen optimizations and click OK to save the changed settings.
Now you can restart your Division 2 and Division 2 crashing issue should have been fixed.
Method 3: Change Paging File Settings
Paging file, also known as Virtual Memory works as a secondary RAM. As well know, if you have more RAM, the programs on your computer will run faster. When your computer runs slowly because there is not enough RAM, you can solve the problem by increasing virtual memory.
If your Division 2 keeps crashing due to inadequate page file size, you need to follow the steps below to fix it.
Step 1: Press Win + R to invoke Run window. Then type control and click OK to open Control Panel.
Step 2: Type advanced in the search box and click View advanced system settings in the search results.
Step 3: In the pop-up window, click Settings under Performance section.
Step 4: Now switch to Advanced tab and click Change under Virtual memory section.
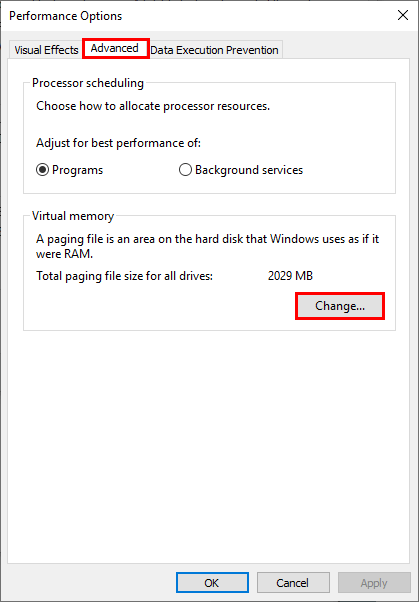
Step 5: Check Automatically manage paging file size for all drives and then click OK to save the settings.
Once it’s done, you can try opening the Division 2 and check if it works properly. If you’re still bothered by Division 2 crashing issue, you have to move on to the next fix.
Method 4: Update Graphics Card Driver
Outdated or faulty graphics card driver is a common factor which leads to a lot of problems in video games. If your Division 2 keeps crashing, you need to check if there is something wrong with the driver.
You can follow the step-by-step guide to update the driver.
Step 1: Right-click Start menu and select Device Manager.
Step 2: Double-click Display adapters. Then right-click your graphics card and choose Update driver.
Step 3: Select Search automatically for updated driver software and then follow the onscreen instructions to finish the process.
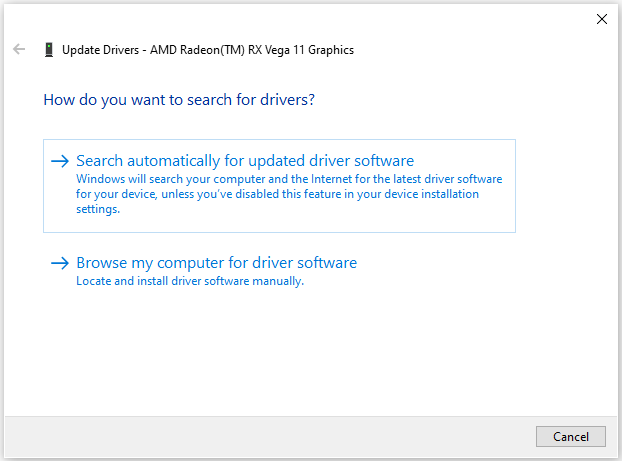
Then you need to restart the computer and check if the problem disappears.
If the above method failed to update drivers, you can use a professional third-party program to do that. Driver Easy Pro can detect all outdated drivers and update them with just one click. Here is the guide:
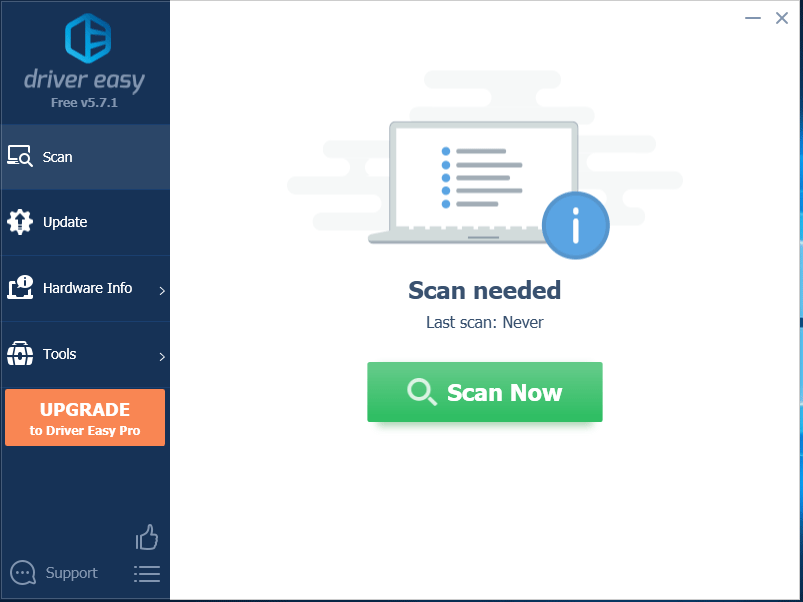
Step 1: Install Driver Easy and launch it. Click the Scan Now button.
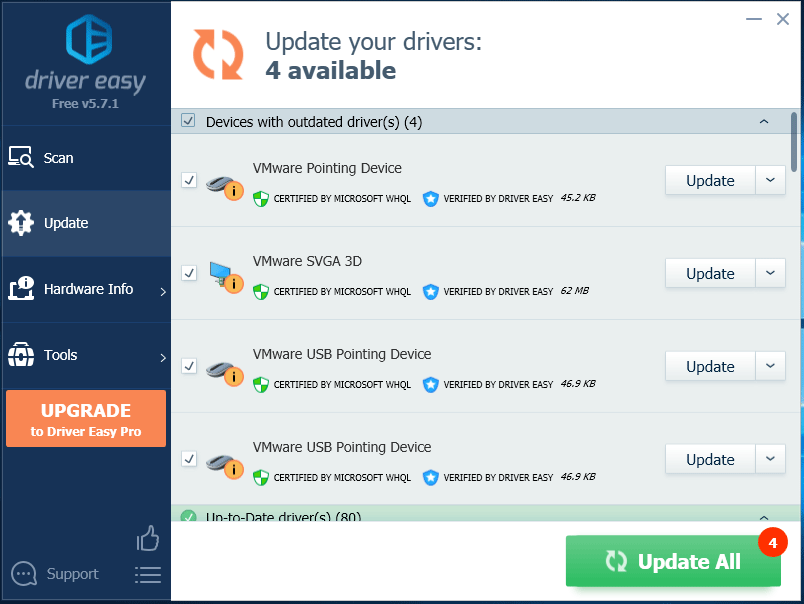
Step 2: After the scanning process is completed, click the Update All button to download and install the latest drivers for all devices with outdated drivers.


User Comments :