Some users have reported they received an error message “C:\Windows\SysWOW64\D3D11.dll is either not designed to run on Windows or it contains an error”. To solve the problem, MiniTool Solution put together some methods in the following contents that have helped many users.
D3D11.dll file is part of the DirectX11 distribution and it is usually used by games and programs that require lots of graphical processing. Unfortunately, some users have encounter “C:WindowsSysWOW64D3D11.dll is either not designed to run on Windows or it contains an error” while launching these games or programs.
If you have the same problem, you can follow the methods below to fix it.
Method 1: Run SFC Scan
An easy way to solve “D3D11.dll is not designed to run on Windows or it contains errors” is to run System File Checker (SFC). It is a Windows built-in utility. When you run a SFC scan, it will look for any changes inside the system files, and then replace the corrupted or missing files with fresh copies.
Here are the detailed steps.
Step 1: Press Win + R to invoke Run window. Then input cmd in the dialogue box and press Shift + Ctrl + Enter to run Command Prompt as administrator.
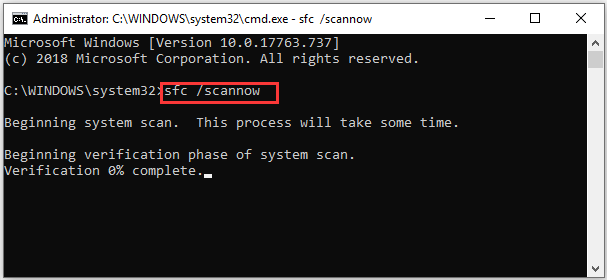
Step 2: In the pop-up Command Prompt, type the command sfc /scannow and press Enter to execute it.

Then you just need to wait until the scan is completed. This might take some time and you need to be patient. Once it’s finished, you can restart your computer. Then try opening the problematic program and check if the problem has been fixed.
Method 2: Re-register the D3D11.dll File
Another way to solve the mentioned problem is to re-register the D3D11.dll file. It has been proved effective by some users. You can also have a try.
Step 1: Run Command Prompt as administrator.
Step 2: Type the following command and press Enter: for %d in (*.dll) do regsvr32 -s %d.
Step 3: Wait for the process to complete. When you get the confirmation message, exit Command Prompt and restart your computer.
When your computer restarts, check if the error message “C:WindowsSysWOW64D3D11.dll is either not designed to run on Windows or it contains an error” disappears. If it still exists, you might need to move on to the next method.
Method 3: Replace the Involved File with a Local Copy Manually
If the methods above fail to solve the problem, you can take ownership of the D3D11.dll file from the sysWOW folder and then replace it with a fresh copy from winsxs folder.
Step 1: Run Command Prompt as administrator.
Step 2: Copy and paste the following commands and press Enter after each:
- dll file: takeown /f C:WindowsSysWOW64
- cacls C:WindowsSystem32en-USwinload.exe.mui /G *:F (* refers to your username)
Step 3: When you see the message “Are you sure (Y/N)”, input the letter y and press Enter. Then close Command Prompt.
Step 4: Open File Explorer and navigate to C:WindowsSysWOW64. Then delete d3d11.dll file in it.
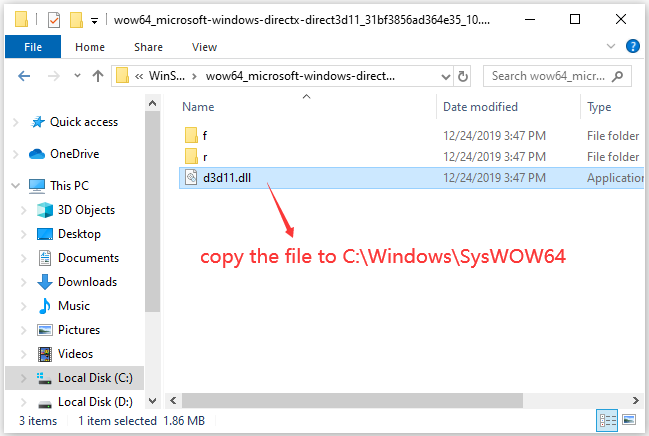
Step 5: Go to the following path and copy the clean d3d11.dll file:
C:WindowsWinSxSwow64_microsoft-windows-directx-direct3d11_31bf3856ad364e35_10.0.18362.387_none_4fbbbb1a93c546d4
Step 6: Paste the clean d3d.dll fil to SysWOW64 folder and then restart your computer.


User Comments :