Have you received the error message "disk already contains the maximum number of partitions" when creating a partition in Disk Management? This issue always happens on an MBR disk. Here, we will show you some effective solutions to fix the error max number of partitions MBR.
Disk Already Contains Maximum Number of Partitions
As you know, a partition on a hard drive can be used to store many files, including pictures, videos, documents, music files and so on. You may partition your hard disk to some drives for different kinds of files in order to distinguish them easily.
However, sometimes when you create a new volume with Windows built-in tool Disk Management, Windows may give you a warning message “You cannot create a new volume in this unallocated space because the disk already contains the maximum number of partitions“, just like the following screenshot shows.
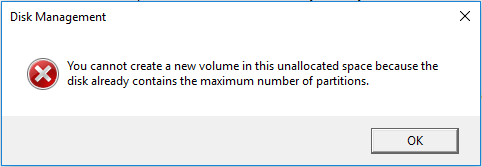
Generally speaking, this error occurs in MBR disk. On an MBR disk, you can create at most four primary partitions, or three primary partitions plus one extended partition. It is allowed to create a lot of logical partitions in the extended partition.
However, if the number of partitions has reached the limit of three primary partitions plus one extended partition, you will meet create partition maximum number problem.
If you cannot create partition from unallocated space with the error disk contains maximum number of partitions in Windows 7/8/10, is there any way to solve it? Of course, this post will provide you four solutions for this issue, so please keep reading.
How to Fix Max Number of Partitions MBR Error
Way 1: Convert MBR Disk to GPT Disk
When it comes to maximum number of partitions problem, many of you consider changing the disk style from MBR to GPT. Why is it necessary to change disk to GPT type? Let’s look at the following content.
- In Windows, as to maximum number of partitions GPT, the disk can reach up to 128. If you use such a hard drive, you can create so many partitions without meeting “cannot create a new simple in this unallocated space” error warning.
- All partitions on GPT disk are primary partitions by default. So if you want to create more than four primary partitions, GPT type is suggested.
- In Windows XP 32-bit, data disk doesn’t support GPT type. Moreover, in Windows XP including 32 bit and 64 bit, Windows Vista 32-bit and Windows 7 32-bit, the disk with operating system can’t be GPT type.
- UEFI motherboard supports MBR and GPT disks, so if you want to use GPT, you must ensure your motherboard is UEFI.
How to do this work? There are two ways: using Disk Management or MiniTool Partition Wizard.
① Run Disk Management
When mentioning the conversion between MBR and GPT disk, some of you probably choose to use Disk Management. However, when right clicking the target disk, you will find “Convert to GPT” feature is greyed out.
You must delete all volumes, and then convert to GPT from MBR. This way will cause data loss, so it is not recommended.
② Use MiniTool Partition Wizard
In order to avoid data loss and completely solve the maximum partition number issue, it is necessary to choose a professional and reliable disk and partition management tool to convert the disk to GPT.
Here MiniTool Partition Wizard is worthy of being recommended. It is available on all operating systems, including Windows 7/8/10 PCs and Windows Server 2003/2008/2012/2016/2019. As a piece of professional partition manager, it enables you to do conversion between MBR and GPT without data loss.
MiniTool Partition Wizard has multiple editions, thereinto, its Free Edition can be used to do the conversion between MBR and GPT on data disk for free. If you need to convert OS disk to GPT to fix the issue disk already contains maximum number of partitions, the Professional Edition should be chosen. Click to learn about the edition comparison.
MiniTool Partition Wizard FreeClick to Download100%Clean & Safe
Here take its Free Edition as an example.
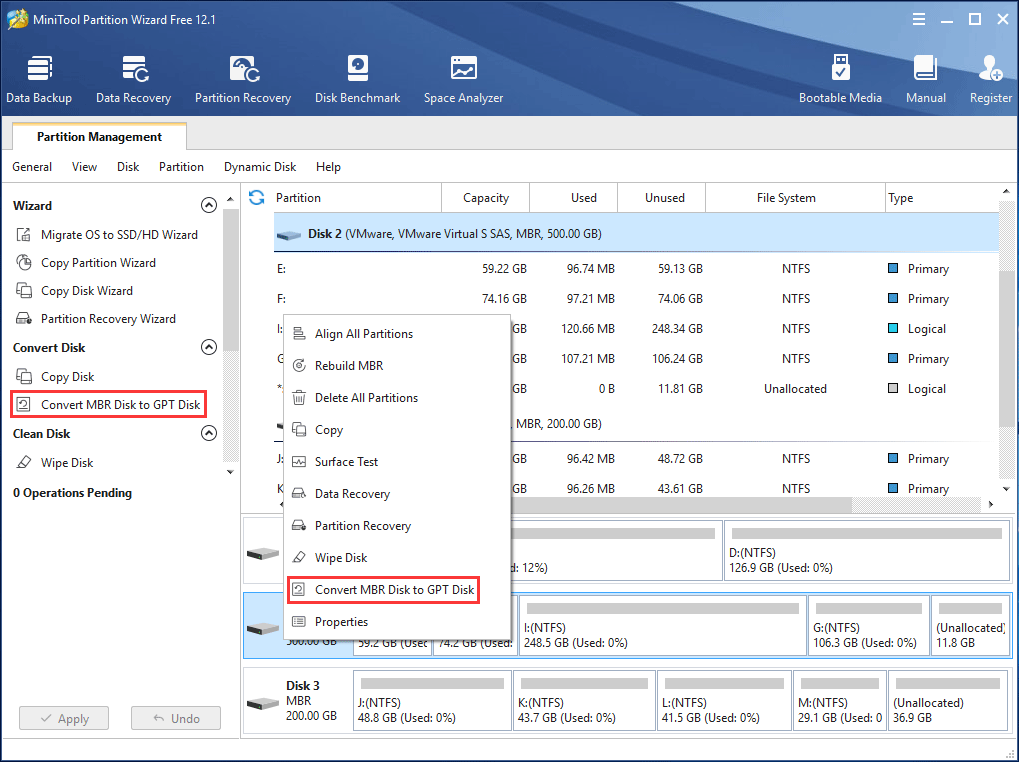
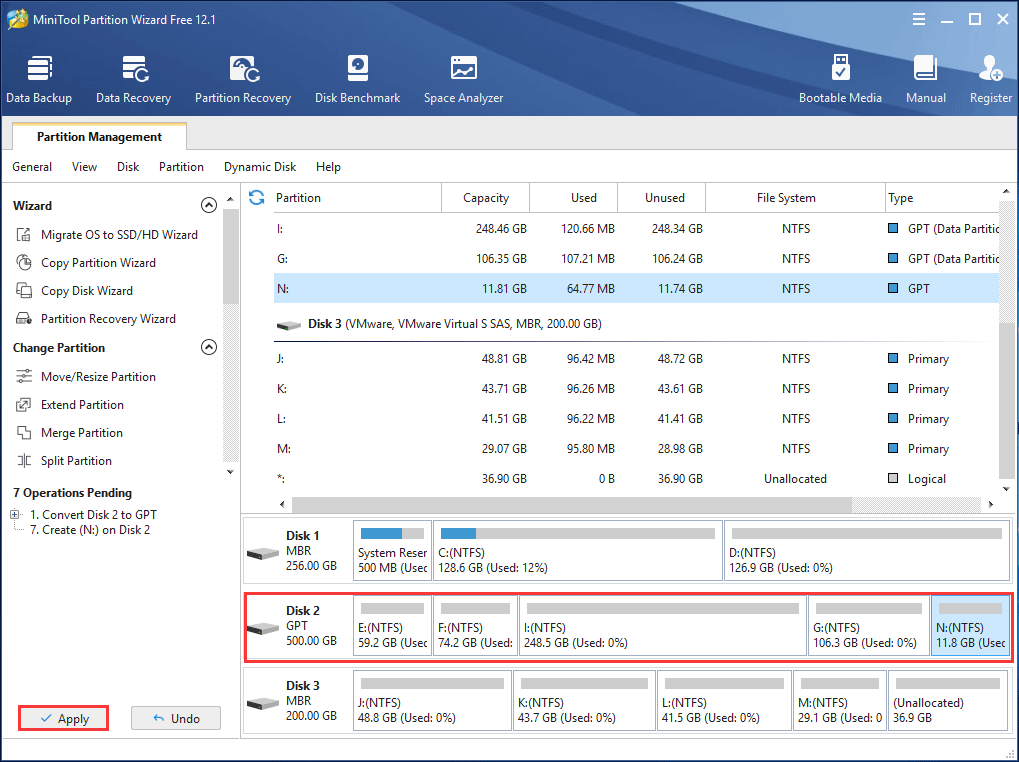
Step 1: Select the target hard drive and click “Convert MBR Disk to GPT Disk” function from “Convert Disk“.
Step 2: Then you preview this disk will become GPT disk and all partitions are primary partitions. Next right-click the unallocated space to create a new partition which is primary by default, just like the following picture shows.
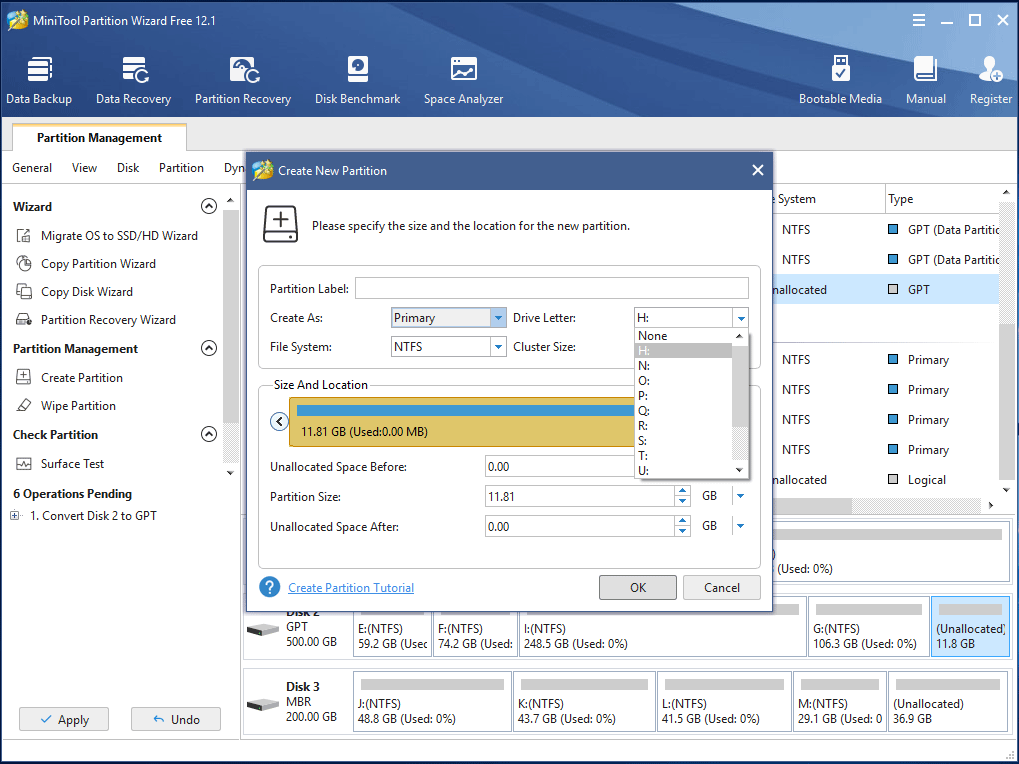
Step 3: Then you will go back to the main interface. Here you can see five primary partitions on the target disk. Click “Apply” to make all operations effective.
Way 2: Convert Primary Partition to Logical
When there are three primary partitions plus one extended partition, but the unallocated space is not next to the logical partition, MiniTool Partition Wizard also doesn’t allow you to create a new partition with unallocated space.
And this tool will tell you an error “PartitionWizard cannot create a partition at here. There are no free MBR slots on the disk“, which is similar to Windows error message “disk already contains maximum number of partitions” due to the rule of maximum partition number.
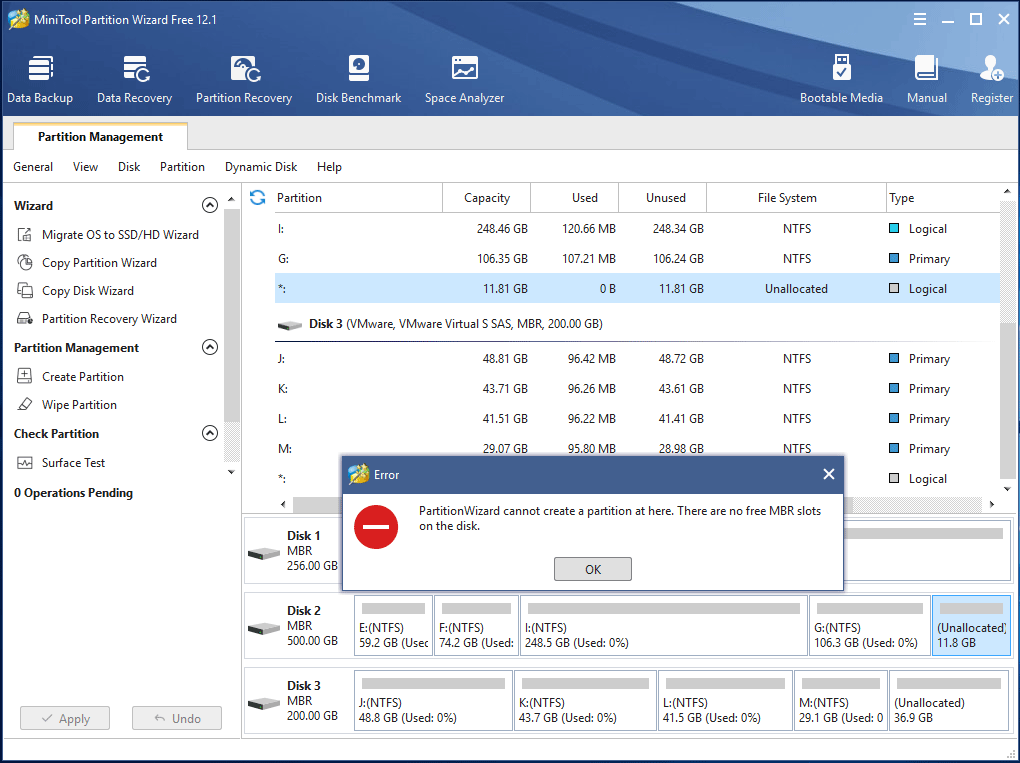
In order to solve create partition maximum number problem and make full use of unallocated space in Windows 7/8/10, please convert an existing primary partition to logical partition and try again for a new partition creation.
How do you convert a primary partition to logical for a new extended partition successfully? Don’t worry. You also can ask MiniTool Partition Wizard for help with its powerful functions. If you don’t know the detailed operation, please do as the following step-by-step guidance shows.
MiniTool Partition Wizard FreeClick to Download100%Clean & Safe
Step 1: Double-click MiniTool Partition Wizard and then run it by clicking “Launch Application” option.
Step 2: Then you will go to its clear and simple main interface. After selecting the primary partition G which is next to the logical drive I and unallocated space, you can see there are many features in the left pane, here please select “Set Partition as Logical” feature from “Change Partition” drop-down menu.
Or right-click the target partition to select this function to convert it to logical.
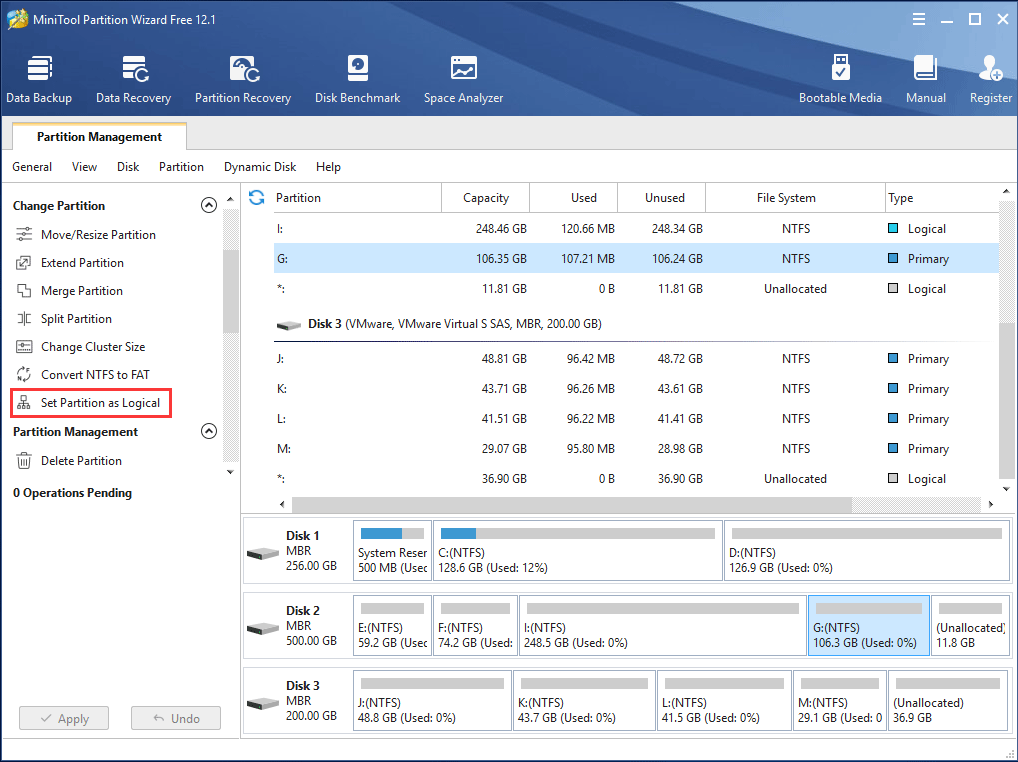
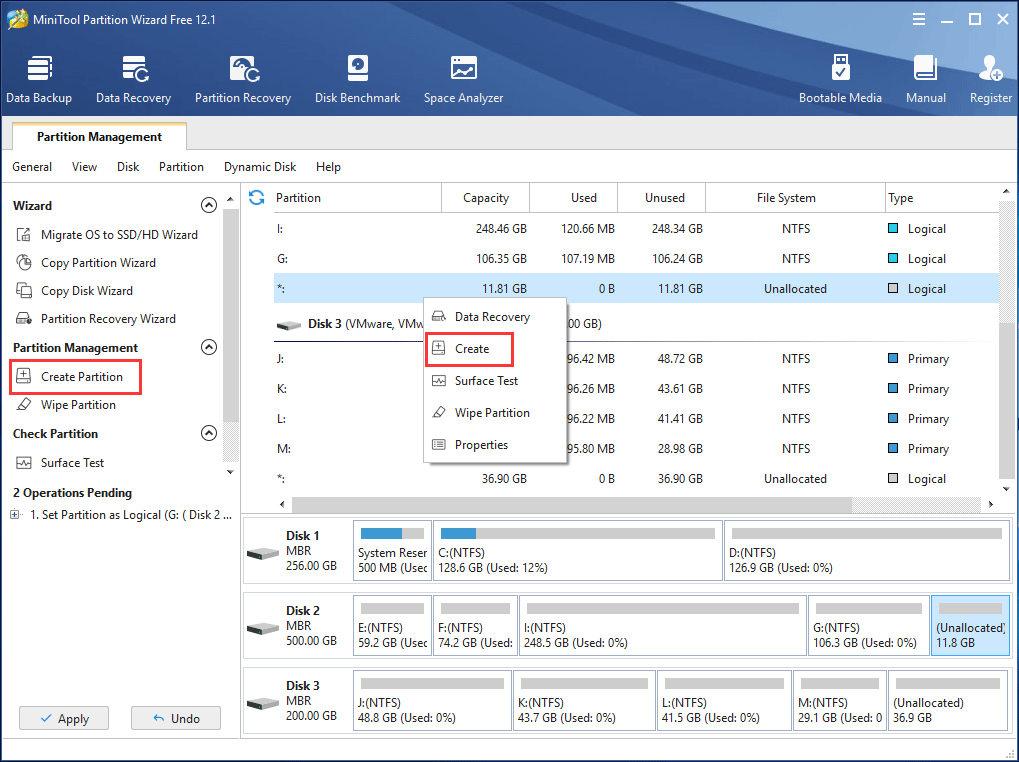
Step 3: Then you can preview this partition G is in logical status. Next right-click the unallocated space to select “Create” function. Or select the unallocated space to click “Create Partition” from “Partition Management” menu.
Step 4: Then during the process of partition creation, you can specify the partition setting. After finishing all settings, then click “OK“.
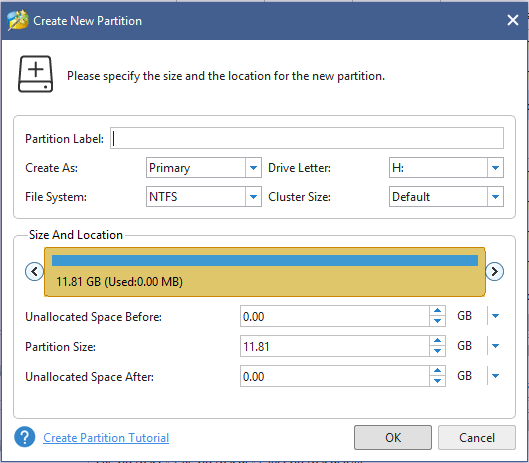
- Partition label: it is designed to add a label to the newly created drive in order to recognize it quickly.
- File system: MiniTool Partition Wizard allows you to set partition in FAT, FAT32, NTFS, Ext2, Ext3, Ext4, Linux Swap file system, or just let it in “unformatted” status.
- Drive letter: you can allocate a letter from D to Z for this new partition. Here the letters that have been used won’t be listed.
- Cluster size: it is recommended to set cluster size as “default”. If you have special needs, you can set it as 1kb, 2kb, 4kb, 8kb, 16kb, 32kb or 64kb.
- Size and Location: it is allowed to drag the black triangles to resize the newly created partition size or input the specific value to textboxes.
Step 5: At last, click “Apply” to execute all changes. Here you can preview partition K will be created.
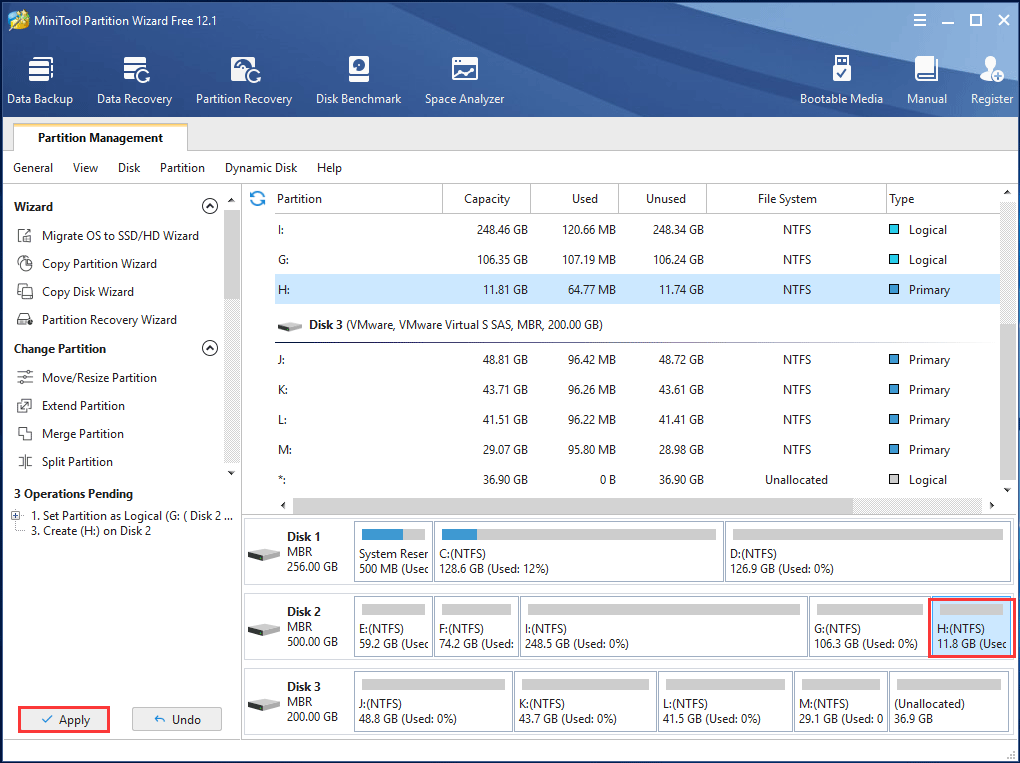
Just do as the above steps show, you can easily solve Windows cannot create new simple volume from unallocated space error warning and create a partition successfully in Windows 7/8/10.
For more cases about setting partition to logical, please refer to this article No Free MBR Slots.
If you are having the same create partition maximum number problem, just download MiniTool Partition Wizard Free Edition to have a try by converting MBR disk to GPT or converting an existing primary partition to logical partition and try again. Or you can share this partition manager with your friends to help fix disk already contains maximum number of partitions error.
MiniTool Partition Wizard FreeClick to Download100%Clean & Safe
Way 3: Shrink Logical Partition to Create a New Partition
In addition, there is another solution. From the following screenshot, you can clearly see the partition layout. Now if you right-click the unallocated space to select “New Simple Volume” feature, maximum number problem emerges at the end of creating a partition.
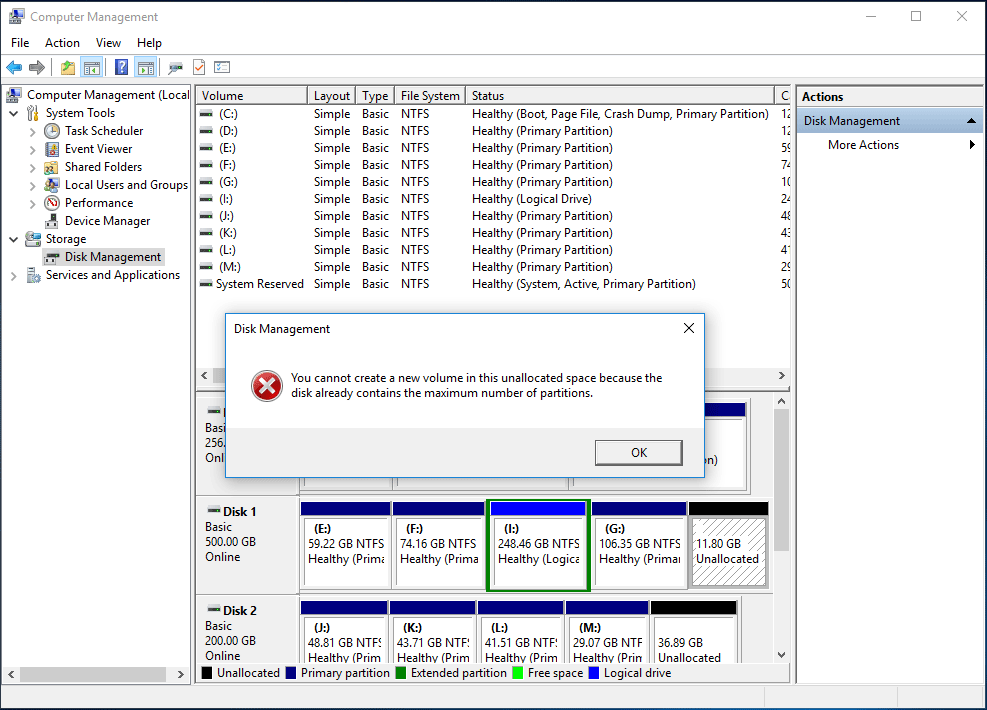
In this case, you can use Disk Management to shrink the logical partition to allocate some free space for new volume creation in Windows 7/8/10.
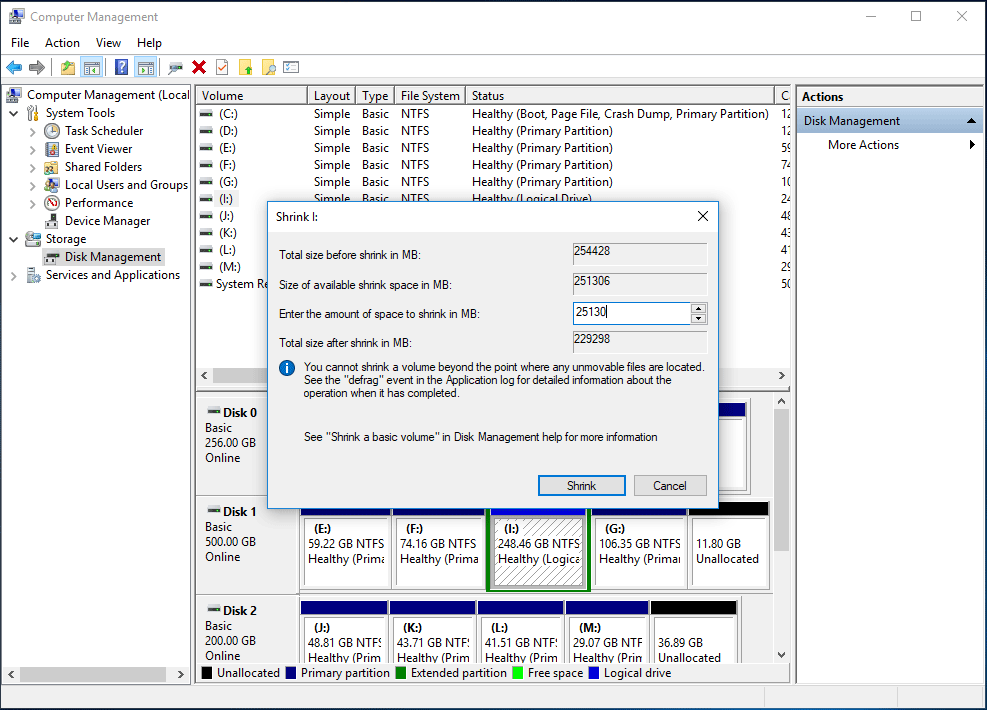
Step 1: Right-click the logical partition and then select “Shrink Volume” for free space. During the process, it is allowed to decide how much free space by setting the value of “Enter the amount of space to shrink in MB“. Then click “OK” to perform this operation.
Step 2: Then you can right click the free space to select “New Simple Volume” for a new partition.
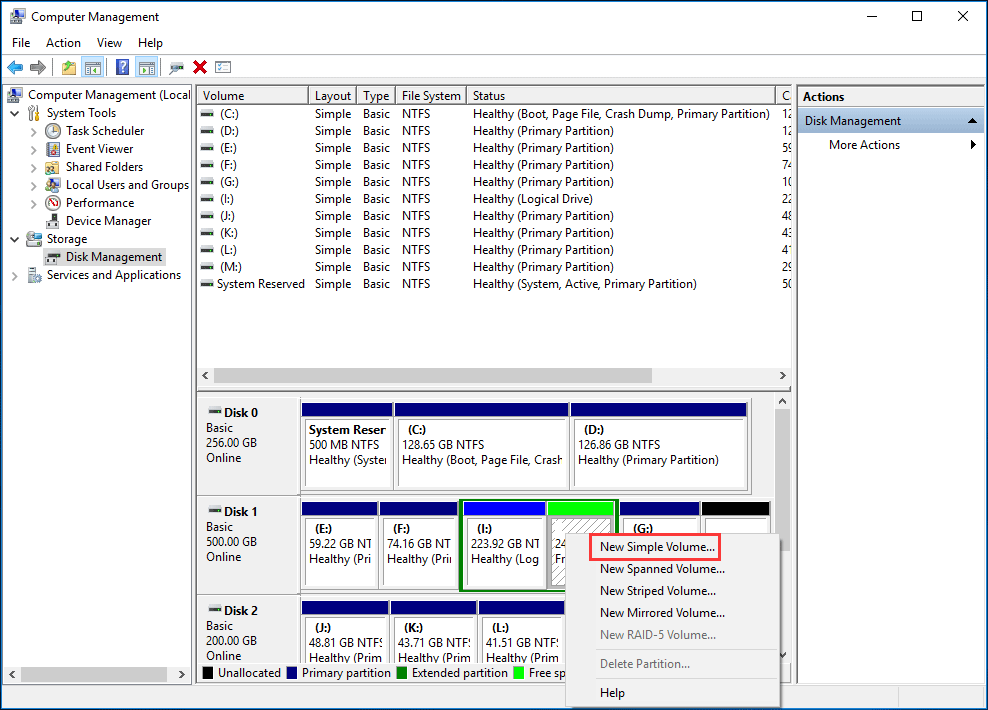
Step 3: If you want to create more partitions, you can repeat step 1 and step 2. Like that, many logical partitions will be created.
MiniTool Partition Wizard FreeClick to Download100%Clean & Safe
Way 4: Convert Basic Disk to Dynamic Disk
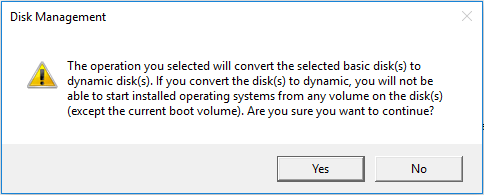
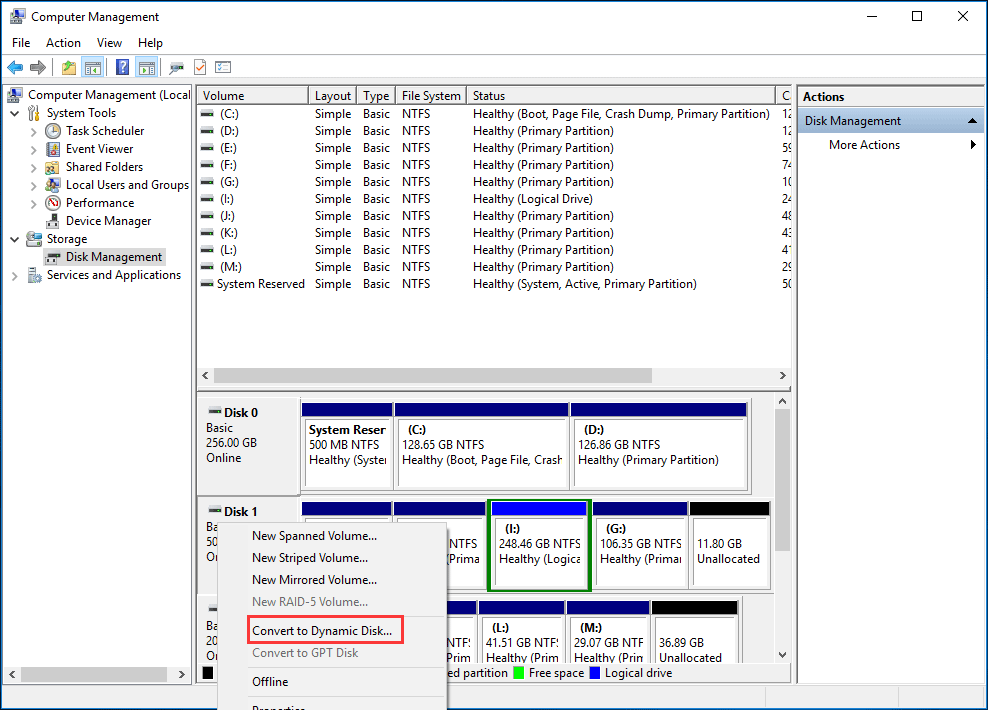
Besides, there is another way to help you get rid of the error disk already contains maximum number of partitions in Windows 7/8/10, that is to convert the basic disk to dynamic disk which could contain a lot of simple volumes and the conversion can be done by using Disk Management.
Useful articles:
Detailed steps are as follows:
Step 1: Right click the basic disk, choose “Convert to Dynamic Disk” from the shortcut menu, and do conversion according to wizards.
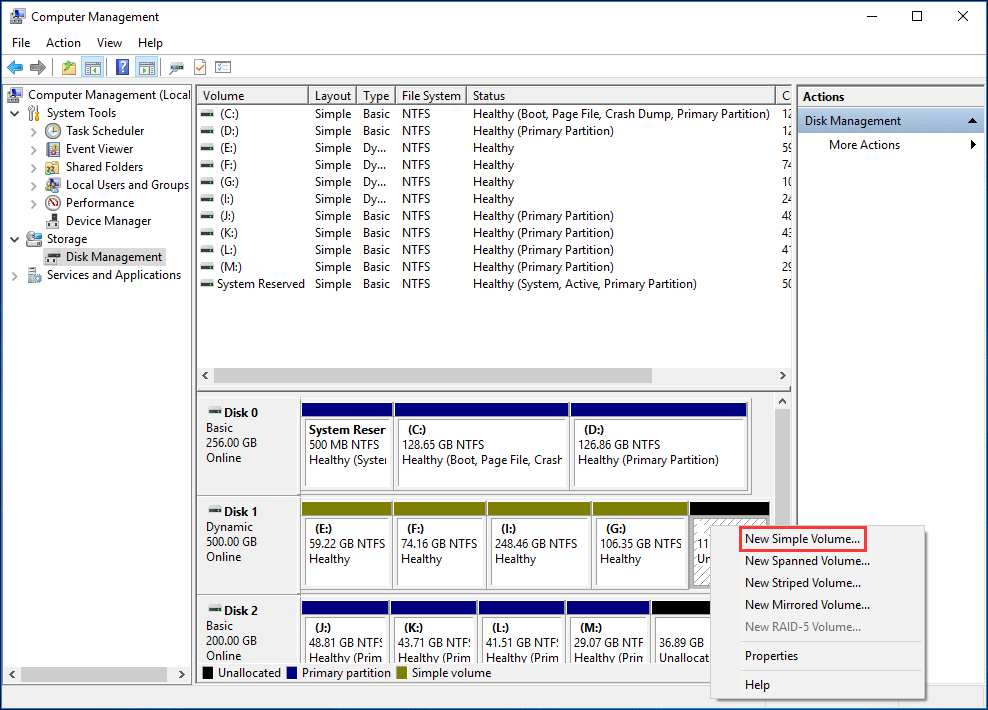
Step 2: After your disk is converted to dynamic disk, you can create a new simple volume with the unallocated space.
Verdict
Cannot create partition from unallocated space with the error disk already contains maximum number of partitions? This post shows you four solutions to fix maximum number of partitions on a disk with MBR partition style in Windows 7/8/10. Try them right now!
Do you have any suggestion or better idea? Please let us know via [email protected] or leave a comment below. Much appreciated.

User Comments :