This post deserves your attention if you are going to convert USB flash drive to local disk. Here, MiniTool Partition Wizard tells you the reasons, preparations, and steps for making a USB flash drive appear as an HDD.
After the USB flash drive is plugged in, it will appear as removable storage in your computer or any other device by default. For some reason, you may want to convert USB flash drive to local disk. If you are running out of hard disk space, the converted USB can be used as a hard drive partition, which means you can partition it as you like.
If the USB appears as removable media, it can’t be split into several partitions with Windows built-in tools. Besides, Windows only recognizes the first partition on a removable disk.
Here comes the question: how to make a USB flash drive appear as an HDD. Well, this post offers you a full guide. You just need to follow the given steps to convert USB flash drive to local disk.
Things to Do Before Starting the Conversion
You need to do the things below to ensure that the conversion performs smoothly and successfully.
- Connect the USB flash drive into the USB port of your computer.
- Ensure that your USB drivers are up to date.
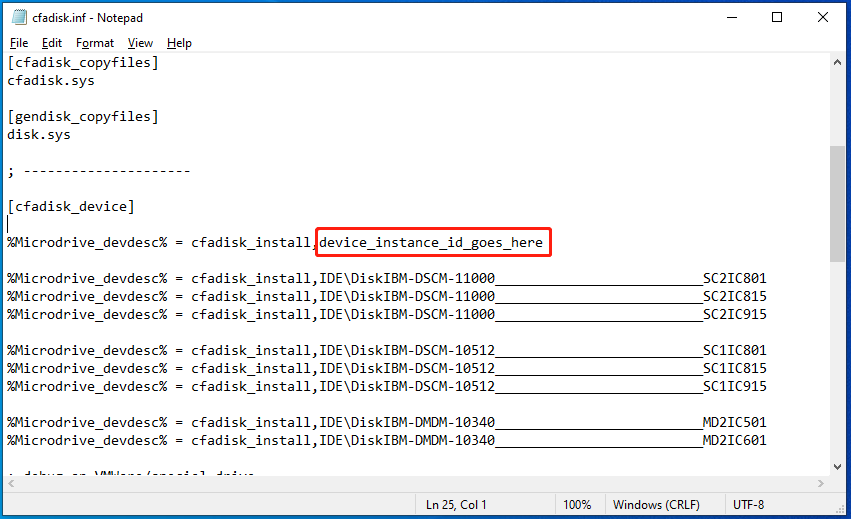
- Download and extract USB_LocalDisk.zip on your computer. After you open the USB LocalDisk folder, right-click on cfadisk.inf and open it using Notepad, Notepad++, or other text editors. Then navigate to line 26 of the .inf file.
- To avoid any kind of errors, you sometimes need to format the USB drive. Remember to create a copy of your USB data with a USB image tool before formatting the drive. If you forget to back up the USB and lose the data, recover data with MiniTool Partition Wizard.
MiniTool Partition Wizard is a multifunctional partition manager for Windows computers. In addition to recovering data, it also allows you to partition, format, back up, and test USB flash drives. You can apply it to manage your USB drive, SSD card, external hard drive, dynamic disk, etc.
MiniTool Partition Wizard FreeClick to Download100%Clean & Safe
Steps to Convert USB Flash Drive to Local Disk
After you make preparations above, you can convert USB flash drive to a local disk by following the steps below.
Step 1: Open the Run window by pressing Windows and R keys.
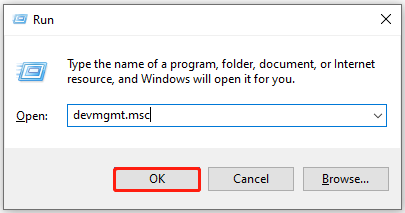
Step 2: Type devmgmt.msc and click OK to open Device Manager.
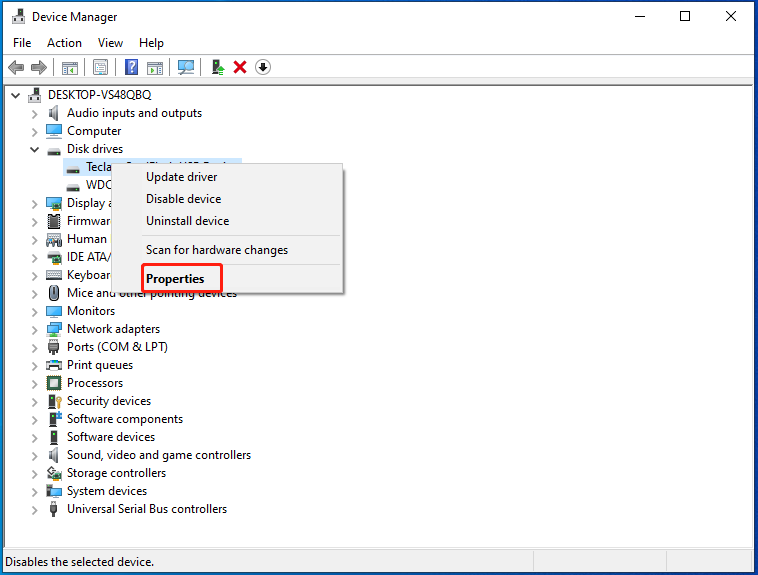
Step 3: Double-click Disk drives to expand this category. Find and right-click on your USB stick, and then click Properties.
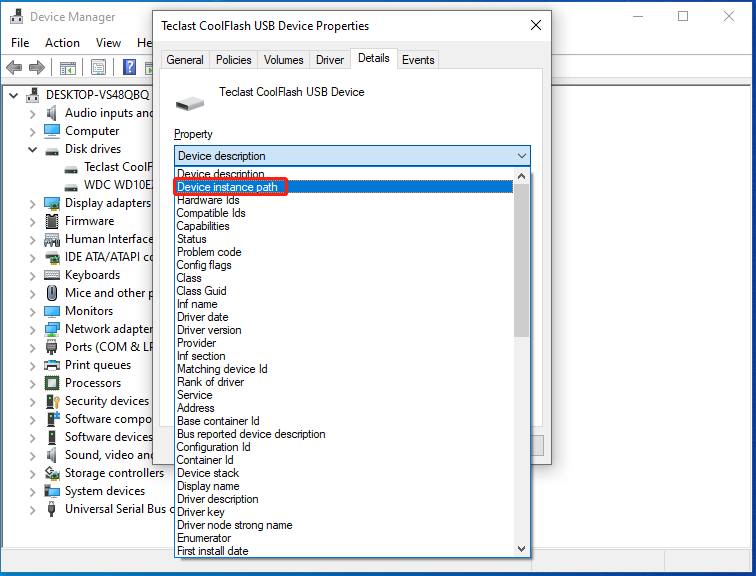
Step 4: Navigate to the Details tab of the Properties window and then open the Device description drop-down menu. Find and tap on Device instance path.
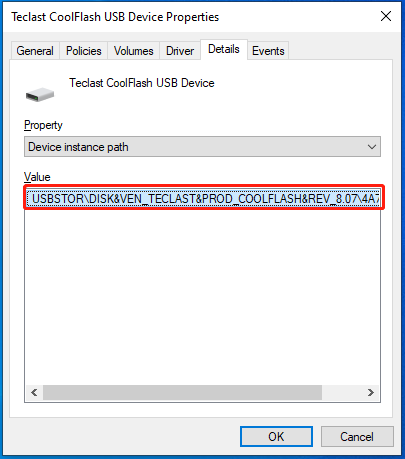
Step 5: Select the value and press Ctrl + C keys to copy the value. Alternatively, right-click on the value and tap Copy.
Step 6: Go to line 26 of the .inf file again.
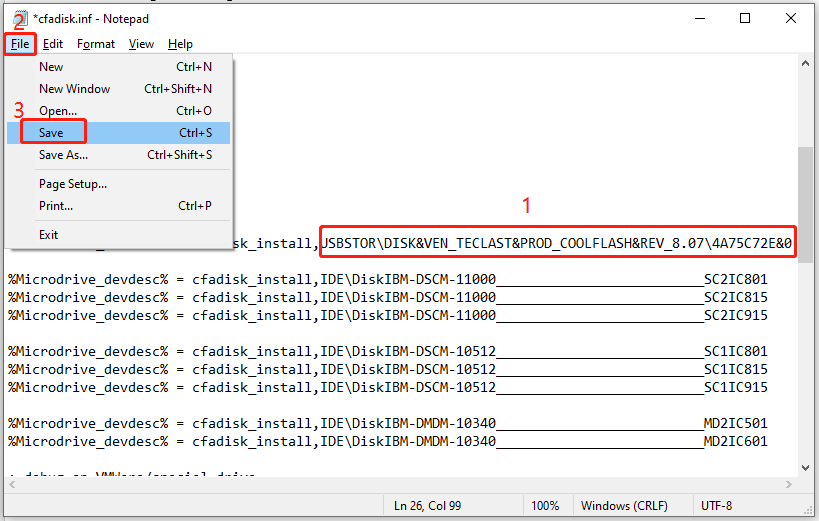
Step 7: Paste the copied value to the location of device_instance_id_goes_here to replace it. Then click File > Save to confirm the operation.
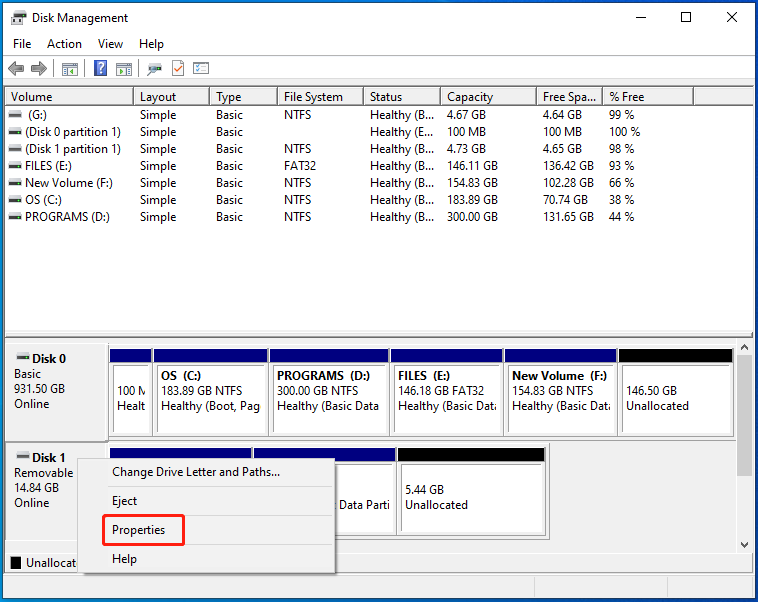
Step 8: Open Disk Management, right-click on your USB drive (claimed as Removable), and click Properties.
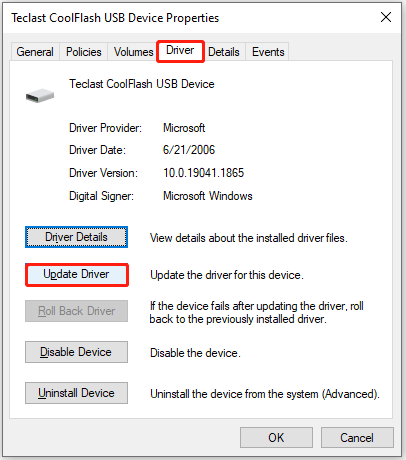
Step 9: Switch to the Update Driver tab and click Update Driver.
Step 10: Tap Browse my computer for drivers > Let me pick from a list of device drivers on my computer > Have Disk > Next.
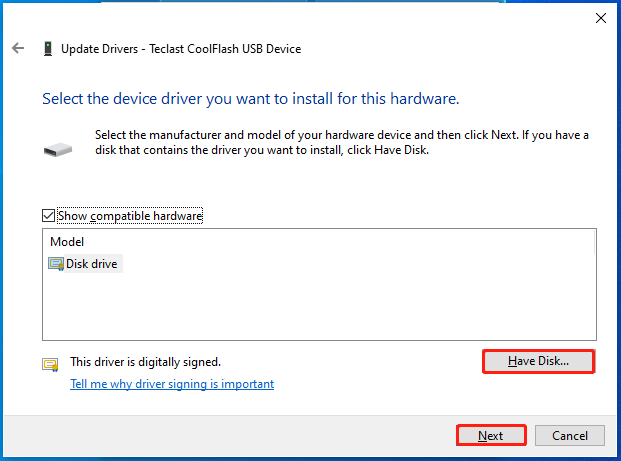
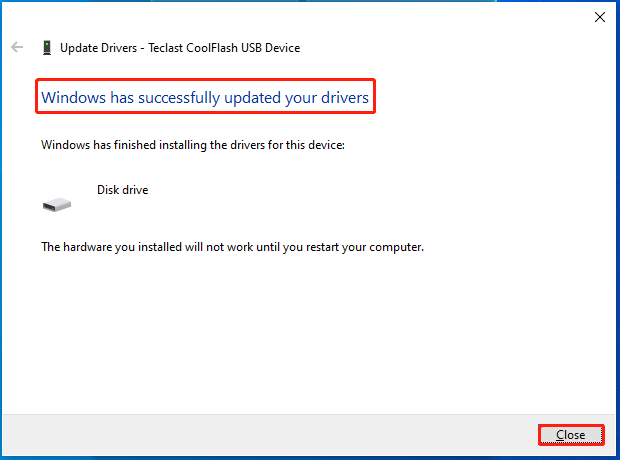
Step 11: Follow the on-screen instructions to complete the operation. Once a window which states that Windows has successfully updated your drivers appears, click the Close button to exit the operation.
You will receive a warning window that tells you must restart your computer for changes to take effect. Click Yes to confirm the process.

![Flash Drive Showing up as 2 Drives [Quick Fix]](https://images.minitool.com/partitionwizard.com/images/uploads/2023/05/flash-drive-showing-up-as-2-drives-thumbnail.jpg)
User Comments :