After upgrading to Windows 10 build, many users complain that their computer goes to sleep too fast. Are you also troubled by this problem? Now, you come to the right place. This post of MiniTool summarizes 3 effective troubleshooting methods.
Why does my computer go to sleep so fast? After investigating lots of user reports and references, it can be concluded that this issue is always related to the improper power plan. In addition, other factors like screensaver settings and power buttons are also responsible for computer goes to sleep too fast Windows 10.
Solution 1. Perform a Registry Fix and Set a Custom Power Plan
One of the most effective troubleshooting methods is to perform a registry fix and then you can reconfigure a custom power plan. This method has been proven by lots of affected users to be helpful. To do so, follow the detailed steps below:
Step 1. Press Win + R keys to open the Run dialog box, and then type regedit in it and hit Enter.

Step 2. Navigate to the following path through the left side panel in Registry Editor.
HKEY_LOCAL_MACHINE > SYSTEM > CurrentControlSet > Control > Power > PowerSettings > 238C9FA8-0AAD-41ED-83F4-97BE242C8F20 > 7bc4a2f9-d8fc-4469-b07b-33eb785aaca0
Step 3. In the right-side pane, double click a value key named Attributes to open it. Then change its Value data to 2 and click OK to save the change. After that, you can exit the Registry Editor.
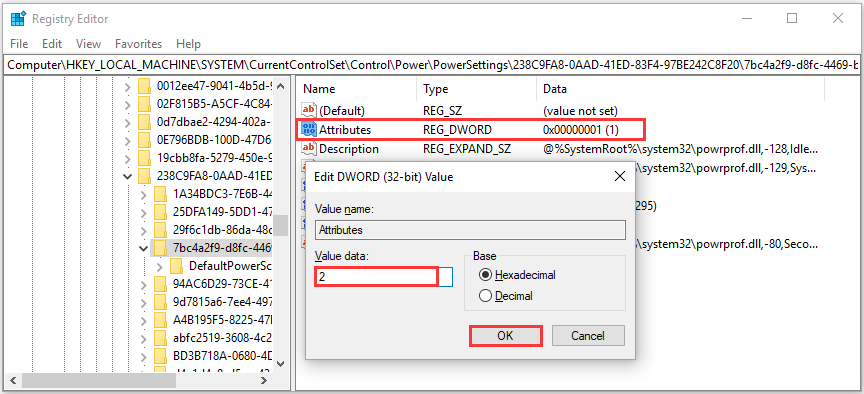
After you have performed the registry fix, you need to continue with the following steps to reconfigure a custom power plan. It indicates that you should change your system unattended sleep timeout to a longer period of time. For that:
Step 1. Type power plan in the search menu and select the Edit Power Plan from the Best match.
Step 2. Click on the Change advanced power settings link at the bottom of the window.
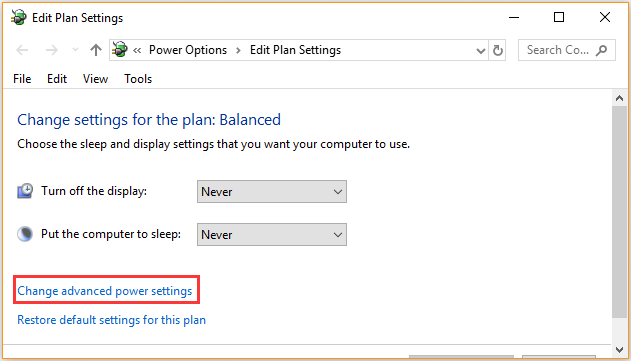
Step 3. Click on Change settings that are currently unavailable and go to the Sleep section.
Step 4. Select the System unattended sleep timeout and change its value to a longer time. For example, if the value of the settings is 2 minutes, you can change it to 30 minutes or longer.
Step 5. Click on Apply to save the changes.
Now, you can see if the computer goes to sleep too fast.
Solution 2. Change Screensaver Settings
A screensaver is a tool in Windows that enables your computer to enter into sleep mode to save energy. It is known that screensaver can provoke some issues related to computer sleeping. If your computer goes to sleep too fast, you can change the screensaver settings.
Step 1. Press Win + R keys to open the Run dialog box, and then type control in it and hit Enter.
Step 2. Click on Appearance and Personalization in Control Panel and select the Change screen saver link in the Personalization heading.
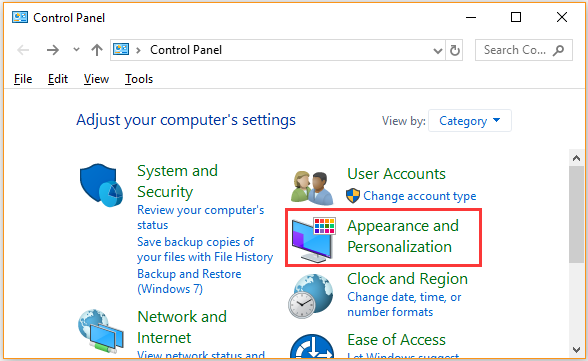
Step 3. Now, you can check if the Screen Saver is enabled. If it is, you can select None to disable the utility.
Note: If you have updated your Windows to the latest build, you may not find the screensaver settings in the default location, then you can type lock screen settings in the search bar and select the best match. In the pop-up window, click on Screen saver settings at the bottom and disable it.
Solution 3. Reset Power Settings
If you have custom power settings before upgrading to a new Windows version, then the new updates may not work with your custom power settings, causing the laptop goes to sleep too fast. To fix this issue, you can try resetting power settings. Here’s how:
Step 1. Press Win + I keys to open the Settings app and select System.
Step 2. Go to the Power & sleep section from the left pane, and then scroll down the right sidebar and click on Additional power settings.
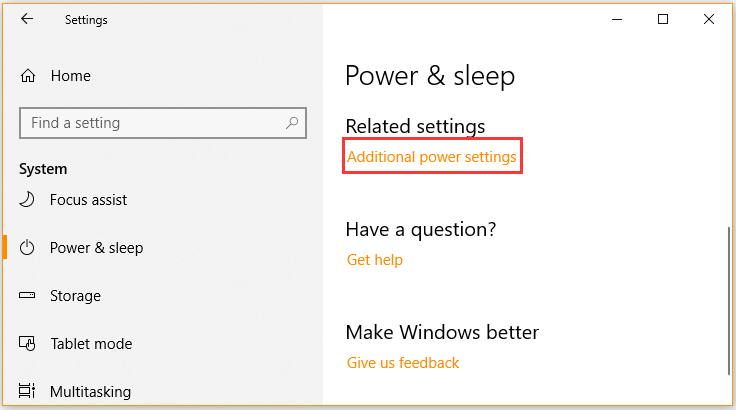
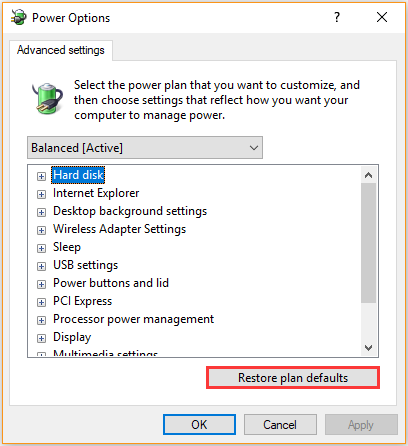
Step 3. Click on the Choose when to turn off the display > Change advanced power settings links.
Step 4. Click on the Restore plan defaults button. After that, you need to reconfigure all power settings like the inactive time that your computer goes to sleep.

![How to Fix CCleaner Not Opening Windows 10 [4 Solutions]](https://images.minitool.com/partitionwizard.com/images/uploads/2021/01/ccleaner-not-opening-windows-10-thumbnail.jpg)
User Comments :