Sometimes you may need to get the graphics card model or manufacturer. Do you know how to check graphics card in Windows 11? In this post, MiniTool summarizes 5 simple ways to help you check graphics card Windows 11.
A graphics card, known as GPU, is an important hardware device that manages the performance of the video and graphics. Sometimes, you may want to know if your graphics card is compatible with a game, a hardware device, or due to other reasons. Here comes a question: how to check your graphics card in Windows 11? If you are looking for this answer, you can get 5 simple methods.
Way 1. Check Graphics Card Windows 11 from Task Manager
If you want to check your graphics card model and monitor GPU usage, then Task Manager is a good choice. Here’s how to do that:
Step 1. Press Ctrl + Shift + ESC keys to open Task Manager and click on More details. Also, you can right-click the Start menu and select Task Manager.
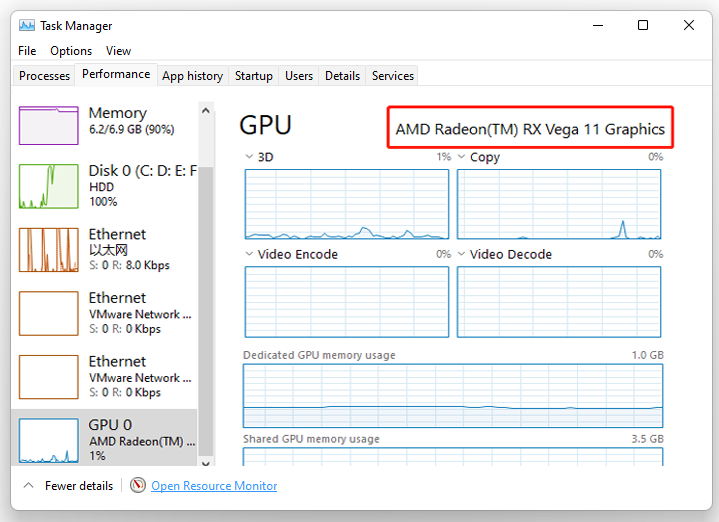
Step 2. Go to the Performance tab, and then scroll down the list to the GPU section and you can check the model and manufacturer of your graphics card. If you have multiple graphics cards, you can select the one you want to check.
Way 2. Check Graphics Card Windows 11 from Display Settings
Another simple method on the graphics card check in Windows 11 is to use the settings app. But this method only applies to a single graphics card on your PC.
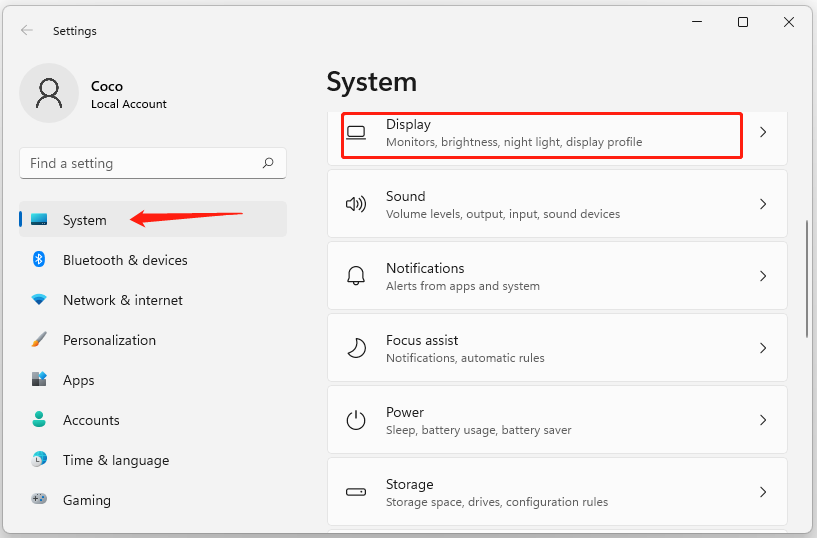
Step 1. Press Win + I keys to access the Settings app, and then select System from the left sidebar and click on Display from the right side.
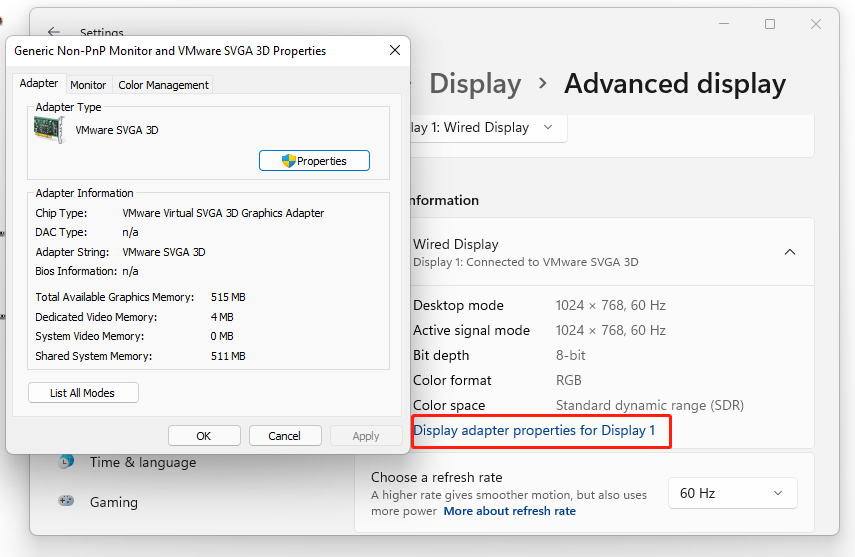
Step 2. Navigate to the Advanced display category, and click on it and you will see the manufacturer and model number of your graphics card under the Display information section. To know more details of this graphics card, you can click on Display adapter properties for Display 1.
Way 3. Check Graphics Card Windows 11 from System Information
If you just want to know the manufacturer and model of your graphics card, you can view the system information. Here’s how:
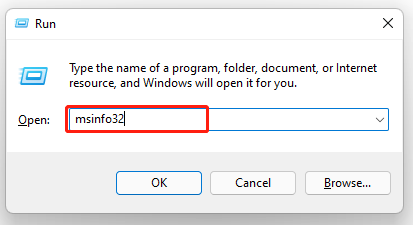
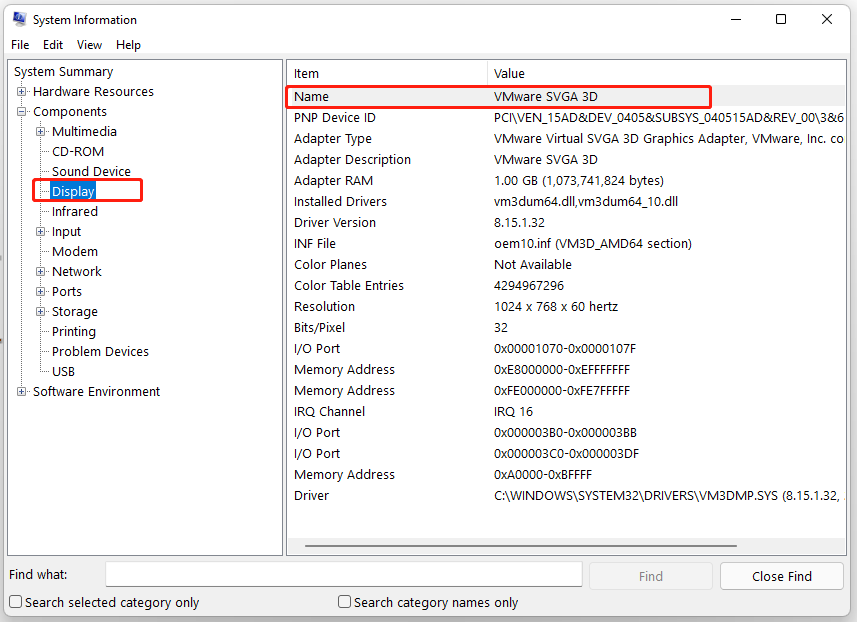
Step 1. Press Win + R keys to open the Run box, and then type msinfo32 in it and hit Enter.
Step 2. Expand the Components category and select Display. Then you can check the installed graphics card from the right pane.
Way 4. Check Graphics Card Windows 11 from Device Manager
As you know, the Device Manager is capable of handling all the I/O devices that you can check information related to the hardware. Here’s how to check graphics card in Windows 11 via Device Manager.
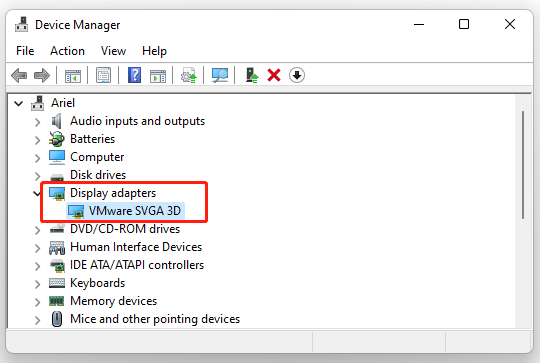
Step 1. Open the Run dialog box again, and then type devmgmt.msc in it and hit Enter.
Step 2. Expand the Display adapters category and then you can view the list of installed graphics cards on your PC. Also, you can right-click the graphics card and select Properties to get more details.
Way 5. Check Graphics Card Windows 11 Using DirectX Diagnostic Tool
How to check GPU in Windows 11? The last way is to use the DirectX Diagnostic Tool. To do so, follow the steps below.
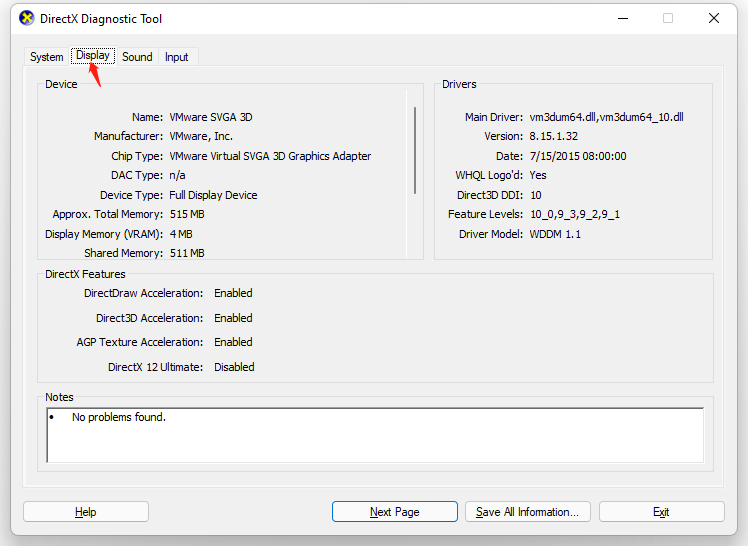
Step 1. Open the Run dialog box again, and then type dxdiag in it and hit Enter. Then click on Yes in the prompted confirmation window.
Step 2. Navigate to the Display tab. Then you can view all related information of your graphics card, including Name, Chip type, Manufacturer, DAC type, Driver model, etc. If you have multiple graphics cards, it will show like in the forms of Display 1 and Display 2.


User Comments :