Most of Windows users may encounter the issue of opening a file in a wrong application. The solution to this problem is to change file associations. MiniTool Partition Wizard introduces the details about it
About File Associations
File association is a kind of relationship between a type of file and a program that can open the file. That is to say that file association refers to the operating system of a certain document should be used to open a program.
When you install applications, the system associates some files according to the requirements of the application software. Take for an example, *.doc documents must be associated with Word during its installation process. In addition, BMP files are opened with the Draw program that comes with Windows because of the system default.
If you install other graphics programs that are associated with BMP documents in the future, you will not be able to use drawing when you double-click BMP. That is why you need to change file associations.
Sometimes a file will not open, a pop-up window will pop up, or we want to open the file in one application but automatically open it in another application. This is all due to file associations.
Read More: How to Change File Extensions in Windows 10 Correctly
How to Change File Associations in Windows 10 or 11?
If you have run into the problem of opening a file in entirely the wrong application, you are not alone. The next solutions mainly tell you how to change the type of files in Windows 10. You can learn from them to solve your problems.
Solution 1: Change File Associations in Windows Settings
If you are accustomed to setting up your computer in Windows settings, the following steps deserve your attention.
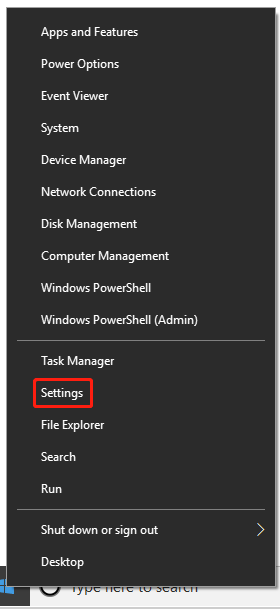
Step 1: Right-click the Start and choose the option of Settings.
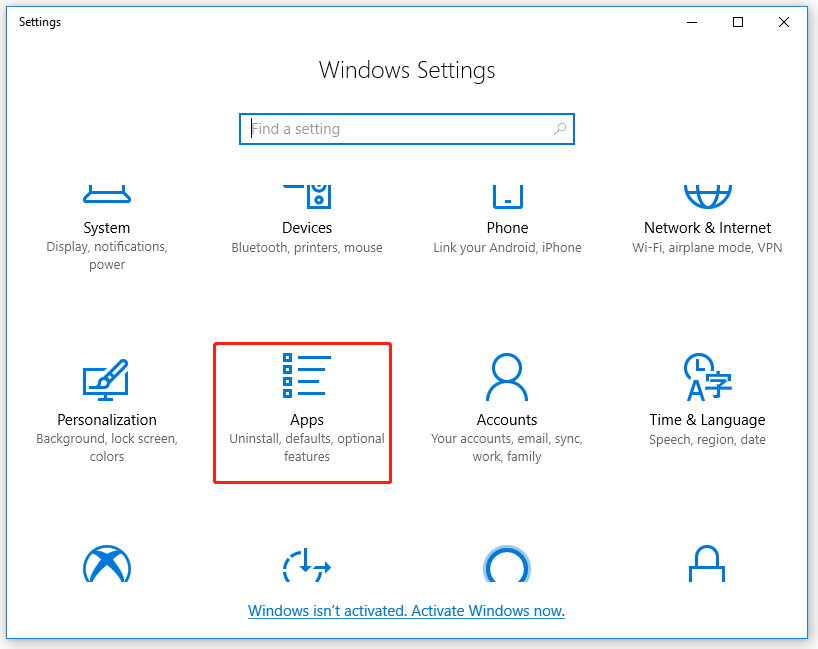
Step 2: In this interface, some options are presented to you. You are supposed to select Apps.
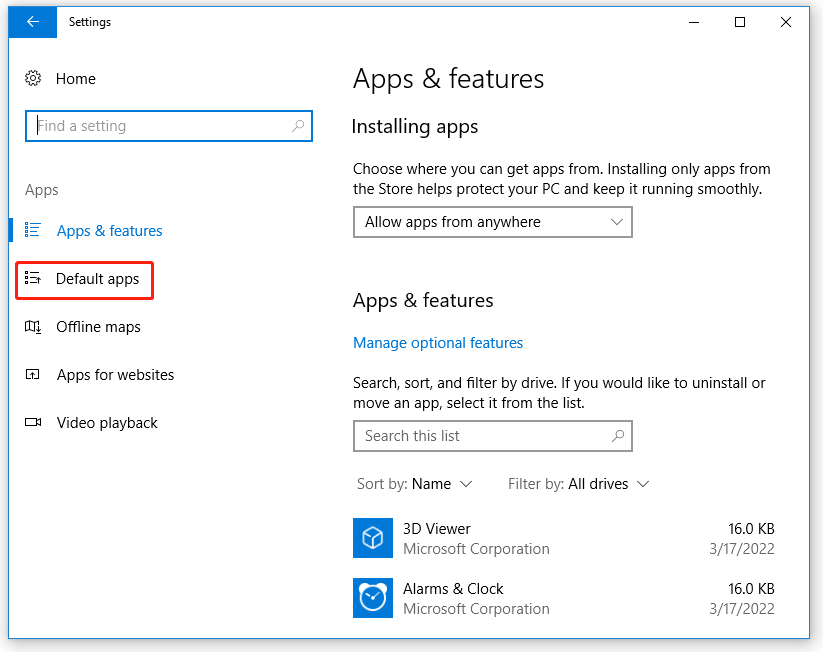
Step 3: Look at the left panel, and choose the option of Default apps.
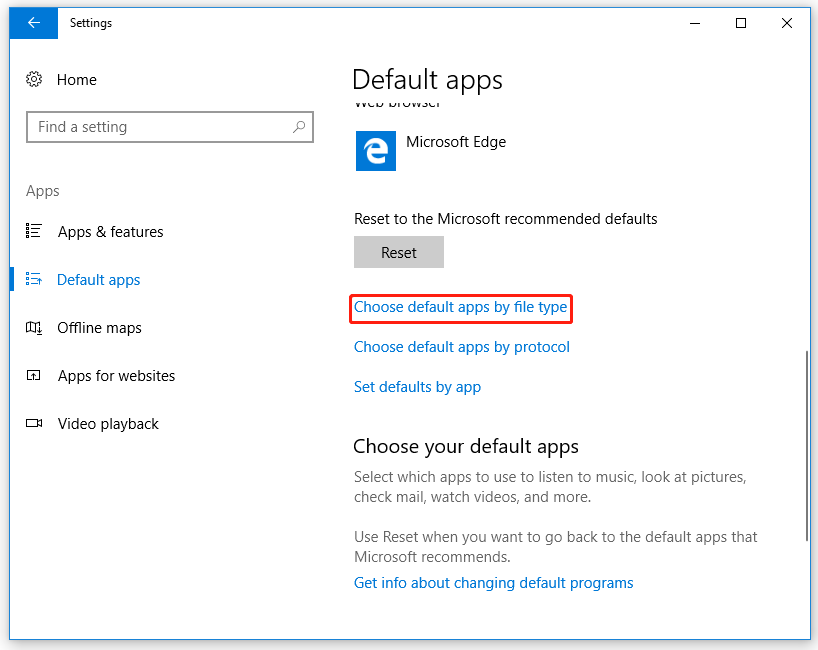
Step 4: Now, you are supposed to scroll your mouse a little from the top of the list and select Choose default apps by file type.
Step 5: Then you will see a list of file types supported by Windows 10 and their associated applications on the right-hand side.
Step 6: You are supposed to scroll through the list to find the file type you want to change the file associations for. For instance, the target is the GIF FILE in this picture. You should click Photo located behind.
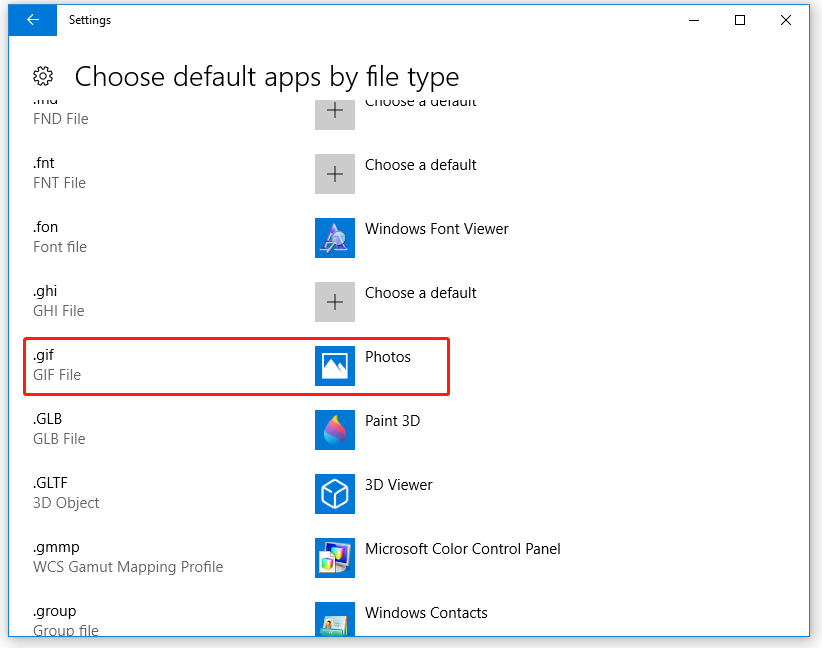
Step 7: Choose your preferred application from the list that appears and click its icon.
In the case of some file types, there will be multiple options, whereas others may have none.
Here, taking Paint for an example, you are supposed to hit Paint.
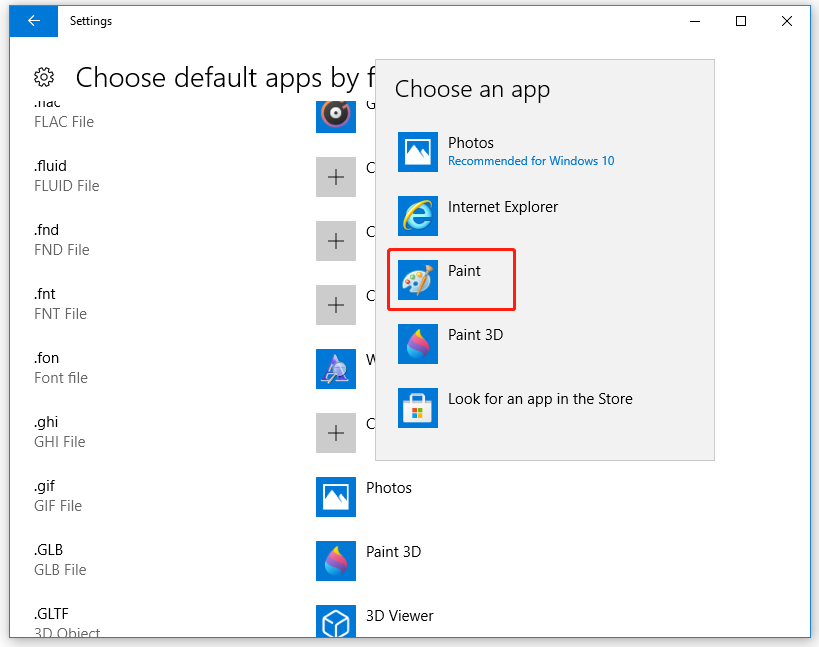
Now, you have learned how to change the type of files successfully in Windows Settings.
Solution 2: Change File Associations via the Control Panel
You can also change file associations via the Control Panel, just as the followings.
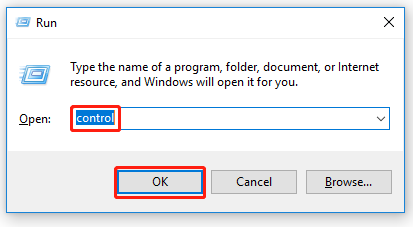
Step 1: Open the Control Panel. You can press “Win + R”, type “control” and hit OK to open it.
Step 2: Hit Programs.
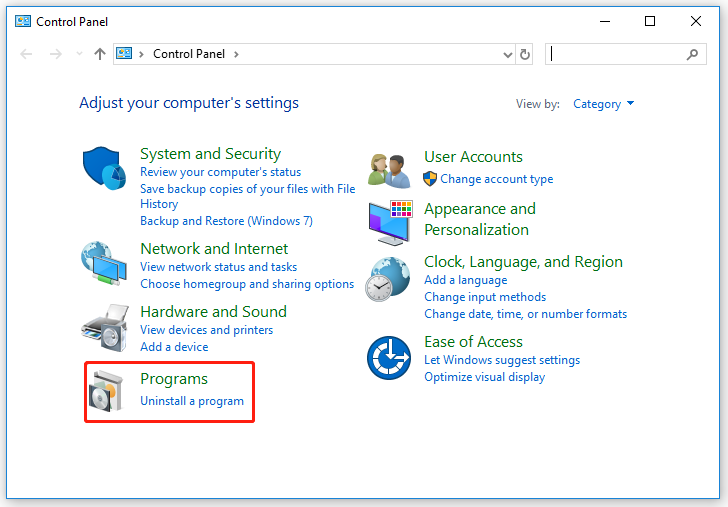
Step 3: After hitting Programs, you will see this interface. Hit Default Programs.
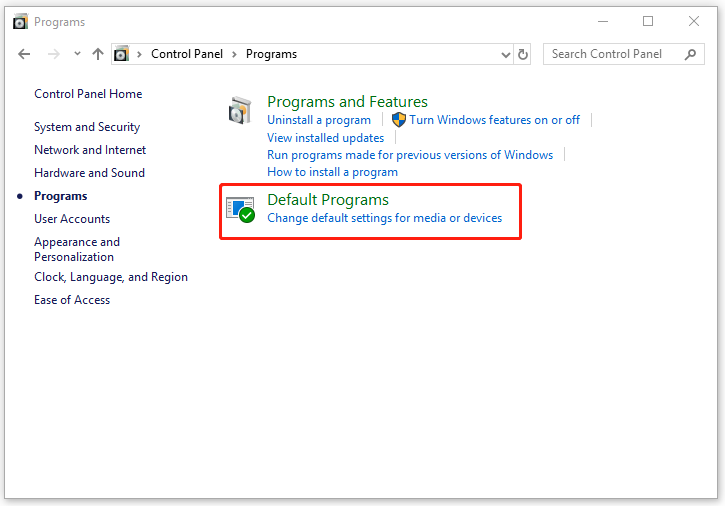
Step 4: Now, select Associate a file type or protocol with a program.
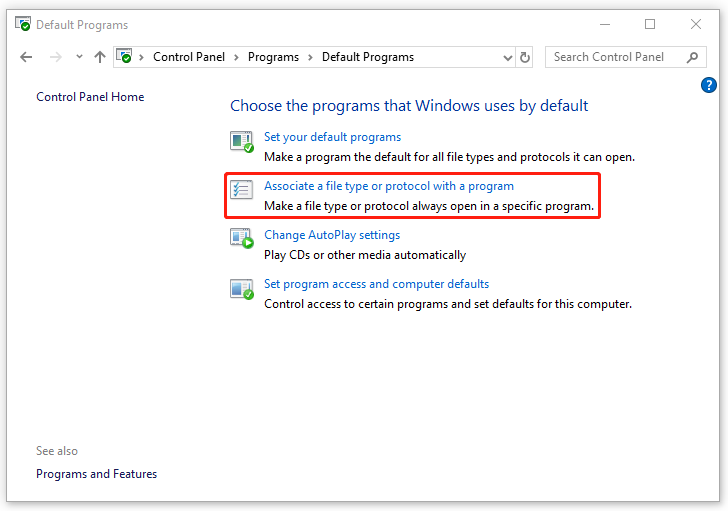
After finishing the whole steps, you will see the interface of Windows settings. You should change file associations like you do in Windows settings.
Solution 3: Change File Associations in File Explorer
You have two options to change file associations in File Explorer.
Option 1: Choose anther app
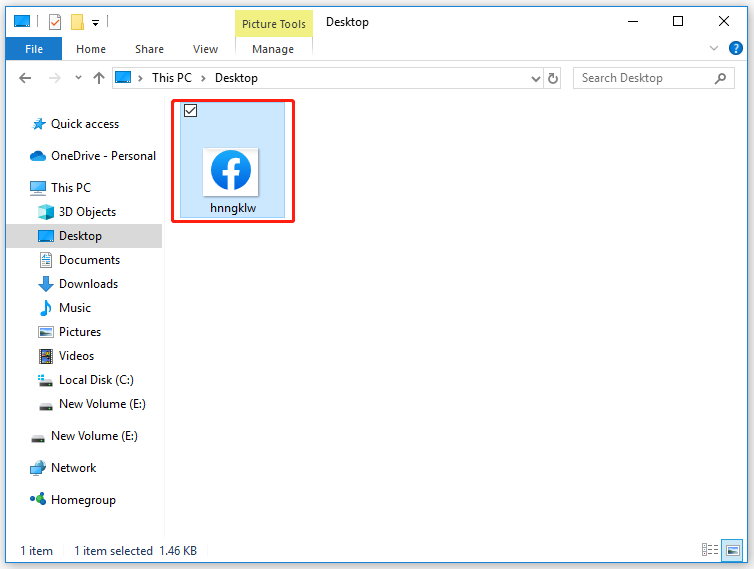
Step 1: You can press “Win + E” to open the File Explorer.
Step 2: Find your target file from the left panel, and right-click it. Supposing that the circled picture is your target, you should right-click it.
Step 3: After right-clicking your target, you are supposed to scroll down your mouse to the Open with, and choose the option of Choose another app.
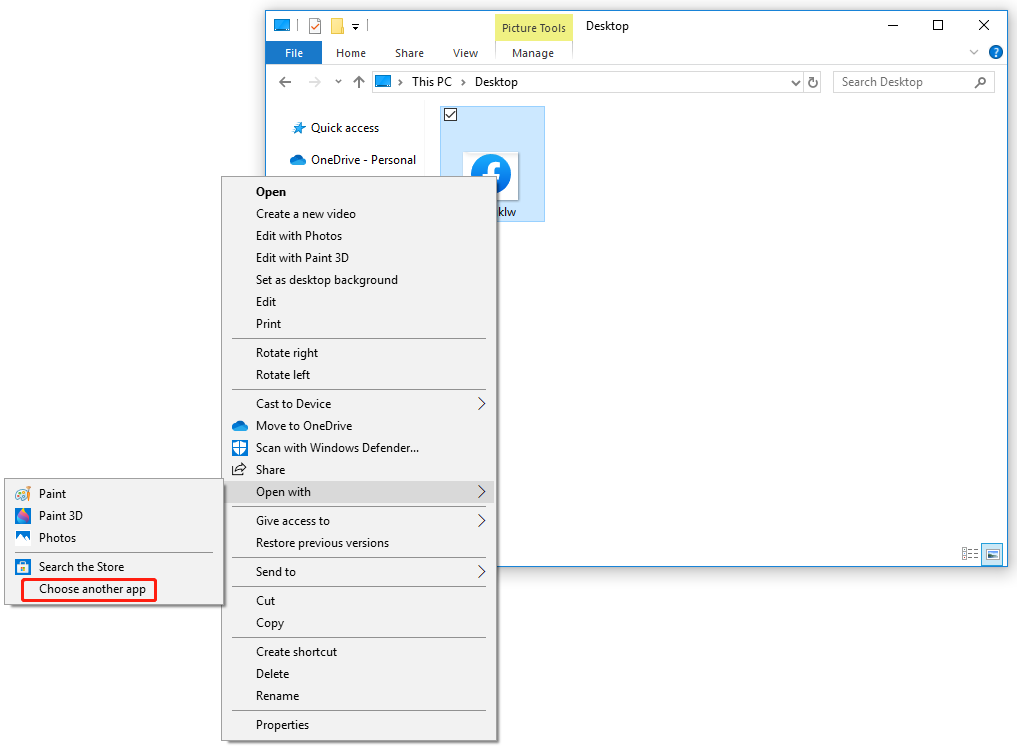
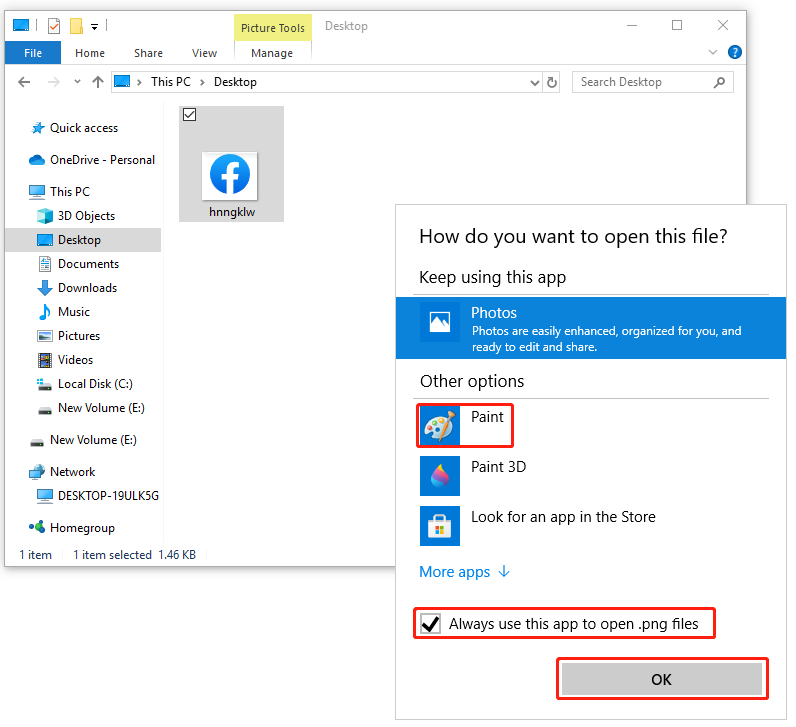
Step 4: Now, if you want to associate the target with Paint, you should hit Paint. Do not remember that checking the box next to Always use this app to open.png files. Then hit OK.
Option 2: Use properties
You could also change file associations by another way in File Explorer.
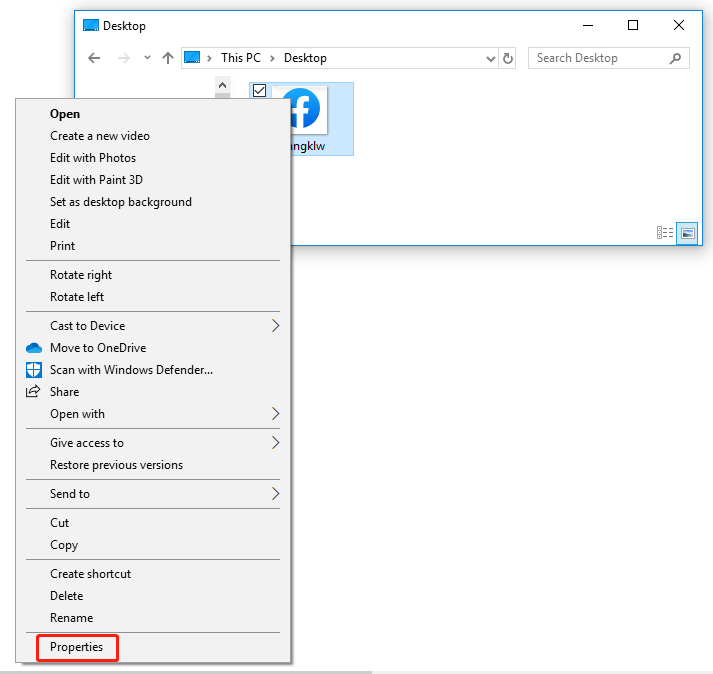
Step 1: Right-click the target file, and hit Properties.
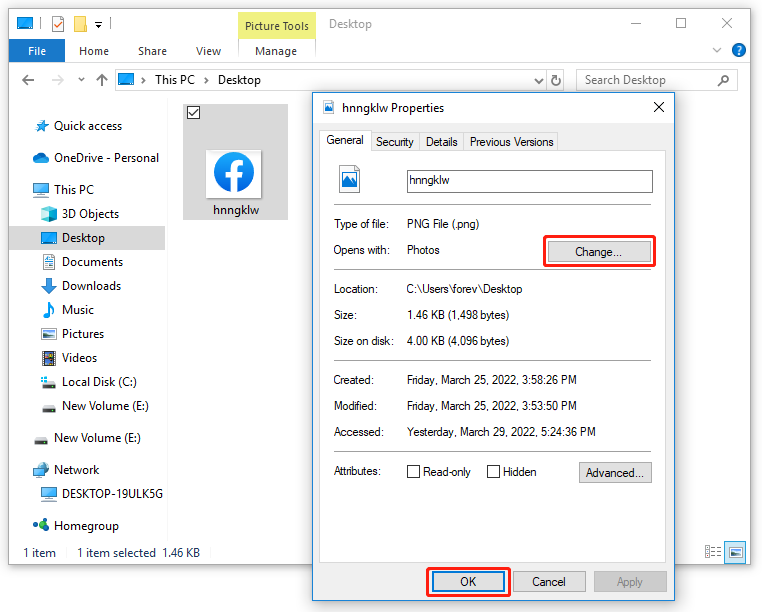
Step 2: Click the option of Change.
You have learned some solutions to change file associations. They are efficient and quite simple, aren’t they?
Most operations of changing file associations in Windows 11 are exactly the same as those in Windows 10. What you should pay attention to are the differences of interfaces between Windows 10 and Windows 11.
Also Read: How to Show File Extensions in Windows 10?
Bottom Line
Most of us have a lot of trouble in our computer. You ought to be patient and learn how to solve your problems. In this post, there are solutions to change file associations. You could follow them to have a try.
Now, you can see the file extension for which you want to change the default program.

User Comments :