Drive letters are used to identify and access different storage volumes. Sometimes it becomes necessary to change these letters to meet specific requirements or resolve conflicts. This post from Partition Magic provides detailed steps to change drive letter in Windows Server.
Why Do You Need to Change Drive Letters in Windows Server?
Each disk on a Windows Server is assigned a drive letter by default, but drive letters can be changed. There are several reasons why you might need to change drive letters in a Windows Server environment:
- Avoiding Conflicts: Drive letter conflicts can occur, especially when new drives are added to the system, causing existing drives to be reassigned.
- Organizational Preferences: Administrators may prefer certain drives to have specific letters for ease of identification and consistency across servers.
- Application Requirements: Some applications might require a specific drive letter to function correctly.
- Replacing Drives: When replacing or upgrading drives, maintaining the same drive letter can avoid the need to reconfigure applications.
How to Change Drive Letter in Windows Server
There are several ways to change drive letter in Windows Server. In the following content, I will show you how to change drive letter in Windows Server in 4 ways.
Method 1: Use Disk Management
Disk Management is a graphical tool that provides a user-friendly interface for managing disks and volumes. Here’s how to change drive letters using Disk Management:
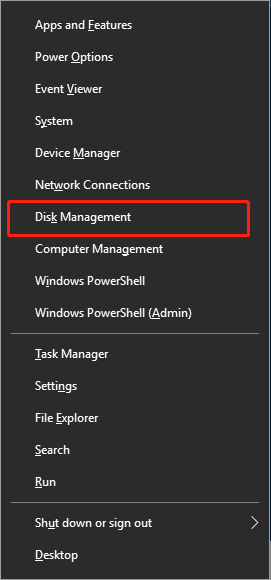
Step 1: Right-click on the Start button or press Windows + X and select Disk Management from the menu.
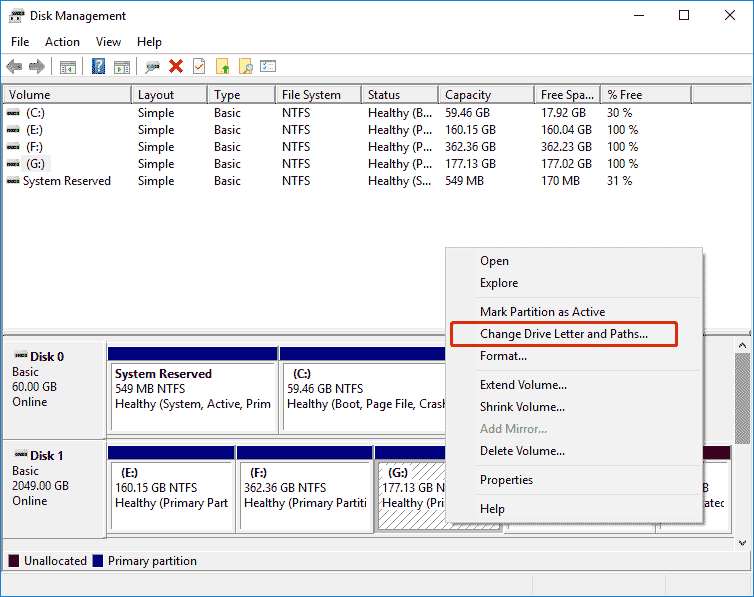
Step 2: In the Disk Management window, locate the drive you wish to change. Right-click on the drive and select Change Drive Letter and Paths.
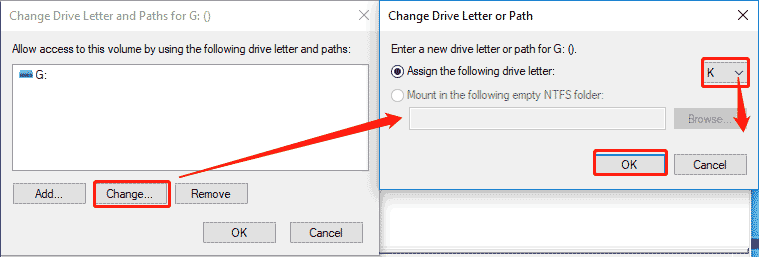
Step 3: In the dialog box that appears, click Change. Select a new drive letter from the dropdown menu and click OK.
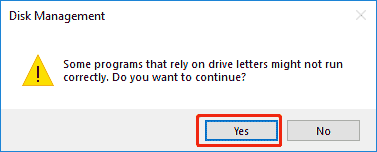
Step 4: A warning message may appear, indicating that some applications may not run correctly after the drive letter is changed. Click Yes to confirm.
Step 5: Check that the drive letter has been updated and that the drive is accessible with the new letter.
Method 2: Use DiskPart
DiskPart is a command-line tool in Windows system that allows you to manage your disks and partitions. For administrators who prefer command-line tools, DiskPart provides a straightforward method to change drive letters.
Step 1: Press Windows + R, type diskpart, and press Enter to open the DiskPart tool.
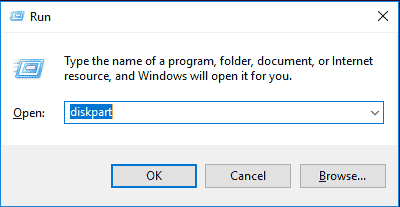
Step 2: Next, you can type the command lines below to change drive letter in Windows Server. Remember to press Enter after typing each command line.
- list disk (this command will list all available drives detected by the computer)
- select disk 1 (replace 1 with the exact disk number)
- list partition (this command will list all partitions on the selected disk)
- select partition X (replace X with the exact volume number of the target partition)
- assign letter=* (replace * with the preferred drive letter like P)
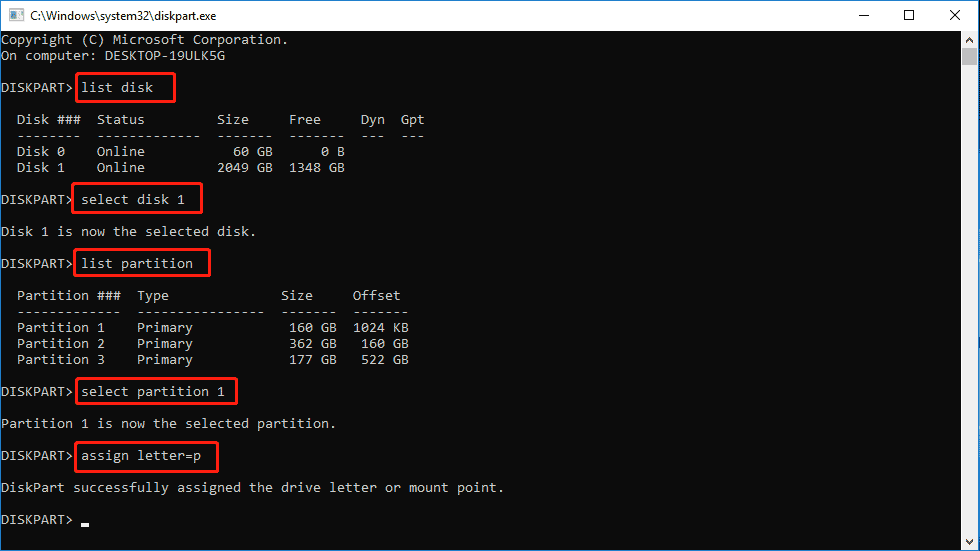
After you change or assign a drive letter for a drive or device, Windows will display the same letter automatically next time you reconnect the device to your computer.
Method 3: Use PowerShell
PowerShell provides a powerful and flexible way to manage system configurations, including changing drive letters.
Step 1: Right-click the Start button and select Windows PowerShell (Admin).
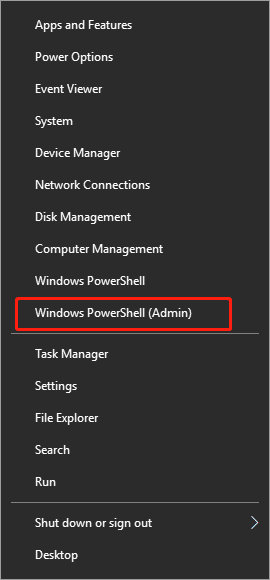
Step 2: Type get-disk command and press Enter to list all available drives that the computer detected. Then, use the following command to select and change the drive letter:
- Get-Partition -Disknumber 1 | Set-Partition -NewDriveLetter P (Replace 1 with the current drive letter and P with the new drive letter).

Method 4: Use MiniTool Partition Wizard
Instead of using CMD or Disk Management to change drive letter for a drive in Windows Server, you can also utilize third-party disk partition manager – MiniTool Partition Wizard to easily change drive letter and manage disk partitions on Windows Server.
With its various powerful features, you can recover hard drive data, clone hard drive, format FAT32, migrate OS, and do many more. Here’s how to use the MiniTool Partition Wizard to change drive letter in Windows Server:
MiniTool Partition Wizard DemoClick to Download100%Clean & Safe
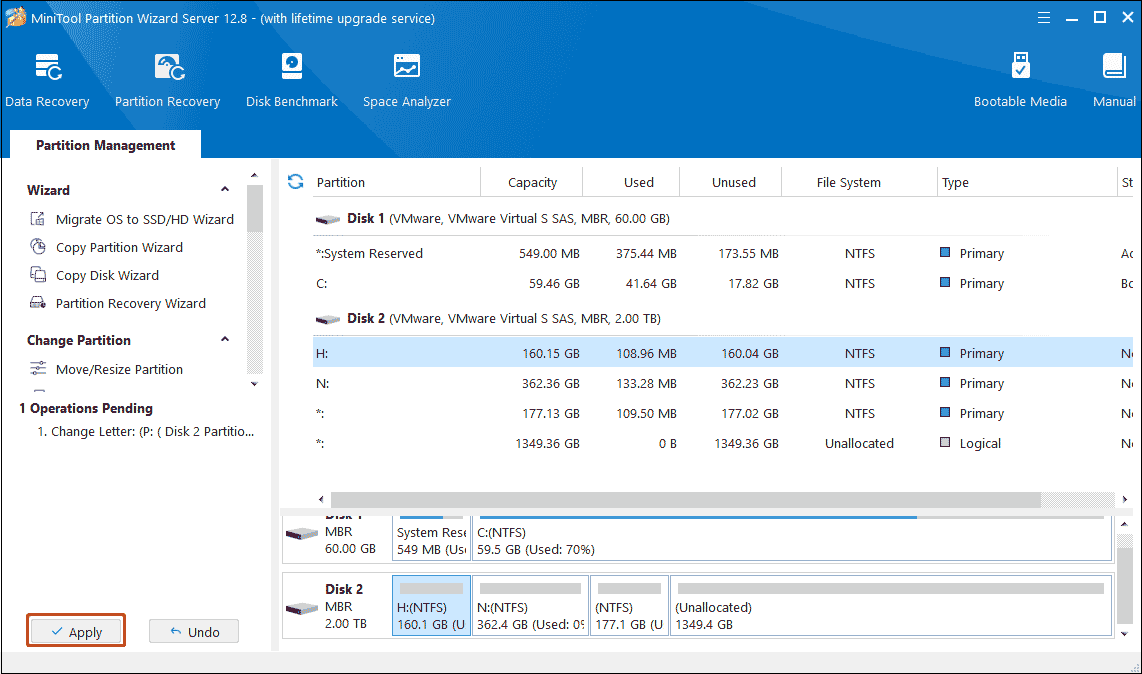
Step 1: Launch MiniTool Partition Wizard to enter its main interface, click the partition where you need to change drive letter, and click Change Drive Letter from the left action panel.
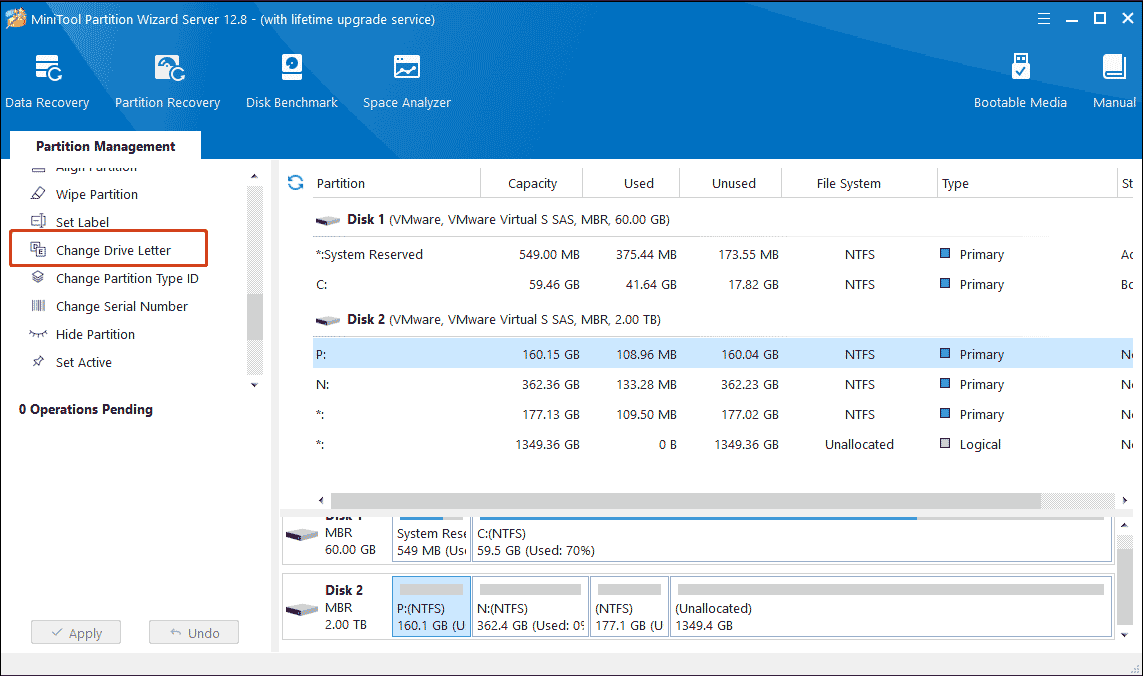
Step 2: In the pop-up window, select a letter and click OK.
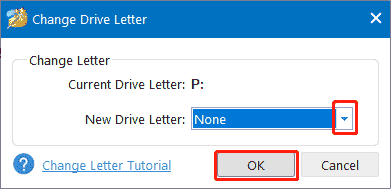
Step 3: When you go back to the main interface, click Apply to execute the pending changes.
By using Disk Management, Command Prompt, PowerShell, and third-party software, administrators can easily manage drive letters to avoid conflicts, meet application requirements, and adhere to organizational preferences.
Bottom Line
Changing drive letters in Windows Server is a critical task that can help maintain an organized and efficient storage system. This post introduces several effective methods to help you change the drive letter in Windows Server. In addition, if you have any problems when using MiniTool Partition Wizard, you can always contact us via the email [email protected]. Thanks in advance.

![Diskpart Unassign Drive Letter in Windows 11/10 [Full Guide]](https://images.minitool.com/partitionwizard.com/images/uploads/2023/06/diskpart-unassign-letter-1.png)
![[Resolved] Change Drive Letter and Paths Greyed Out Windows 10](https://images.minitool.com/partitionwizard.com/images/uploads/2021/07/change-drive-letter-and-paths-greyed-out-thumbnail.jpg)
User Comments :