Are you using WD My Cloud to store your data? What can you do if you can’t access WD My Cloud from your computer? Don’t worry. In this post developed by MiniTool Partition Wizard, you will learn about 4 methods to fix the issue.
Nowadays, cloud storage services are increasingly popular among users. By saving their important files in a reliable cloud storage service, users can free up disk space and access these files anywhere after signing into the account of the service.
WD My Cloud is one of those services and is used by a large mount of users. However, some users report recently that they can’t access WD My Cloud in their computer. It could be a quite frustrating problem, as they are unable to access the stored data.
If you are facing the WD My Cloud not working issue, don’t panic. Here are some methods that may help you out of trouble. How do I access My Cloud? Just work your way down the list.
Fix 1: Add Wd My Cloud to The List of Credentials
In most cases, you can’t access WD My Cloud account on your computer because your Windows doesn’t allow you to do so. To resolve the problem, you can add your account to the list of credentials. Here’s how to do that in Windows 10:
Step 1: Press Windows + S, input control panel and click the best match search result to open it.
Step 2: Navigate to User Account > Credential Manager.
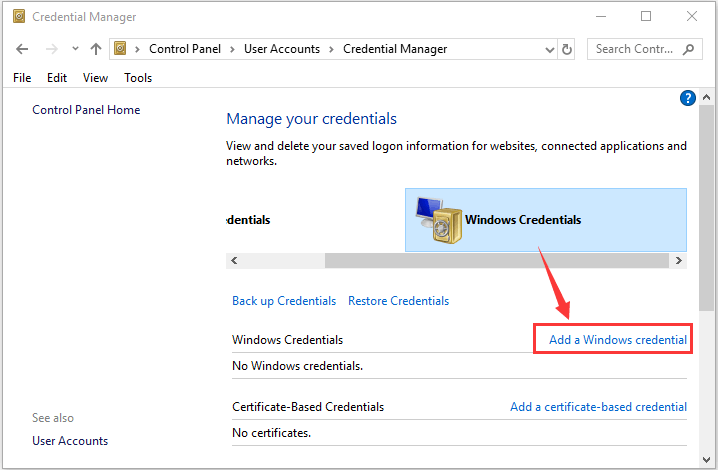
Step 3: Choose Windows Credentials and then click Add a Windows credential.
Step 4: Type the name of your WD My Cloud device in the Internet or network address bar. Enter the username and password of your account, and click OK to save the new credential.
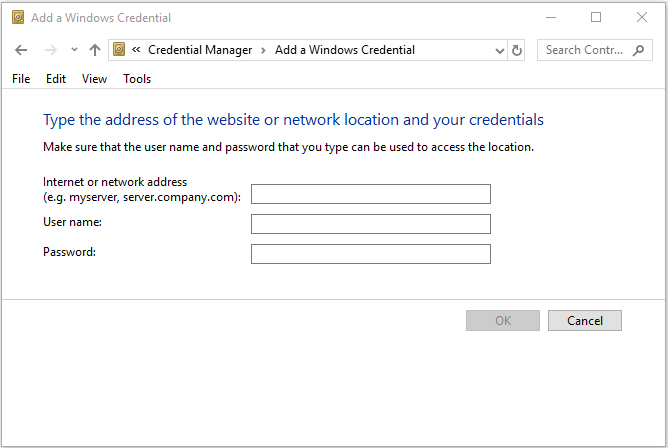
Once it’s done, close the Control Panel, restart your computer, and check if you can access your WD My Cloud account now.
Fix 2: Modify Your Windows Registry
Alternatively, you can also modify your registry to gain the access to your WD My Cloud account in Windows 10.
Step 1: Press Windows + R to invoke Run window. Type regedit and click OK to open Registry Editor.
Step 2: Go to the following path: ComputerHKEY_LOCAL_MACHINESYSTEMCurrentControlSetServicesLanmanWorkstation
Step 3: Select LanmanWorkstation key, right-click any empty space in the right pane and choose New > DWORD (32-bit) value.
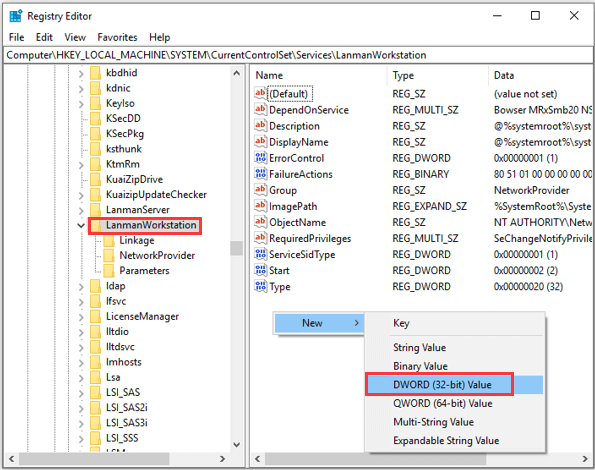
Step 4: Name the new DWORD as AllowInsecureGuestAuth and the double-click it to open it. Set its value data to 1 and click OK button to save changes.
After that, restart your computer and try accessing your WD My Cloud account again.
Fix 3: Change Network Settings
Some users have fixed the issue effectively by changing their network settings. You can follow the steps below to have a try.
Step 1: Right-click the network icon at the right corner of Taskbar and choose Open Network & Internet settings.
Step 2: In the pop-up window, click Change adapter options.
Step 3: Right-click the network adapter you are currently using and choose Properties.
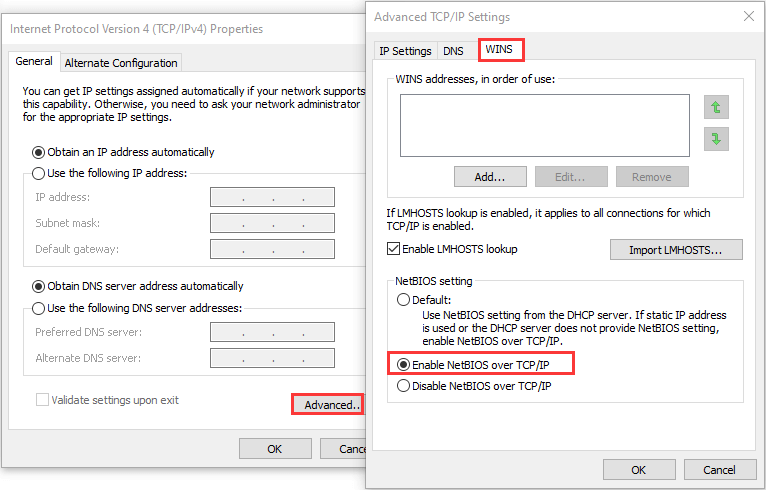
Step 4: Choose Internet Protocol Version 4 (TCP/IPv4) and click Properties.
Step 5: Click Advanced button to open Advaned TCP/IP Settings. Switch to the WINS tab, check Enable NetBIOS over TCP/IP option and click OK to save the changes.
Fix 4: Reset Your Network
Finally, if WD My Cloud not working issue still exists after trying the above methods, then you can try resetting your network. It is also an easy operation, and here’s a simple guide.
Step 1: Press Windows + I to open Settings.
Step 2: Go to Network & Internet > Status.
Step 3: Scroll down to click Network reset.
Step 4: In the new interface, click Reset now button.
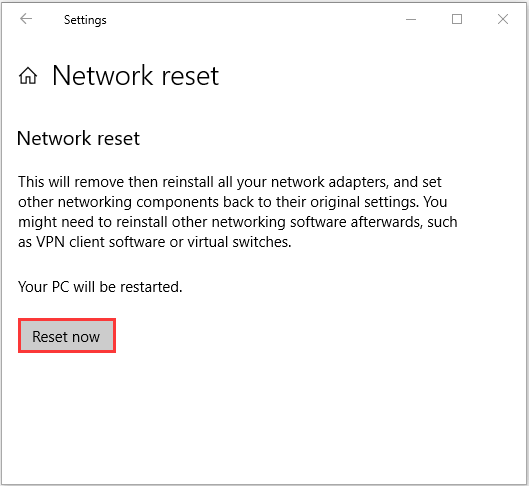
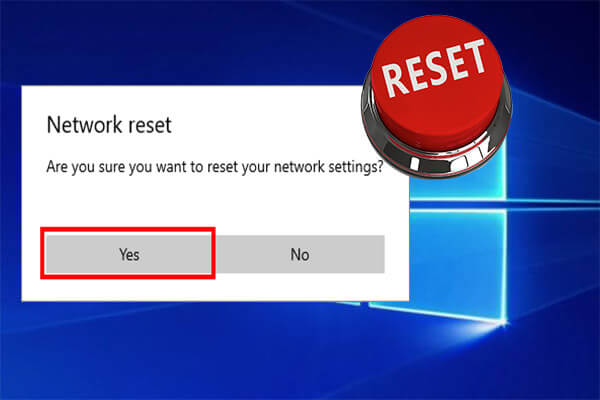
Then, your computer will reset all your network adapters and set related components back to the original settings, and restart automatically. After that, you should be able to access WD My Cloud without problems.


User Comments :