Do you want to download or update CanoScan drivers? Now, you come to the right place. This post of MiniTool will guide you through detailed steps to download CanoScan driver for a Windows 11/10/7 PC.
Why You Need CanoScan Drivers
To make the Canon Scanner keep a good working condition and obtain the best experience possible, you can try downloading or updating the CanoScan drivers. In addition, if you encounter some issues like scanner not working and no scanners were detected, you can fix them by updating or reinstalling the scanner driver software.
The software Scanner Canon now can work with Windows 11 and Windows 10/8.1/7 (32 bit and 64-bit) operating systems. Bear in mind that if you upgraded OS with the Cannon Scanner driver remaining installed, you may not scan by pressing the SCAN button on the product. In this case, you need to re-download CanoScan driver.
CanoScan Drivers Download or Update for Windows 11/10/7
There are 2 simple ways for you to get the Canon Scanner driver download. Let’s start trying.
# 1. Download CanoScan Driver Manually
The first way is to manually download CanoScan drivers from the Cannon support center. Before you start downloading the driver, make sure you have known your Canon Scanner model and your operating system (whether it is Windows 10, Windows 8.1, or Windows 7, and also running 32 bit or 64 bit). Once confirmed, you can follow the installation guide below:
Step 1. Click here to open the Canon Software & Drivers download center.
Step 2. Type your scanner model in the search bar and select your desired software Scanner Canon from the list. Here we take CanoScan LiDE 300 for example.
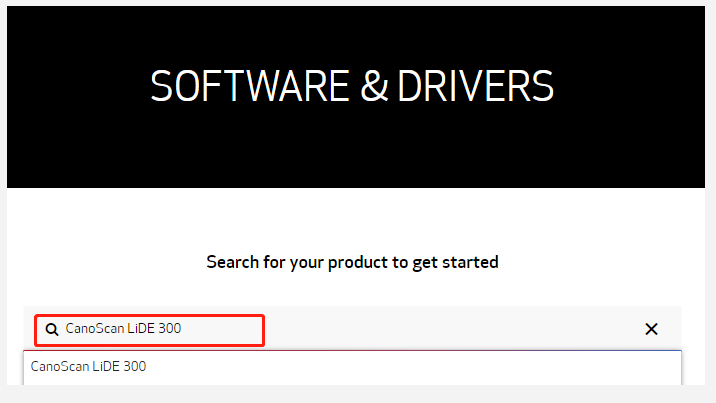
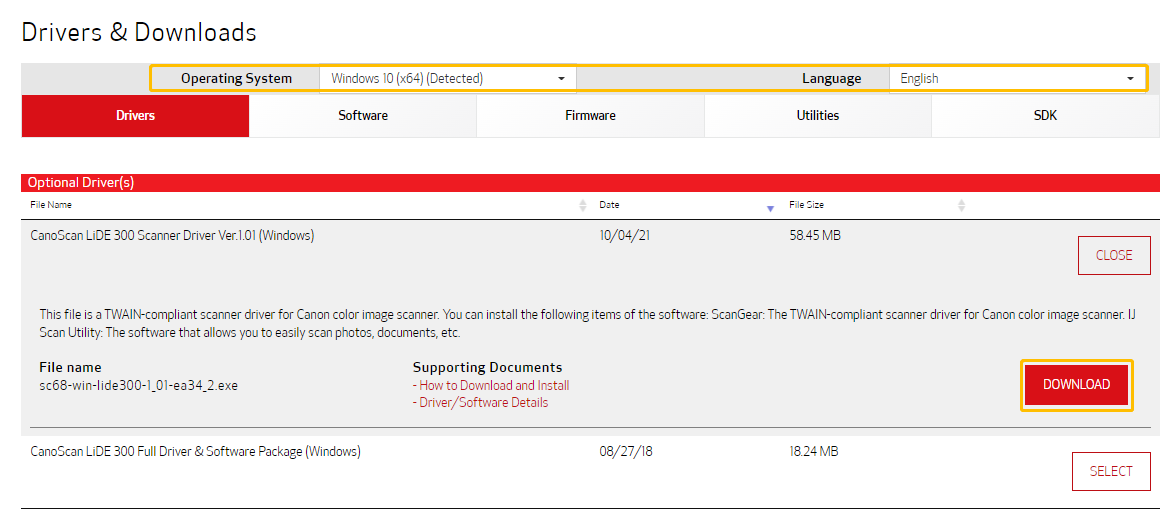
Step 3. On the result page, scroll down to the Drivers & Downloads section, and then select your Operating System and Language from the drop-down menu, and select Drivers.
Step 4. Now, you should see a list of optional drivers related to the CanoScan LiDE 300. Select the CanoScan utility download you want and click on Download. Then select a location to save the downloaded file.
Step 5. Once downloaded, double click the downloaded .exe file to decompress it, and then the installation setup will start automatically. Click on Next and follow the on-screen instructions to complete the installation.
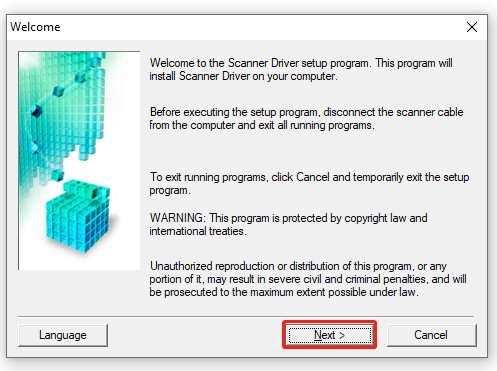
Right now, you should install the Cannon Scanner driver successfully.
# 2. Update CanoScan Drivers Automatically via Device Manager
If you are still troubled by various scanner issues, you can try updating or reinstalling the Canon Scanner drivers via Device Manager. To do so, follow the steps below:
Step 1. Make sure that you connect your Canon scanner to your Windows computer.
Step 2. Press Windows + R keys to open the Run dialog box, and then type devmgmt.msc in it and hit Enter.
Step 3. In the Device Manager window, expand the Print queues or Printers category, and then right-click the Conon Scanner driver (or it may show as Unknow device) and select Update driver.
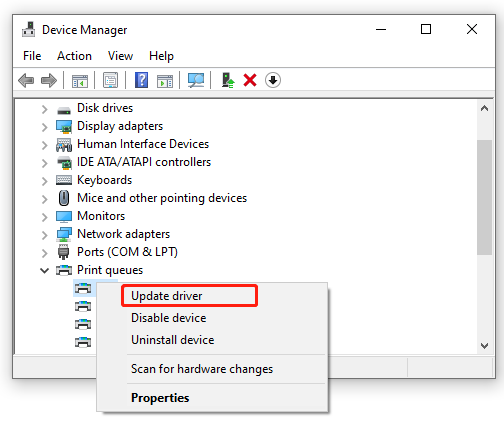
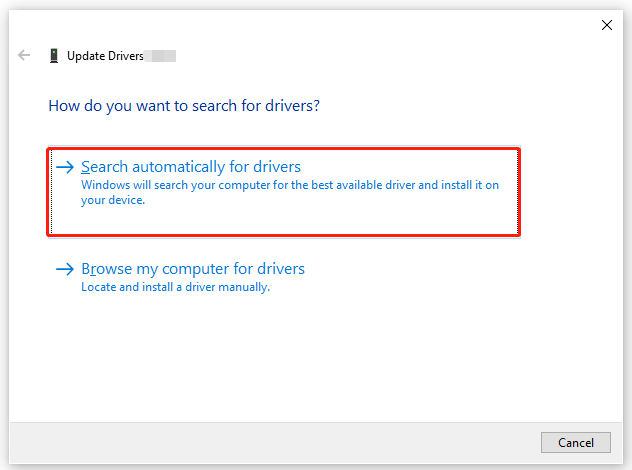
Step 4. Select the Search automatically for drivers and Windows will detect the updated driver for you automatically. If any available updated drivers are detected, you can follow the on-screen prompts to finish the installation.
Once updated, you can restart your computer and check if the scanner issue gets fixed. If it still occurs, you can try reinstalling the device driver by selecting Uninstall device in Step 3.


![Notepad++ Hex Editor Download and Install (x86) [Full Guide]](https://images.minitool.com/partitionwizard.com/images/uploads/2021/11/notepad-hex-editor-download-install-thumbnail.jpg)
User Comments :