It’s quite annoying when you fail to connect to the internet. Sometimes this problem occurs due to Broadcom 802.11n Network Adapter not working. In this post, MiniTool offers some solutions to it.
Some Broadcom 802.11n Network Adapter users report that they have trouble in connecting to the internet. When they check the properties of this adapter, they find that the device status shows “This device cannot start. (Code 10)”.
If you’re one of them. You can try the following fixes to solve the problem.
Solution 1: Run Network Adapter Troubleshooter
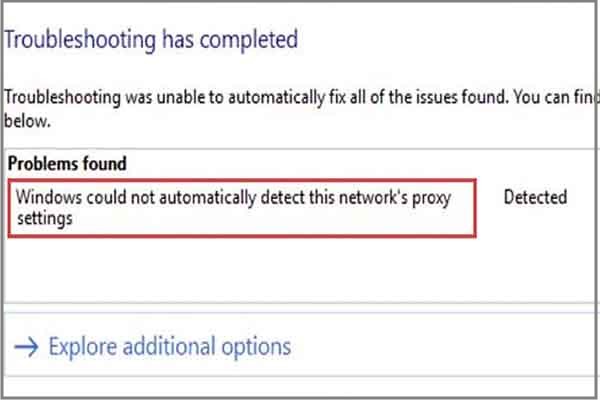
A simple way to solve Broadcom 802.11n Network Adapter not working is to run Network Adapter troubleshooter, a built-in collection to troubleshoot some common problems. It is easy to operate. Just follow the steps below.
Step 1: Press Win + R to invoke Run window. Then input control panel and press Enter to access Control Panel.
Step 2: Select View by: Large icons from the upper right corner in the window. Then click Troubleshooting.
Step 3: In the left side, click View all. Then Windows will list all the troubleshooters available on the PC. You need to click Network Adapter from the list.
Step 4: In the pop-up window, click Advanced to view more options. Then click Run as administrator and check Apply repairs automatically.
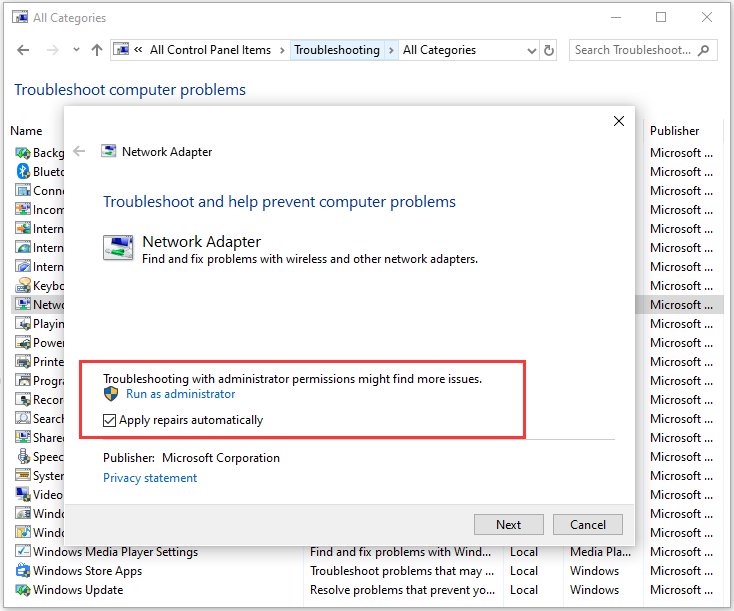
Step 5: Click Next and follow the onscreen instructions to finish the operation.
Then you can restart your computer and check if the problem has been solved.
Solution 2: Update Your Network Adapter Driver
Corrupted or outdated device driver could be a reason for Broadcom 802.11n Network Adapter not working. You can fix the issue by updating your Broadcom 802.11n Network Adapter driver on Windows 10.
Here is how to do it.
Step 1: Right-click Start and choose Device Manager.
Step 2: In the pop-up window, double-click Network adapters to extend it.
Step 3: Right-click your Broadcom 802.11n Network Adapter driver and select Update driver.
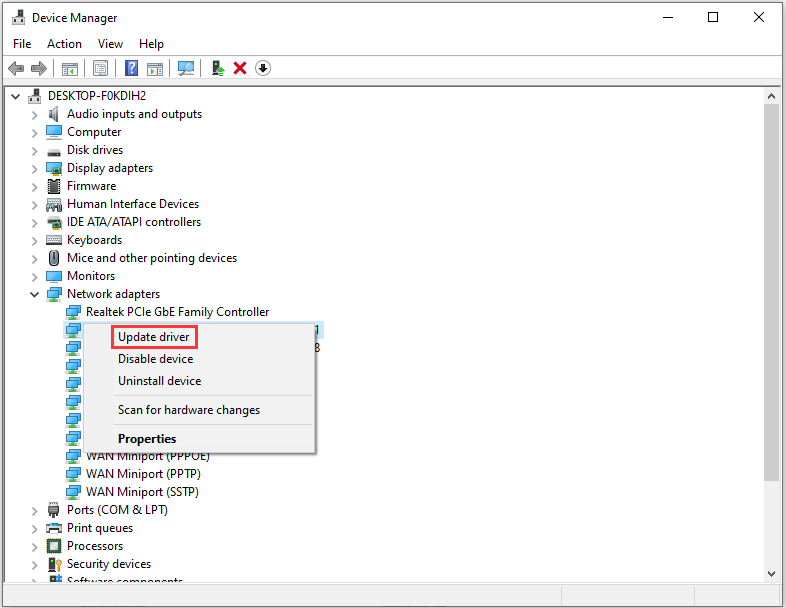
Step 4: Select Search automatically for updated driver software. Then Windows will search for the latest software for your Broadcom 802.11n Network Adapter driver automatically.
Step 5: Follow the instructions to complete the process. Then restart your computer and check if the problem disappears.
If you’re still bothered by the same problem, you may need to try the next solution.
Solution 3: Fix Corrupted Registry entries
Broadcom 802.11n Network Adapter not working error could also be caused by corrupted registry entries. To solve the problem, you need to use Registry Editor, a built-in tool in Windows 10.
Step 1: Open Run window and input regedit. Then press Enter to access Registry Editor.
Step 2: Copy the following path and paste it to the address bar:
HKEY_LOCAL_MACHINESYSTEMCurrentControlSetControlClass4D36E978-E325-11CE-BFC1-08002BE10318
Step 3: In the right pane, right-click the key UpperFilters and select Delete. Then delete LowerFilters with the same method.
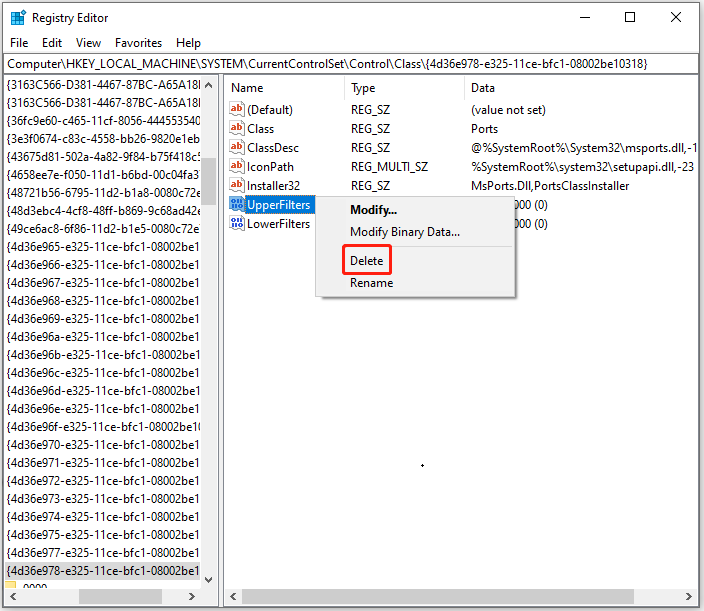
Then you can exit Registry Editor and restart the computer to check if the issue still exists.
If you have tried all the solutions above but you’re stilled bothered by Broadcom 802.11n Network Adapter not working, you can try restoring your computer to earlier data with a system restore point.

User Comments :