Sometimes, you might unable to play games on secure servers because an issue with your computer is blocking the VAC system. How to fix the issue? Here in this article, MiniTool Partition Wizard displays several feasible solutions and hope you can get rid of the issue effectively with them.
“An issue with your computer is blocking the VAC system” is an error message that might appear when you are playing certain games, and it is often reported by Steam users.
VAC refers to Valve Anti-Cheat. Commonly, you will receive the error message if you use a cheat while playing a game that uses the VAC engine, like DOTA 2 and Counter-Strike: Global Offensive. You will be prompt that you cannot play on secure servers.
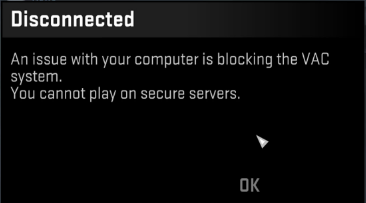
Actually, even if you don’t use a cheat during gaming play, you could also come across the problem due to other factors, including software confliction, corrupted game files, and etc. Luckily, here are some feasible methods that may help you get out of the trouble. If you’re sure that you’re not cheating, then you can work your way down the list to resolve the issue.
Fix 1: Remove Software Confliction
According to the Steam support, there are some software that might interfere with the Steam client or the games and lead to the “disconnected by VAC” issue. Some involved items are listed below:
- CCleaner
- Powershell
- Sandboxie
- Cheat Engine
- IObit Start Menu 8
- Process Hacker
- DLL Injectors
- Hypervisors
- Steam Idlers
If you are using any of these programs, please disable it when you are playing games. If this doesn’t help, you can move on to the next solution.
Fix 2: Verify the Integrity of Game Files
If you encounter the “disconnected by VAC” issue in a specific game, perhaps some important installation files of the game are missing or corrupted. In this case, you can verify the integrity of the game files in Steam.
Step 1: Open your Steam and click LIBRARY tab.
Step 2: Among the list of installed games, right-click the problematic game and choose Properties.
Step 3: Click LOCAL FILES tab and hit VERIFY INTEGRITY OF GAME FILES option.
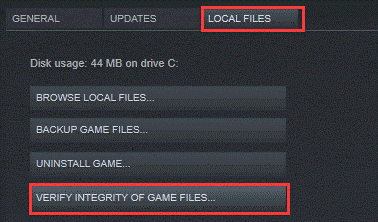
After the process is completed, restart the game and check if “an issue with your computer is blocking the VAC system” error message disappears.
Fix 3: Add the Steam Folder to the Exception List of Your Antivirus
It is possible that your antivirus mistakenly regards your Steam or game as a negative application. To protect your system, the antivirus might disturb the operations of them and thus trigger the “disconnected by VAC: you cannot play on secure servers” issue.
To resolve the problem, you just need to add your Steam or game folder to the exception list of your antivirus. Here’s how to do that in Windows Defender Antivirus:
Step 1: Press Windows + I to open Settings and then go to Update & Security > Windows Security.
Step 2: Click Virus & threat protection to open Windows Security window. Then, click Manage settings under Virus & threat protection settings section.
Step 3: Click Add or remove exclusions under Exclusions section. Hit Add an exclusion and choose Folder from the drop-down list.
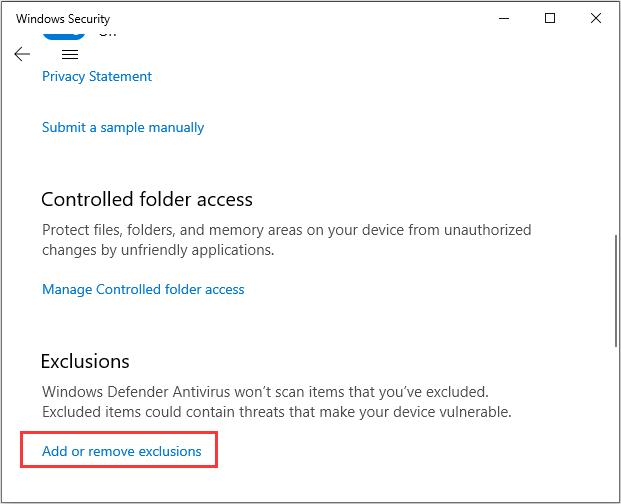
Step 4: Find and choose your Steam folder (or game folder), and click Select Folder button to add it to the exclusion list
Fix 4: Update Network Adapter Driver
In some cases, this problem is related to the network adapter driver. To get rid of the issue, you can try updating your network adapter driver. If you don’t know how to do that, here’s a simple guide for you.
Step 1: Right-click the Start button and choose Device Manager.
Step 2: Expand Network adapters category, right-click the current network adapter driver, and choose Update driver.
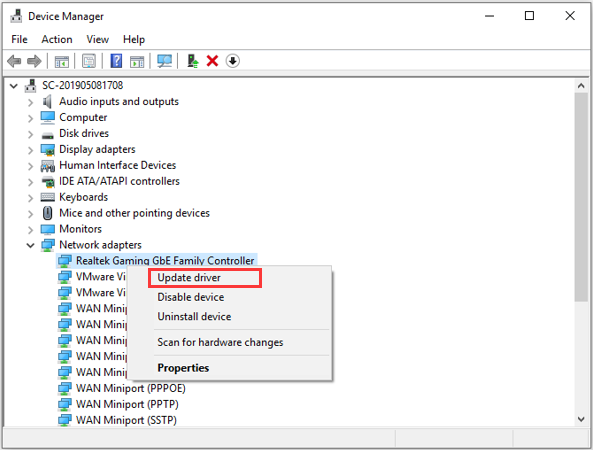
Step 3: Click Search automatically for updated driver software option and follow the onscreen instruction to complete the process.
Once it’s done, restart your computer and launch the game again. Now, you should be able to play the game without the “disconnected by VAC” issue.
Fix 5: Activate Data Execution Prevention (optional)
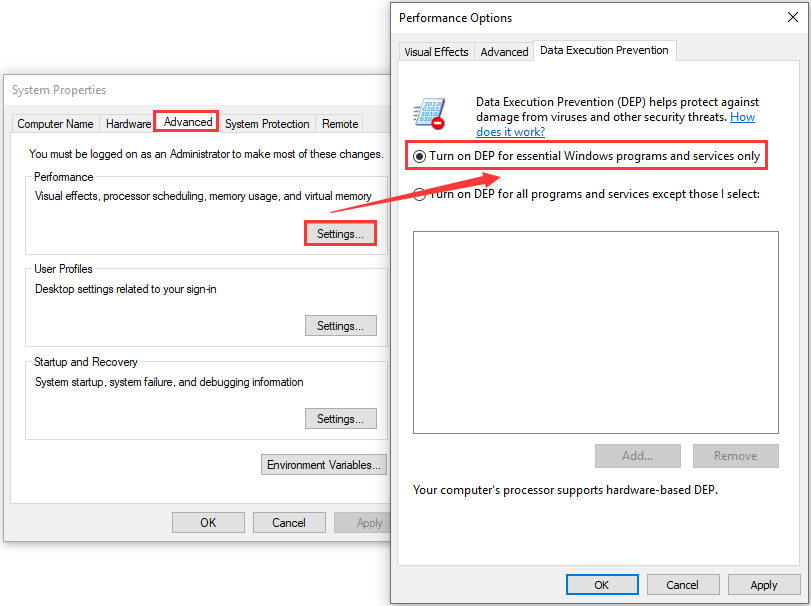
If your motherboard support Data Execution Prevention (DEP), activating the feature on your computer might resolve the problem effectively. Just follow the steps below:
Step 1: Right-click This PC icon and choose Properties.
Step 2: Click Advanced system settings.
Step 3: Under the Advanced tab, click Settings button in Performance section.
Step 4: In the new window, switch to the Data Execution Prevention tab and check the Turn on DEP for essential Windows programs and services only option. Click Apply to save changes.

User Comments :