Windows 11 is the latest Windows operating system released several months ago. Compared with Windows 10, it has many changed or new features. For example, the Windows 11 taskbar changes obviously. Its alignment is changed to the center by default, while that of Windows 10 is set to the left. And there is much space on the Windows 11 taskbar that is not in use.
What can you do to make full use of your taskbar space? It is no doubt that you can pin the shortcuts of some apps that you use frequently to the taskbar. In addition, you can add performance stats to Windows 11 taskbar as well. By doing this, your Windows will display performance stats on the taskbar so that you can check it whenever you want. The following are the performance metrics that will be shown:
- CPU Usage of the Computer
- GPU Usage on the Computer
- RAM Usage on the Computer
- VRAM Usage on the Computer
To add performance stats to Windows 11 taskbar, follow the tutorial below.
Add Performance Stats to Windows 11 Taskbar with Xbox Game Bar
You can add performance stats to Windows 11 taskbar by using Xbox Game Bar.
Xbox Game Bar is an official built-in tool in your Windows 11. It can help you to capture video, broadcast your gameplay online, take screenshots, and quickly access the Xbox app. What’s more, the performance widget provided by Xbox Game Bar allows you to see the performance stats of your computer which mainly includes the utilization of the processor, memory, GPU, RAM, VRAM, and FPS.
It is convenient to view performance information if you get performance stats on the taskbar in Windows 11. To achieve it, there are three stages in total that you should follow.
Stage 1: Enable Xbox Game Bar
Step 1: Make sure you have installed Xbox Game Bar on your computer. If not, you should download it from Microsoft Store.
Step 2: Press Windows + I to directly go to Settings.
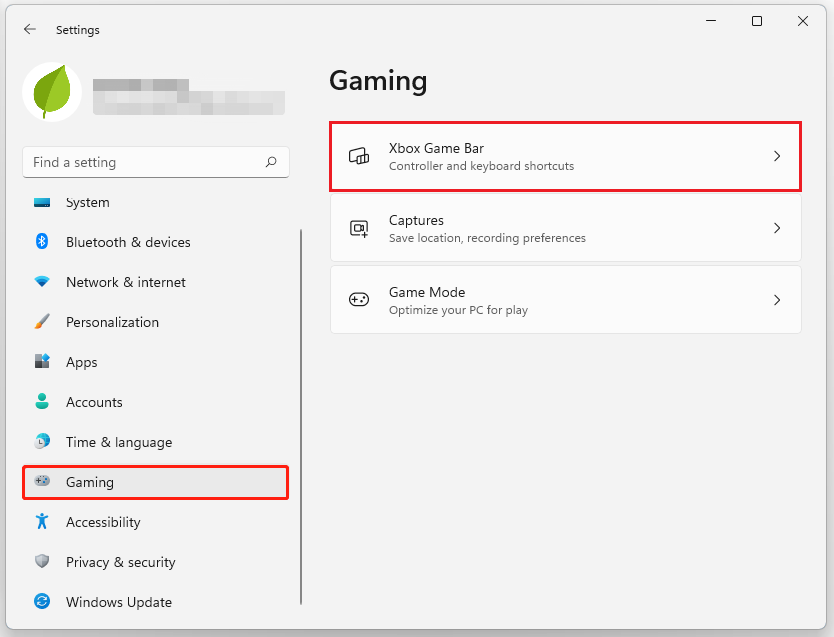
Step 3: In the Settings window, select the Gaming option. Then click Xbox Game Bar from the right panel.
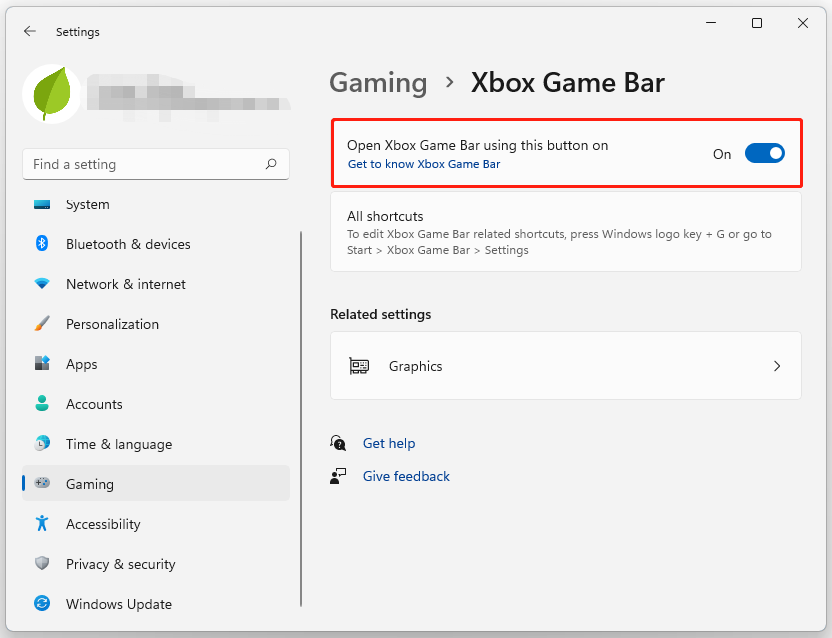
Step 4: Enable the Open Xbox Game Bar using this button on the controller option.
Step 5: Once the operation has been done, close the Settings window.
Stage 2: Change Performance Options
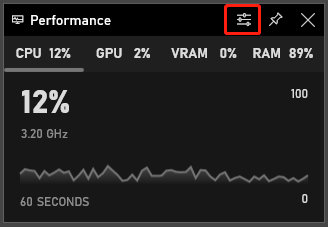
Step 1: Press Windows + G on your keyboard to open the Xbox Game Bar. Usually, the Performance widget will be shown by default on the left side of your screen. If not, you can click the Performance icon on the top to open it.

Step 2: Click Performance options on the top toolbar of the Performance widget.
Step 3: In the Performance options, select Bottom under the GRAPH POSITION section.
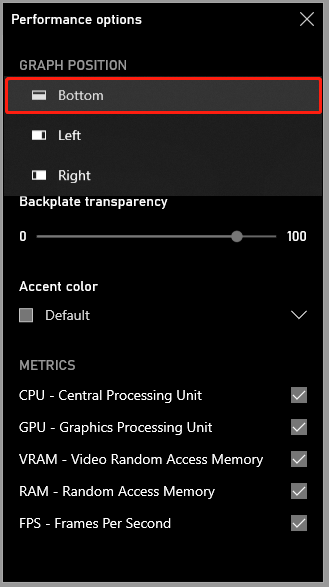
Step 4: Enable the checkbox for the Override default transparency option and then drag the slider to 100% below the Backplate transparency option.
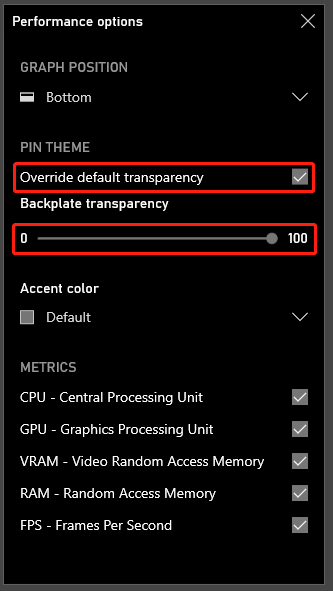
Step 5: Choose the metrics you want to see in the Performance widget from the METRICS setting. Then, close this window.
Stage 3: Pin Performance Information to Taskbar
Step 1: Move your cursor to the bottom right corner of the Performance widget and you will see the Collapse Chart icon. Click it to get a briefer window.
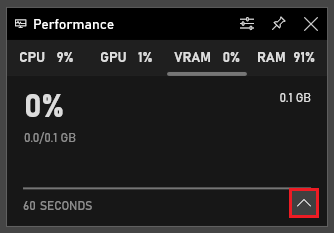
Step 2: Drag the Performance widget to the empty space of your taskbar.
Step 3: Once the position is sure, click the Pin icon.

After the whole operation, you add performance stats to Windows 11 taskbar successfully. As a result, your Windows will display performance stats on the taskbar for you.
This article provides a simple way to add performance stats to Windows 11 taskbar. You don’t need to use any third-party software. If you want to check performance data whenever you like, you can use this way to get performance stats on the taskbar in Windows 11 easily.
If you have any other questions about this topic, you can leave them in our comment part below.

User Comments :