How to add or remove Copy To folder and Move To folder context menu in Windows 11? If you are also trying to find a guide, you come to the right place. In this post, MiniTool provides you with a step-by-step guide with clear screenshots.
Windows 11 is a fully new operating system compared with other Windows operating systems. This version brings many new features and changes. One of the biggest changes is the Windows 11 context menu. When right-clicking an item in File Explorer Windows 11, you will find a modern condensed context menu with Show more options. It may be inconvenient and time-consuming for those who want to find their desired options quickly. So, many people want to get full context menu in Windows 11. In addition, users can add the “Copy To folder” and “Move To folder” context menu that the files or folders can be copied and moved immediately after selecting.
How to add or remove Copy To folder/Move To folder in Windows 11? This tutorial will show you detailed steps and provide clear screenshots.
How to Add or Remove “Copy To folder” and “Move To folder” Context Menu in Windows 11
Before you start the following steps, you need to make sure that you signed the system as an administrator. Once signed in, you can add or remove Copy To folder and Move To folder context menu in Windows 11.
Method 1. Use the “Copy To folder” and “Move To folder” REG File
To add or remove Copy To folder and Move To folder context menu in Windows 11 directly, you can use a REG file to set it. Here’s how to do that:
Step 1. Click here to download the Add_Copy-Move_To_Folder_to_context_menu.reg file and save it on your desktop.
Step 2. Double click the downloaded .reg file to open it and click on Yes or Run in the confirmation window to execute the operation.
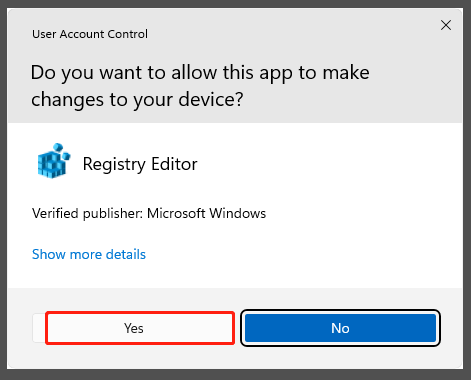
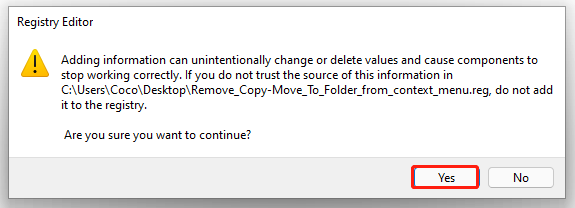
Step 3. Now, you will receive a warning message whether you want to continue. If you are sure, click on Yes.
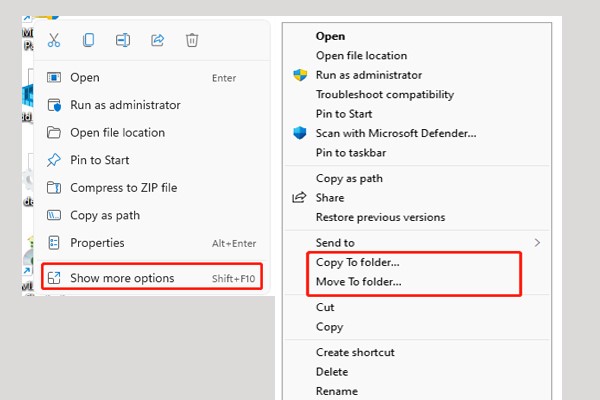
Step 4. To use the Copy To folder and Move To folder context menu, you can right-click the file that you want to copy or move and select Show more options. Then select your desired option in the full context menus.
Of course, you can delete the downloaded .reg file if you like.
Method 2. Use Registry Editor
Another method to add or remove Copy To folder and Move To folder in Windows 11 is to manually change some value keys in Registry Editor. To do so, follow the steps below carefully.
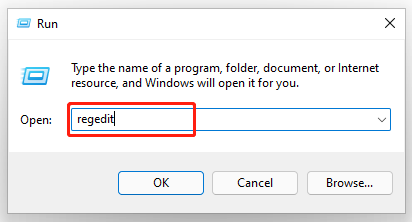
Step 1. Press Win + R keys to open the Run dialog box, and then type regedit in it and hit Enter. Click on Yes in the pop-up UAC window to confirm the operation.
Step 2. In the Registry Editor window, locate the following path via the left navigation bar.
HKEY_CLASSES_ROOTAllFilesystemObjectsshellexContextMenuHandlers
Step 3. Right-click the ContextMenuHandlers folder and select New > Key to create a new folder. Then name the folder Move To folder.
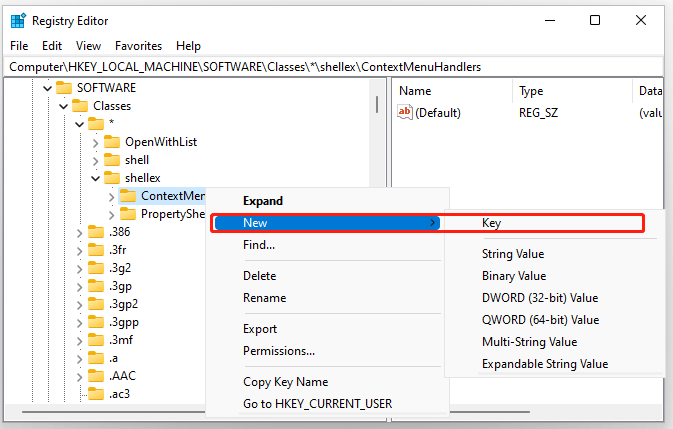
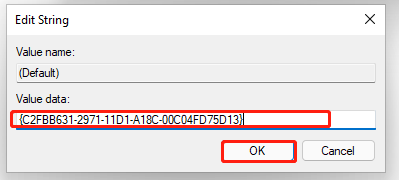
Step 4. With the Move To folder key selected, double click the Default string from the right hand and enter the following key to the Value data box and click on OK. After that, you will see the Move To folder option in the full context menus.
{C2FBB631-2971-11D1-A18C-00C04FD75D13}
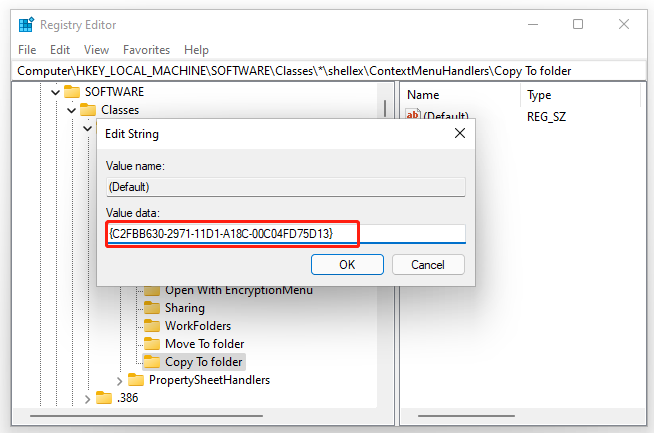
Step 5. In the same location as Step 3, right-click the ContextMenuHandlers folder again and select New > Key to create a new folder. Then name it Copy To folder.
Step 6. With the Copy To folder key selected, double click the Default string from the right hand and enter the following key to the Value data box and click on OK. If you don’t want to use the option in the future, you can delete the Copy To folder key in the same location.
{C2FBB630-2971-11D1-A18C-00C04FD75D13}
How to add or remove Copy To folder and Move To folder in Windows 11? The 2 ways have been illustrated. Now, it’s your turn to have a try.

![How to Map a Network Drive in Windows 11? [Step-by-Step Guide]](https://images.minitool.com/partitionwizard.com/images/uploads/2021/10/how-to-map-a-network-drive-in-windows-11-thumbnail.jpg)
User Comments :