Sometimes, you might fail to open a specific website and receive error message “Access Denied. You don’t have permission to access on this server”. It can be fixed easily. You just need to follow the solutions provided by MiniTool in this post.
Some users report that they are stopped to visit a specific website by access denied on this server error. The full error message says “Access Denied. You don’t have permission to access on this server” with the URL which you cannot access and followed by a reference number.
This access denied website issue is most likely caused by certain network-related issue in your browser, and it commonly occurs in Mozilla Firefox browser. If you are using Firefox browser and encounter this problem unfortunately, you can try the given methods below to fix it.
Let’s see the details about these solutions.
Fix 1: Clear Everything About the Website
If a website detects that there is something wrong with the related browser cookies, it might block you and give the access denied on this server error. So, you can try clearing everything about the website at first.
To clear website data in Firefox browser, just follow the steps below:
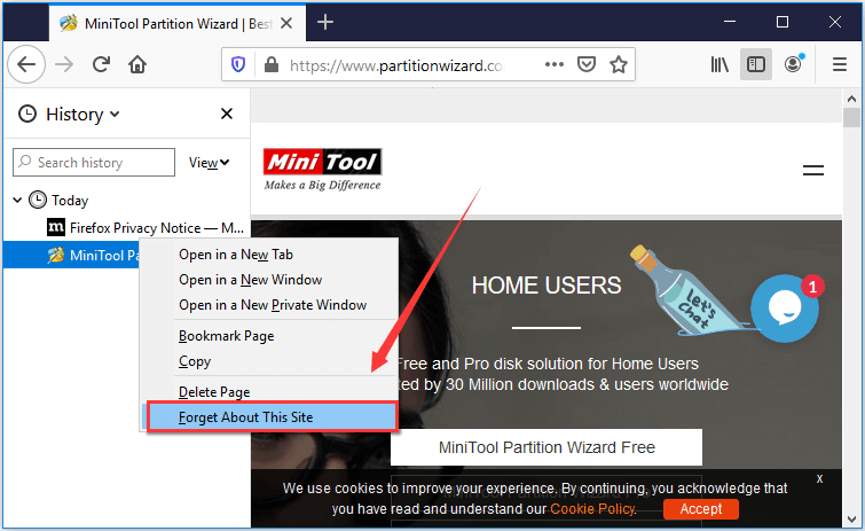
Step 1: Open your browser and press Ctrl + H to open the browsing history.
Step 2: In the list of browser history, find and right-click the problematic website.
Step 3: Choose Forget About This Site from the drop-down menu.

Fix 2: Turn Off VPN or Uninstall VPN Service
The VPN you are using currently might also lead to access denied website issue. Therefore, you can try disabling your VPN to fix it. If you are using a VPN software, you just need to exit or log off from your account; if you are using the VPN built in your Windows, just turn it off by choosing it in your network list and clicking Disconnect button.
You might want to uninstall the VPN service if disabling it has fixed access denied on this server issue. To do that, you can follow the given instructions below.
Step 1: Press Windows + R to open Run dialog.
Step 2: Type appwiz.cpl and press Enter to go to Programs and Features page in Control Panel.
Step 3: Select the VPN service you are using and click Uninstall to remove it.
Once it’s done, restart your computer. If you want to continue using this VPN service, you can go to its official website to download the latest version.
Fix 3: Configure Proxy Settings
If you don’t use VPN or above methods fail to fix the issue for you, you might need to configure your proxy settings in Firefox browser.
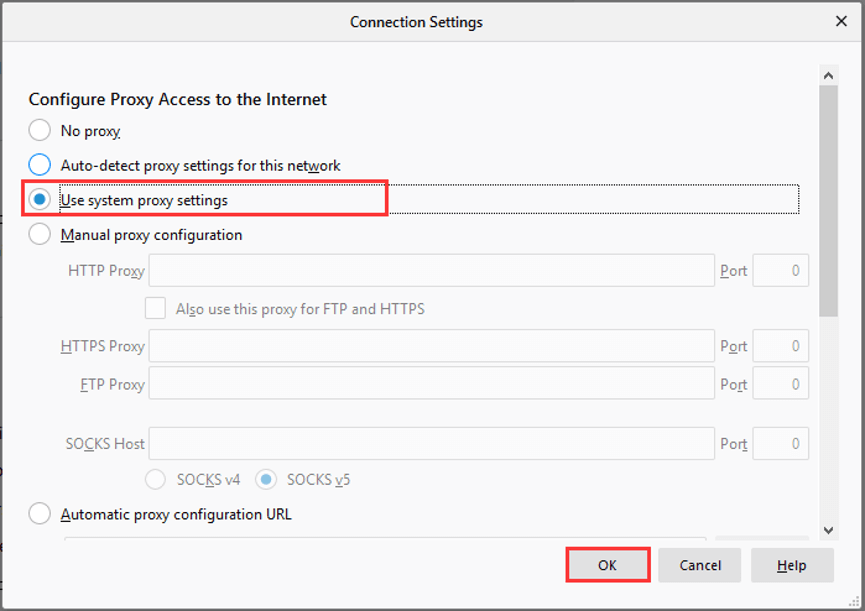
Just right-click the three-line icon and chose Options. Then, go to Network Settings and click Settings button. In Connection Settings page, select Use system proxy settings and click OK to make sure your browser uses the same network settings in your Windows.

If this doesn’t work to fix the issue either, you can try disabling the proxy for your LAN. Here’s a simple guide.
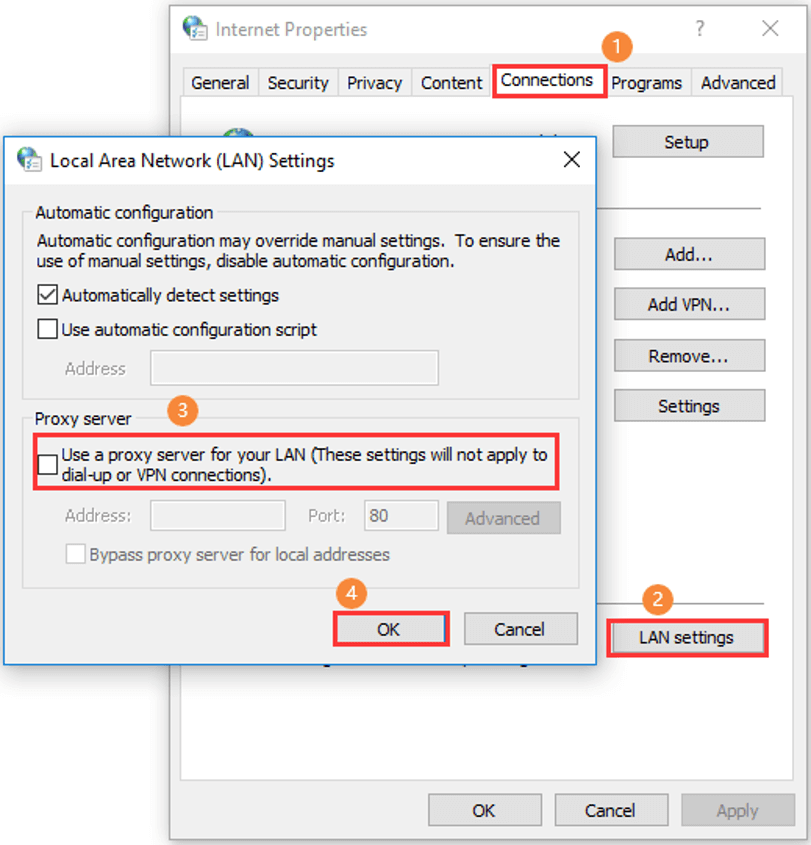
Step 1: After invoking Run dialog, type inetcpl.cpl and press Enter to open Internet Properties.
Step 2: In the pop-up window, switch to Connection tab.
Step 3: Click LAN settings button.
Step 4: In the Local Area Network (LAN) Settings window, uncheck Use a proxy server for your LAN and click OK.

Step 5: Save the change and restart your computer.
Now, you should be able to visit the website without any problems.


User Comments :