The CPU fan is a device that can keep the CPU cool so that the CPU can work normally without getting heated. If there is a problem with the CPU fan, users will see an error message “511- CPU fan not detected” when starting their computer. Here, MiniTool Partition Wizard will tell you how to fix this error.
Reasons for the “511-CPU Fan Not Detected” Error
After some users boot their computers, the boot menu shows “511-CPU fan not detected” and “F1: Boot”. Why does this happen? Some common reasons are listed below:
Now you know the possible reasons for the “511-CPU fan not detected” error. So, how to fix the CPU fan error on boot? Scroll down to know the detail.
How to Fix the “511-CPU Fan Not Detected” Error on Boot
A CPU fan is very important for effective heat dissipation of the CPU. If the internal CPU fan doesn’t run smoothly, please don’t use your computer. Besides, to get rid of the CPU fan error on boot, you can try the methods below.
Method 1: Reset BIOS Settings to Default
There are some BIOS controls that can detect the rotation and speed of the CPU fan. Any error in the controls may cause the “511-CPU fan not detected” error. In this case, you need to reset BIOS settings to default to fix the error. There are two ways below to do that:
1. Access BIOS Settings from Desktop (Windows 10)
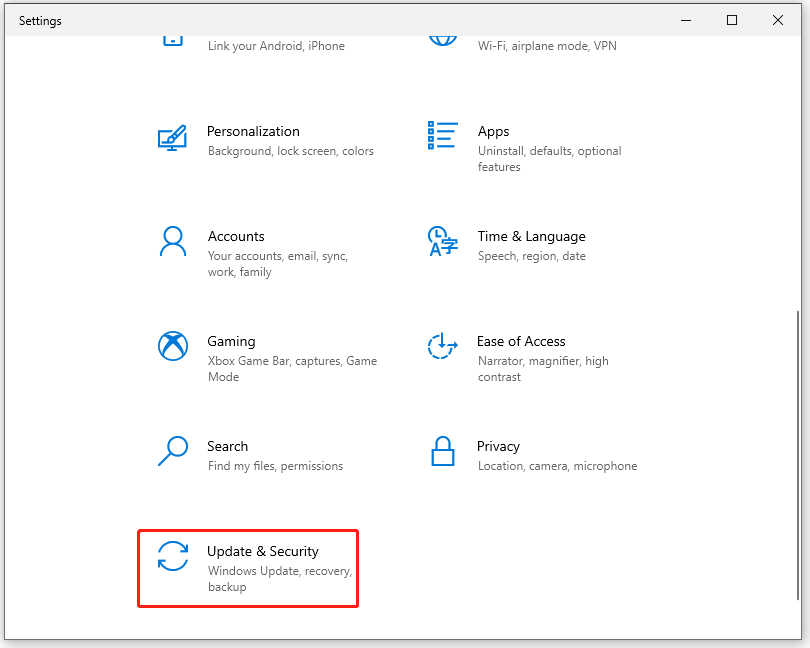
Step 1: Click the Start button, click the Settings button, and then choose Update & Security.

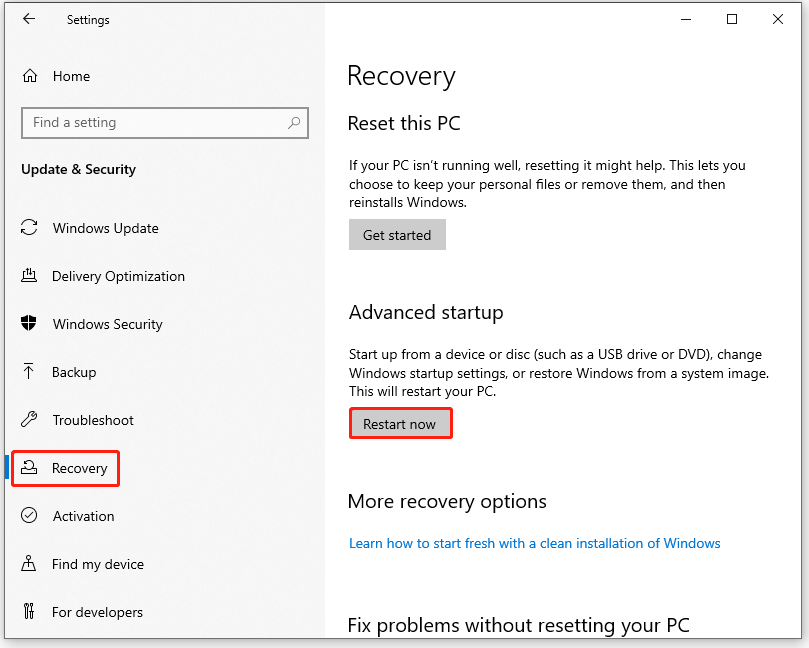
Step 2: Choose Recovery from the left menu, and click Restart Now under Advanced startup. The computer will reboot to a special menu.

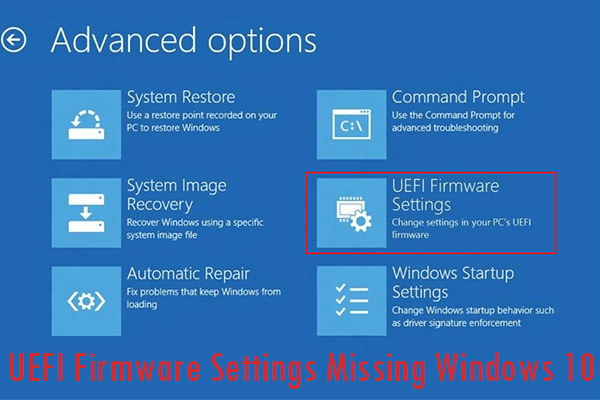
Step 3: Now, choose Troubleshoot > Advanced options > UEFI Firmware Settings, and click Restart. Then, your system will restart and take you to the BIOS.
Step 4: In BIOS Mode, find the Reset to default option and perform the resetting operation.
2. Access BIOS Settings from Startup Screen
Step 1: Restart your computer and press the BIOS hotkey (e.g., F2, F10, Esc, or DEL) to open BIOS Mode. (The key may vary according to your computer’s motherboard manufacturer.)
Step 2: Once in BIOS Mode, choose the Reset to default option.
Once done, reboot your computer to see if there is still a “511-CPU fan not detected” error.
What If Your Computer Can’t Access BIOS? A Guide for You!
Method 2: Clean the CPU Fan and Heatsink
This issue “511-CPU fan not detected” can also be fixed by cleaning the CPU fan and heatsink. Here is how to do that:
Step 1: Turn off your computer, and open the CPU case. (After opening the CPU case, you can also check the fan, fan rotor, radiator, or motherboard for physical damage, because any damage may cause this error.)
Step 2: Clean dust from CPU Fan’s rotors and heatsink.
After that, turn on your computer and check if the CPU fan error on boot is resolved.
Method 3: Secure CPU Fan Connections
When the CPU fan cable is loose or connected to the wrong socket, your computer won’t recognize that the fan is plugged in and will prompt a “511-CPU fan not detected” error. In this case, you should make sure CPU fan cables are properly connected to the correct socket. How to do that? Here is the guide:
Step 1: Turn off your computer and unplug everything.
Step 2: Disconnect and then reconnect the cables.
Once done, restart your computer to check if the CPU fan error on boot is fixed.
That’s all about how to fix the “511-CPU fan not detected” error on boot. If you have any questions about this topic, please leave them in the comment zone and we will try to answer them as soon as possible.


User Comments :