If you are looking for a way to fix the error code 0x8007042c, you are at the right place. In this article, MiniTool Partition Wizard will show you how to resolve the Windows update error 0x8007042c with detailed instructions.
Updating Windows should be a common operation to keep the system complete and a basic solution to some computer problems. However, some issues might come up during the process with different error codes, which has been a usual topic for Windows users.
Today, we will talk about the error code 0x8007042c which will prevent you from downloading the latest Windows 10 updates. It has been reported by plenty of users, and it may occur due to related services issues, virus infections, and so on.
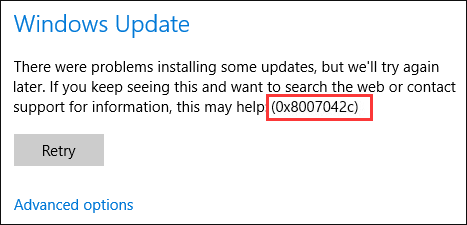
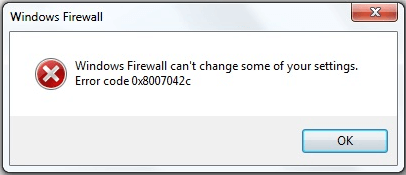
But actually, the 0x8007042c error is not limited to the Windows update operation. Typically, it can also happen to Windows Firewall with the error message “Windows Firewall can’t change some of your settings. Error code 0x8007042c”.
How to resolve the error 0x8007042c in Windows 10? Don’t worry. Here are some solutions and you can have a try.
Fix 1: Configure Related Services
If you receive the error code 0x8007042c, perhaps there are some problems with the related services. You need to make sure they are running and in the right startup type. Don’t know how to do that? Just follow the steps below:
Step 1: Press Windows + R to open Run window.
Step 2: Input services.msc and click OK to invoke Services app.
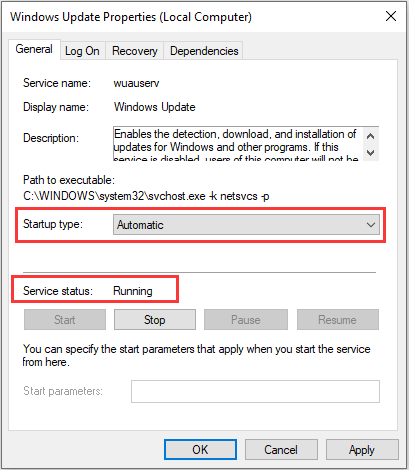
Step 3: Among the list, locate Windows Update service and double-click it to access its Properties.
Step 4: In the General tab, choose Automatic from the list of Startup type and make sure the Service status is Running. If it is not running, click Start button to enable it. Then, click Apply and OK to save changes.
Step 5: Then, locate the following services and perform the same operation for them:
- Background Intelligent Transfer Service
- Cryptographic Service
- Windows Installer
Fix 2: Use Windows Update Troubleshooter
For Windows update errors, Windows provides a corresponding troubleshooter tool for users. you can also have a try.
Step 1: Press Windows + I to open Windows Settings.
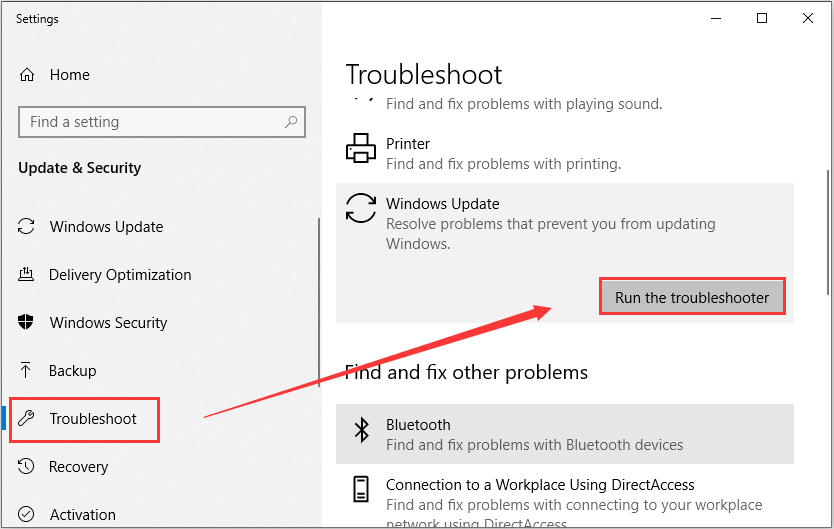
Step 2: Navigate to Update & Security > Troubleshoot.
Step 3: In the right pane, select Windows Update and then click Run the troubleshooter button.
Wait for a few minutes until the process is completed. Then, you can try updating your Windows again.
Fix 3: Rename SoftwareDistribution and Catroot2 Folders
Some common Windows update issue can be easily resolved by resetting the related components: rename the SoftwareDistribution and Catroot2 folders. And this may also work to resolve the error 0x8007042.
Step 1: Invoke Run window, input cmd, and press Ctrl + Shift + Enter to open Command Prompt as administrator.
Step 2: In the command console, input the following commands and press Enter after each to stop services that may be using the folders:
- net stop wuauserv
- net stop cryptSvc
- net stop bits
- net stop msiserver
Step 3: Execute the following command lines to rename SoftwareDistribution and Catroot2 folers:
- ren C:WindowsSoftwareDistribution SoftwareDistribution.old
- ren C:WindowsSystem32catroot2 Catroot2.old
Stop 4: Execute these commands to restart the involved services:
- net start wuauserv
- net start cryptSvc
- net start bits
- net start msiserver
Fix 4: Disable Antivirus
Finally, if all above methods fail to get rid of the issue, perhaps the problem lies in your antivirus program. Try disabling or removing any antivirus applications. If you are using Windows Defender Antivirus, disable it by following the steps below:
Step 1: Open Setting and go to Update & Security > Windows Security.
Step 2: In the right pane, click Virus & threat protection under Protection areas section to open Windows Security window.
Step 3: Click Manage settings under Virus & threat protection settings section.
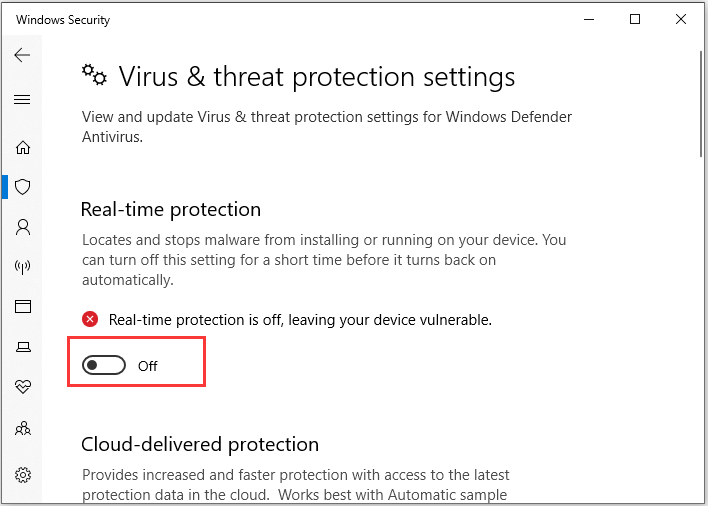
Step 4: Now, toggle off the switch button of Real-time protection to disable Windows Defender Antivirus.

![How to Fix Windows Update Error 0x8e5e03fa [New Tips]](https://images.minitool.com/partitionwizard.com/images/uploads/2020/07/0x8e5e03fa-thumbnail.jpg)
User Comments :