What Causes Error Code 0x80070035?
Windows allows users to share files between computers on the local network. The methods are various, including mapping a network drive, adding a network location, creating a shared folder, etc. However, the premise is that you can find the computer’s address.
Some people report that they have received the “error code 0x80070035, the network path was not found” message when they type the address or access the shared folder or network drive/location.
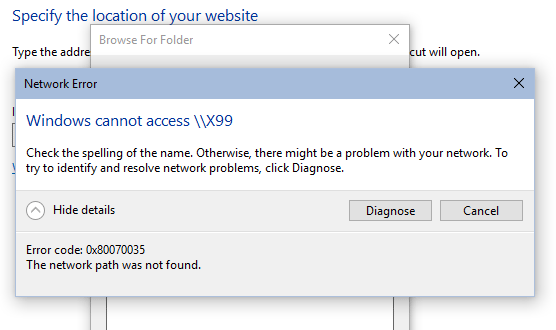
Why will they receive this error? Some of the reasons are as follows:
- They have typed the wrong address. This is the simplest reason and checking the address carefully will solve the issue.
- The sharing feature is not enabled.
- The firewall is blocking.
- Wrong network settings.
- Others.
How to Remove the Error Code 0x80070035
If you make sure you have typed the correct address but you still receive “error code 0x80070035 the network path was not found”, you can try the following solutions one by one.
Fix 1. Disable Firewall and Antivirus Temporarily
Firewalls and antivirus may block you from sharing files. You need to disable them temporarily. To do that, you can refer to the following two posts:
- How to Disable and Enable Windows Defender Firewall?
- How to Disable Antivirus on Windows 10 Temporarily/Permanently
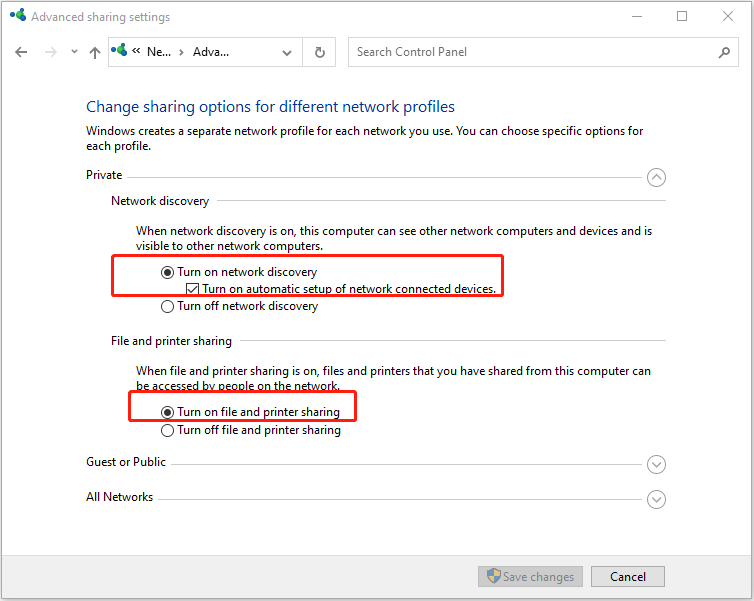
Fix 2. Make Sure Network Discovery and File Sharing Features Are Enabled
- Open Control Panel and click Network and Internet > Network and Sharing Center > Change advanced sharing settings.
- Under the Private section, make sure Turn on network discovery and Turn on file and printer sharing options are ticked.
- Click the Save changes button.
- Reboot your PC.
Fix 3. Make Sure SMB V1.0 Is Enabled
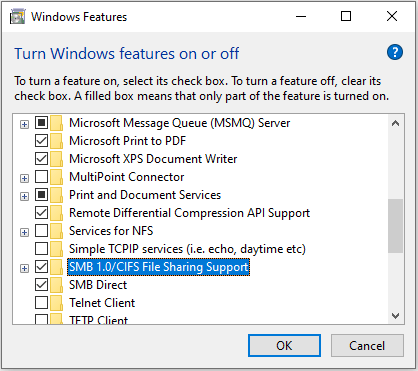
File sharing requires SMB V1.0 support. You should check it is enabled.
- In the Windows Search box, type “Turn Windows features on or off” and then open the corresponding tool from the result list.
- Check SMB 1.0/CIFS File Sharing Support and then click the OK button.
- Reboot your PC.
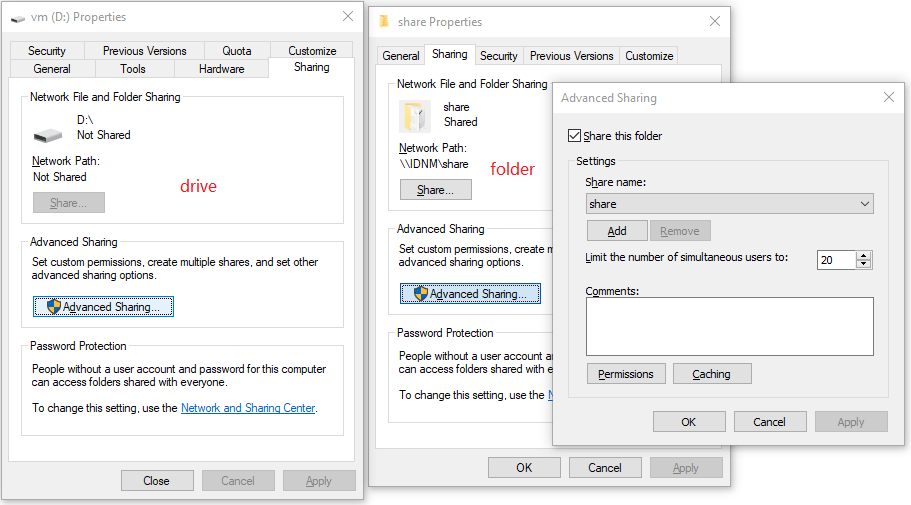
Fix 4. Make Sure the Network Drive or Shared Folder Is Shared
- In File Explorer, right-click the network drive or shared folder and choose Properties.
- Go to the Sharing tab and click the Advanced Sharing button.
- On the pop-up window, tick the checkbox before Share this folder.
- Click Apply and then OK.
Fix 5. Reinstall Network Adapter
- Open Device Manager.
- Click View > Show hidden devices.
- Expand the Network adapters directory.
- Right-click all drivers under this directory one by one and choose Uninstall device.
- Reboot your PC and these drivers will be reinstalled automatically.
Fix 6. Use Registry Editor
- Press Windows key + R to open the Run dialog.
- In the run box, type “regedit” and press Enter to open Registry Editor.
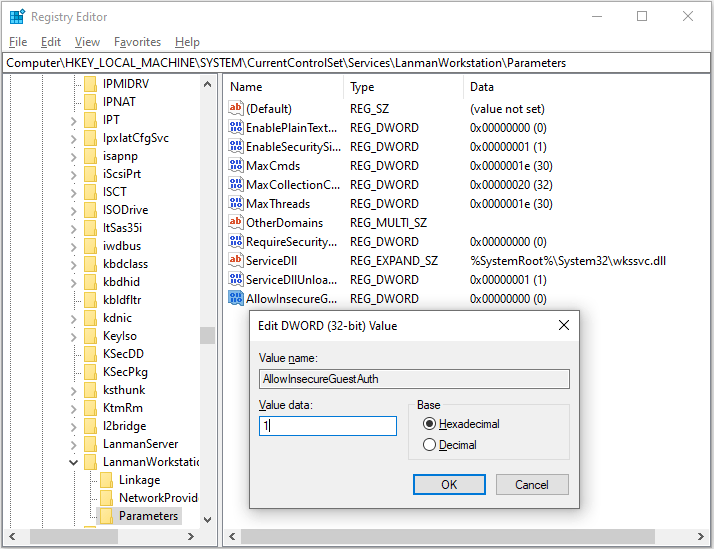
- Navigate to HKLM\SYSTEM\CurrentControlSet\Services\LanmanWorkstation\Parameters.
- Locate AllowInsecureGuestAuth. If you don’t find that, you should right-click on the black area, choose New > DWORD (32-bit) Value, and then rename it AllowInsecureGuestAuth.
- Double-click AllowInsecureGuestAuth and change its Value data to 1.
- Click the OK button and close Registry Editor.
Fix 7. Use Local Security Policy
- Press Windows key + R to open the Run dialog.
- In the run box, type “secpol.msc” and press Enter to open Local Security Policy.
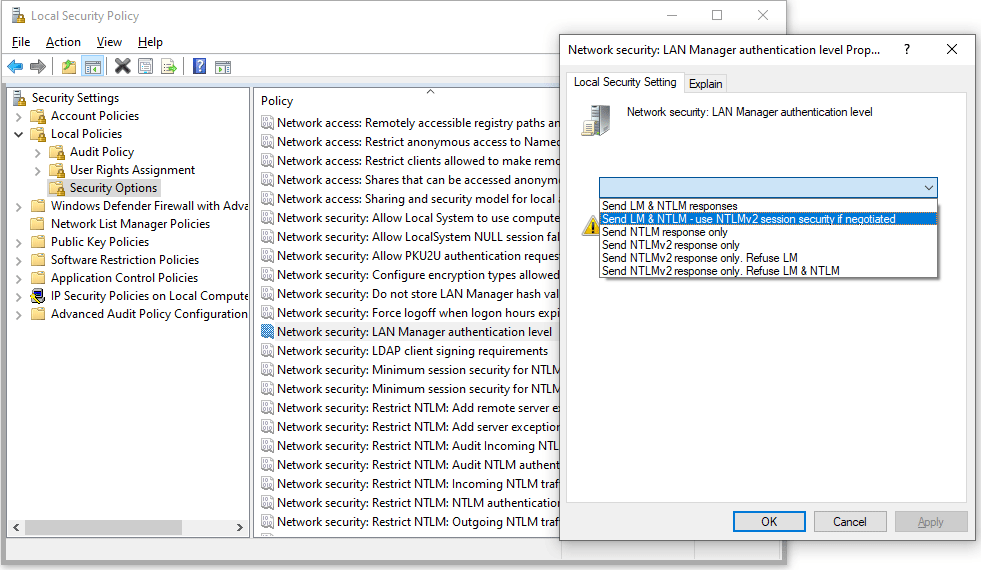
- Expand Local Policies and highlight Security Options.
- On the right pane, right-click Network security: LAN Manager authentication level and choose Properties.
- On the pop-up window, expand the drop-down menu and choose Send LM & NTLM-use NTLMv2 session security if negotiated.
- Click Apply and OK. Then, close the Local Security Policy.
Fix 8. Add Reliable Multicast Protocol
- Open Control Panel and click Network and Internet > Network and Sharing Center.
- This time click Change adapter settings.
- Right-click on your network and choose Properties.
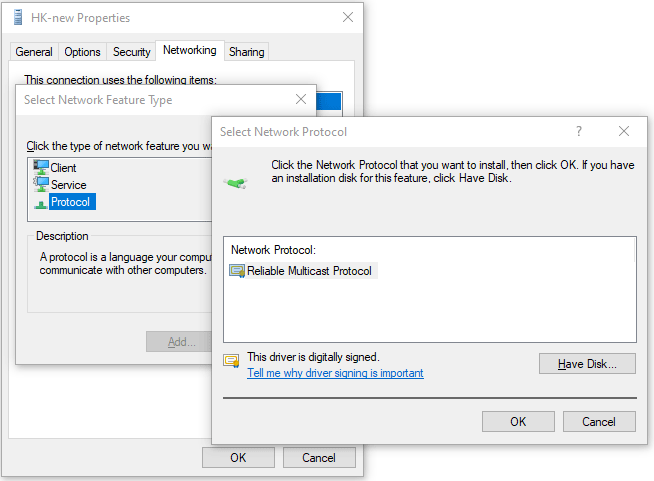
- On the Networking tab, click the Install button.
- Choose Protocol and click the Add button.
- Select Reliable Multicast Protocol and then click OK to install it.
Fix 9. Enable NetBIOS over TCP/IP
- Press Windows key + R to open the Run dialog.
- In the run box, type “ncpa.cpl” and press Enter to open Network Connections.
- Right-click on your WiFi network and select Properties.
- On the Networking tab, double-click on Internet Protocol Version 4 to open its properties.
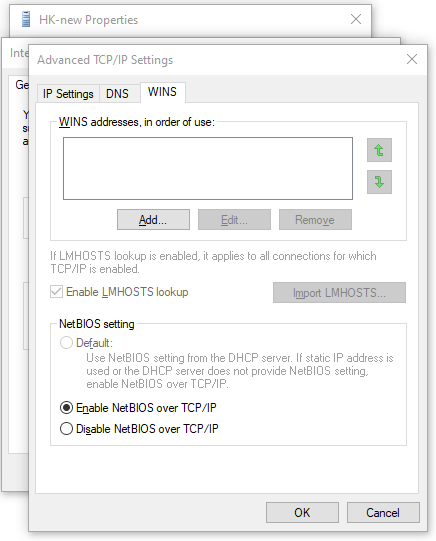
- On the General tab, click the Advanced button.
- Go to the WINS tab, select Enable NetBIOS over TCP/IP and click OK.
Fix 10. Use Commands
Step 1: Open Command Prompt and execute the following command lines one by one to flush DNS and IP address.
- ipconfig /release
- ipconfig /flushdns
- ipconfig /renew
- ipconfig /flushdns
- nbtstat –r
- netsh int ip reset
- netsh winsock reset
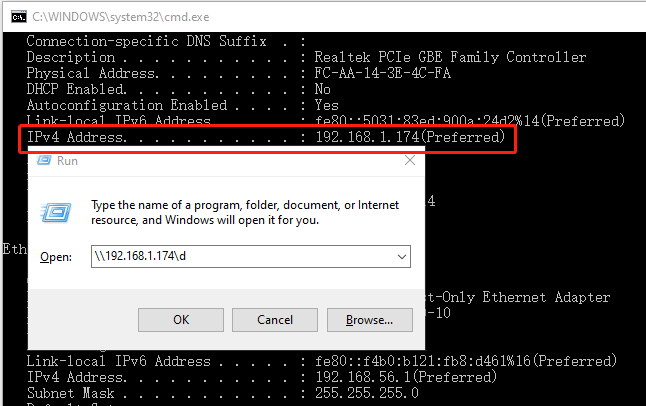
Step 2: Access the drive or folder over network using IP address.
- Execute the command “ipconfig /all”.
- Write down the IPv4 Address.
- Press Windows key + R to open the Run box.
- Type \\IPv4 Address\the drive you want to access and hit Enter.
Bottom Line
MiniTool Partition Wizard can help you clone the operating system, manage disks, and recover data. If you have this need, you can download it from the official website.


User Comments :