When updating Windows 10, you may encounter the Windows Update failed to install error 0x80240034. This post from MiniTool will show you how to fix the error with top 6 solutions. If you don't know how to troubleshoot the error 0x80240034, check out this post now.
The Windows update error 0x80240034 usually occurs during the download process. And you can see the Windows 10 error 0x80240034 with the “failed to download” or “failed to install” message when you view the Windows update history.
If you encounter the error 0x80240034 when downloading or installing the Windows 10 update, try the following solutions to fix the error immediately.
Solution 1. Run Windows Update Troubleshooter
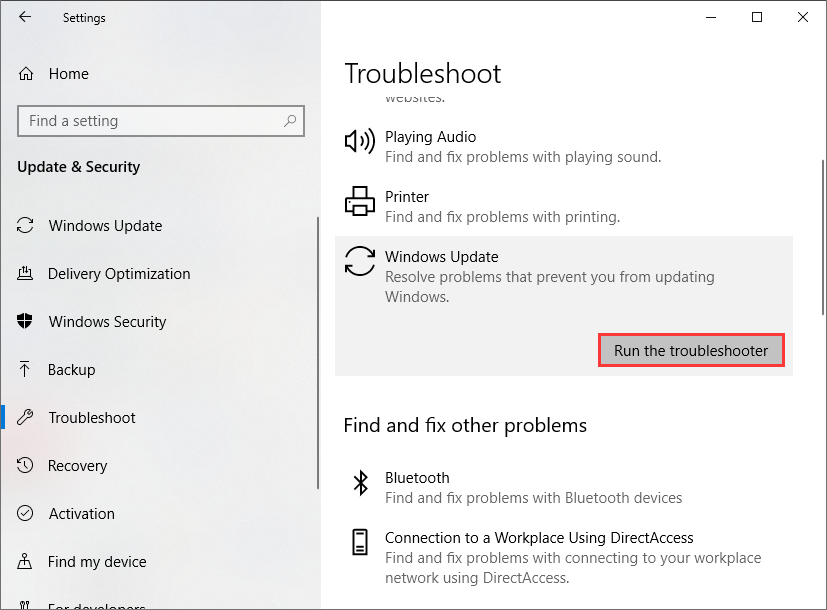
Windows Update Troubleshooter can help you troubleshoot some Windows update issues. If you come across the Windows update error 0x80240034, run the Windows Update Troubleshooter at first.
Step 1. Right click Windows Start menu and choose Settings from the context menu to open it.
Step 2. Choose Update & Security.
Step 3. Switch to the Troubleshoot tab.
Step 4. Find Windows Update and click on it.
Step 5. Then click Run Troubleshooter.
Solution 2. Disable Antivirus Programs Temporarily
Antivirus software can help you protect your computer against viruss. However, sometimes it may block Windows updates, causing Windows update error 0x80240034. So before you update Windows 10, you can disable your antivirus and firewall software temporarily.
And when the installation process is done, just re-enable it as soon as possible.
Solution 3. Run DISM Tool
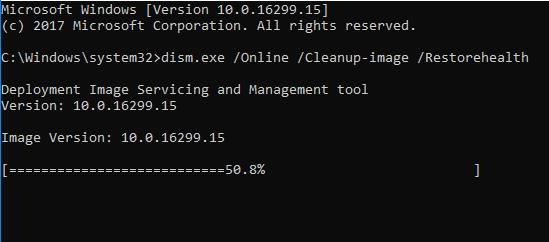
You can run DISM (Deployment Imaging and Servicing Management) tool to repair Windows system image, which can help you fix many Windows update errors such as error code 0x80240034, 0x8024a105 and so on.
If you don’t know how to run DISM tool, follow the steps below.
Step 1. Input cmd in the Windows Cortana search box, right-click the best match and select Run as administrator.
Step 2. Type the following DISM command and hit Enter to fix corrupted Windows update files
dism.exe /Online /Cleanup-image /Restorehealth
Solution 4. Run System File Checker
Windows may not behave as expected if some system files are missing or corrupted. The Windows built-in utility System File Checker can help you scan and fix corrupted system files. By running the System File Checker, the Windows update error 0x80240034 should be fixed.
Here are detailed steps.
Step 1. Type cmd in the Windows search box and right-click the best match Command Prompt. Then choose Run as administrator from the right-click menu.
Step 2. Type the following SFC command to repair system files and press Enter.
sfc /scannow
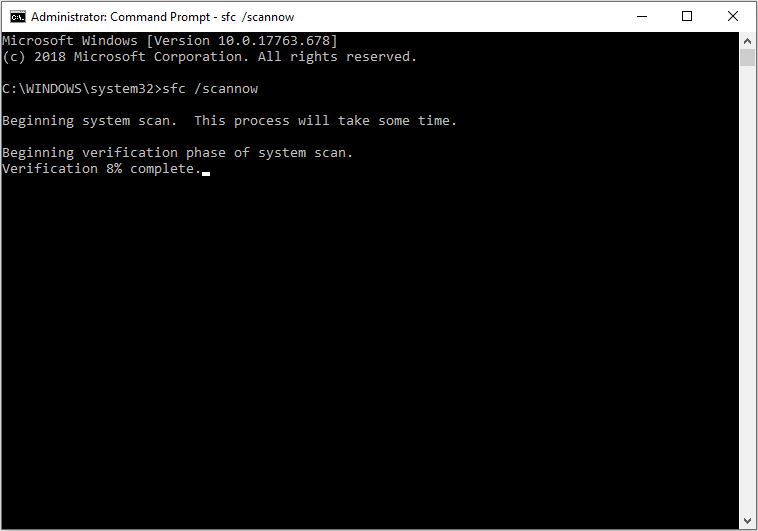
After finishing the steps above, the corrupted system files should have been repaired and Windows update error 0x80240034 should have been fixed.
Solution 5. Reset Windows Update Store
If the above fixes cannot help you get rid of Windows update error 0x80240034, try resetting Windows update store with the following commands.
Step 1. Type cmd in the Windows search box and select the Command Prompt. Then right click it and choose Run as administrator.
Step 2. Run the following command one by one in the command prompt window.
net stop wuauserv
net stop cryptSvc
net stop bits
ren C:WindowsSoftwareDistribution SoftwareDistribution.old
ren C:WindowsSystem32catroot2 Catroot2.old
Step 3. Then reboot your PC and check if the 0x80240034 Windows Update Error on Windows 10 is fixed.
Solution 6. Install the Latest Windows 10 Using the ISO File.
If you are still failed to download or install the latest Windows 10 update, you can install the latest Windows version from an ISO file created by Windows 10 Media Creation Tool. This can help you bypass the error 0x80240034 in Windows 10. If you don’t know how to install the update from a Windows 10 ISO file, check out the following steps.
Step 1. Download the Windows 10 Media Creation Tool from Microsoft’s official website.
Step 2. Run the windows 10 Media Creation Tool and then accept the License terms.
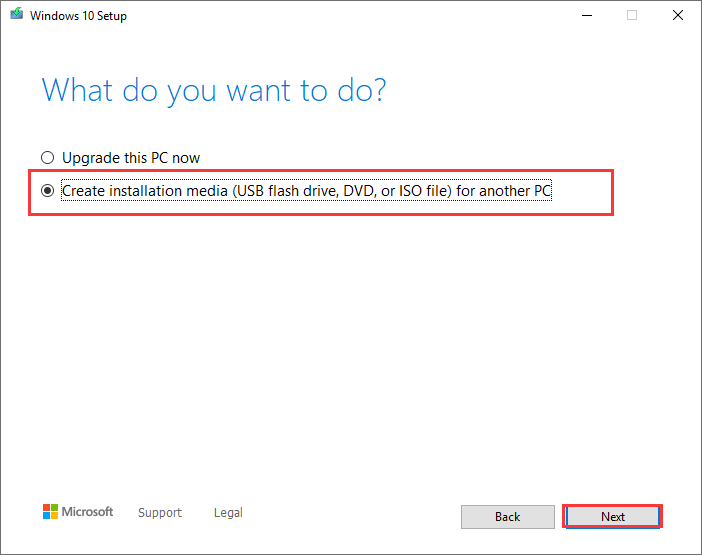
Step 3. Select Create installation media for another PC and click Next.
Step 4. Check the default Language, Edition and Architecture settings and then click Next.
Step 5. Then choose ISO file and then click Next.
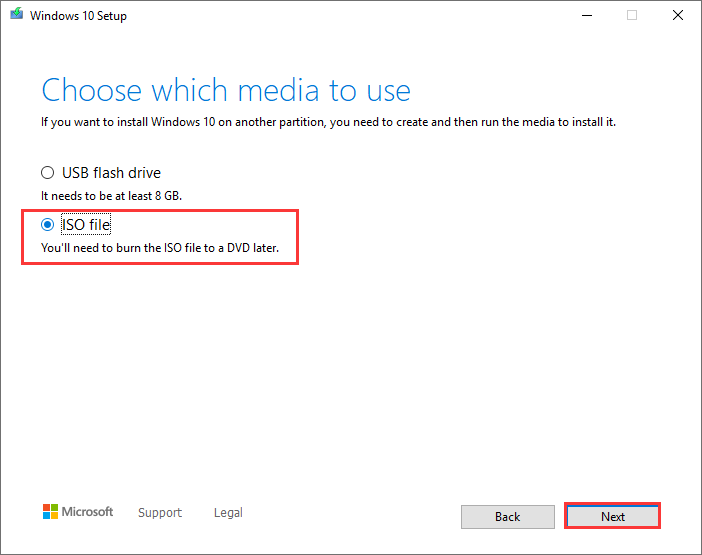
Step 6. Save the Windows ISO file to your computer and wait patiently for the downloading process.
Step 7. When the download is completed, you can disconnect your PC from the Internet.
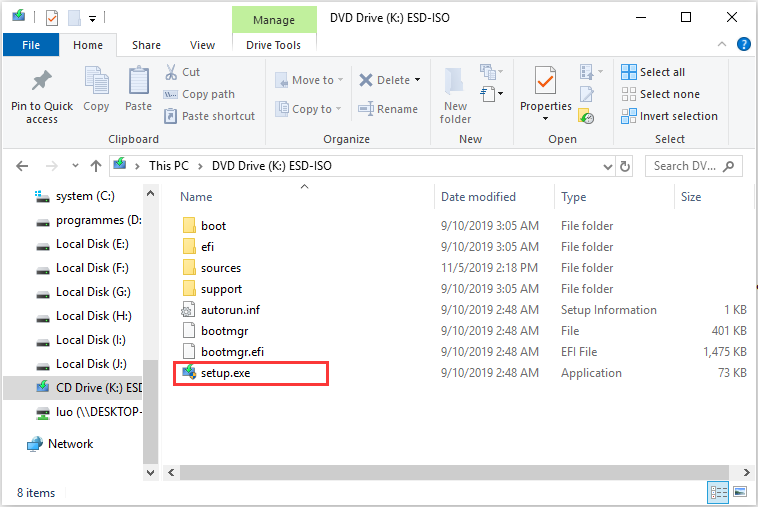
Step 8. Find the Windows ISO file on your computer and double click it to open the file.
Step 9. Double click at setup application.
Step 10. Click Next and follow the instructions to update your Windows PC.
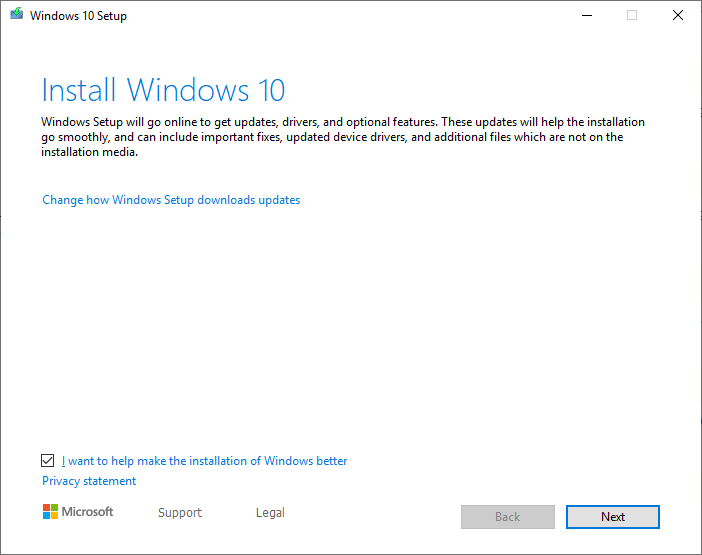
This final fix should help you install the latest Windows update successfully.
Conclusion
After reading this post, have you fixed the Windows update error 0x80240034? Which method works for you? Please let me know if this guide has helped you. If you have better solutions, please don’t hesitate to share it with us by leaving a comment in the following comment zone.


User Comments :