Have you ever encountered the Windows could not find a driver for your network adapter issue? Did you fix it successfully? If not, MiniTool will illustrate some methods to fix the issue in this post. You can pick one randomly to solve the error.
Solution 1: Run Hardware and Devices Troubleshooter
The troubleshooter is a built-in feature in Windows, which can help you solve some issues related to hardware and devices. If Windows 10 could not find a driver for your network adapter, you can try running the troubleshooter to fix the issue. Here’s how to do.
Step 1: Open Windows Settings by pressing Win and I keys.
Step 2: Go to Update & Security, and then click on Troubleshoot.
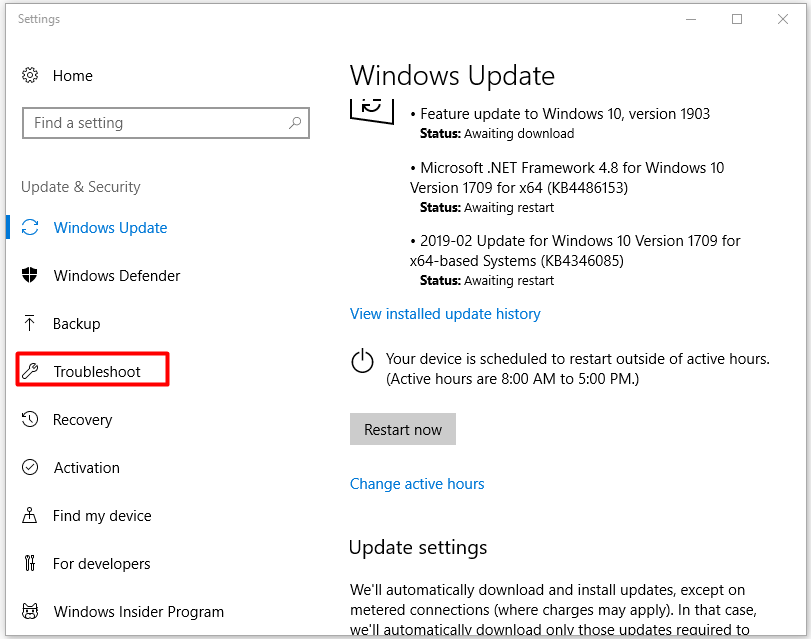
Step 3: Drop down the right side of the Troubleshoot page and click on Hardware and Devices.
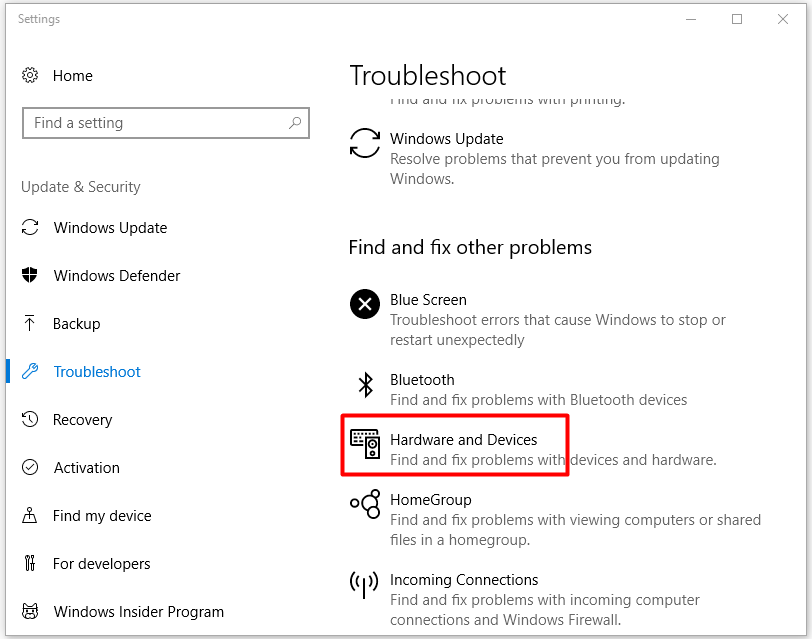
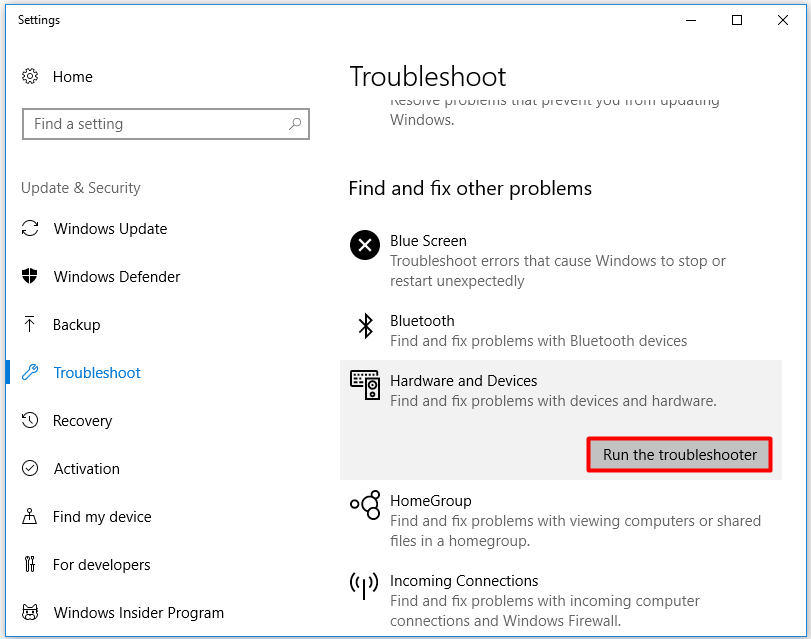
Step 4: After that, click on Run as troubleshooter. Then, the program will detect problems on your hardware and devices automatically.
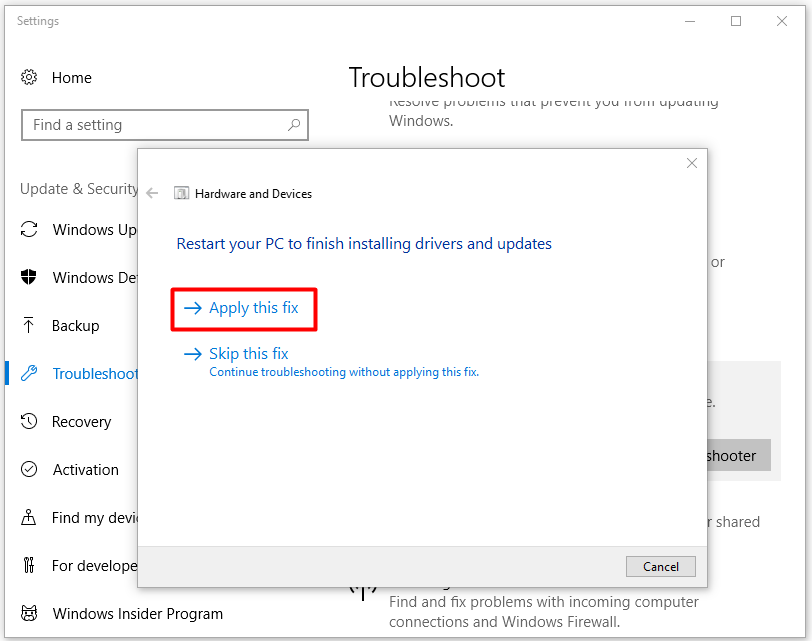
Step 5: After the troubleshooting process finishes, the troubleshooter will offer you two options (Apply this fix and Skip this fix). You can choose Apply this fix to solve the issue.
Solution 2: Reset the Router
You may be surprised at the times of resetting the router to fix Internet connectivity in Windows 10, but this operation can fix some issues indeed. By doing so, you can establish a new connection with the ISP and reset it to its default factory settings.
Step 1: Turn off the router and unplug it. Wait for a few minutes, and then plug it back.
Step 2: Turn on the router. Thereafter, press the Reset button on the router with a paperclip for approximate 15-30 seconds. Then, check if the Windows did not detect a properly installed network adapter issue is fixed.
Solution 3: Reinstall a Driver for the Network Adapter
The “Windows could not find a driver for your network adapter” error message indicates that the issue could be caused by the corrupted network adapter driver. You cannot solve the issue by updating the driver without a connection. However, reinstalling the network driver works.
Here are specific steps to reinstall the driver.
Step 1: Open the Run dialog window by pressing Win and R keys.
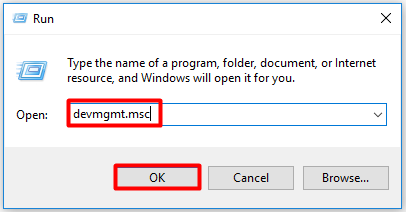
Step 2: Type devmgmt.msc in the window and click OK to open the Device Manager.
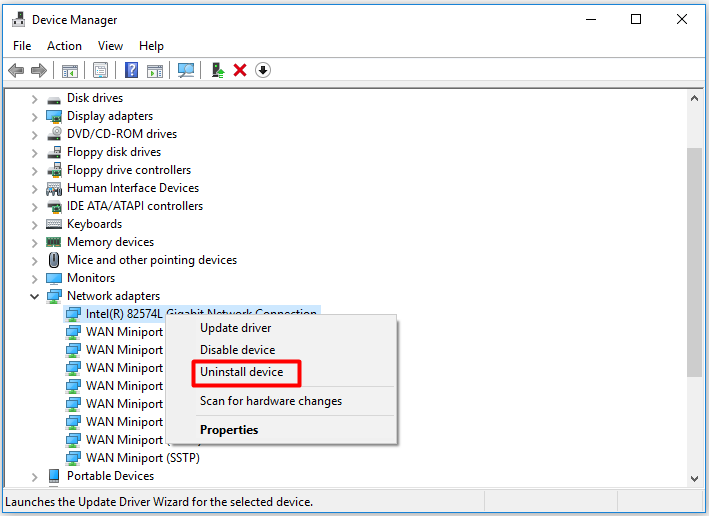
Step 3: Double click Network adapters to expand it. Then right click your network adapter and click on the Uninstall device option from the elevated menu.
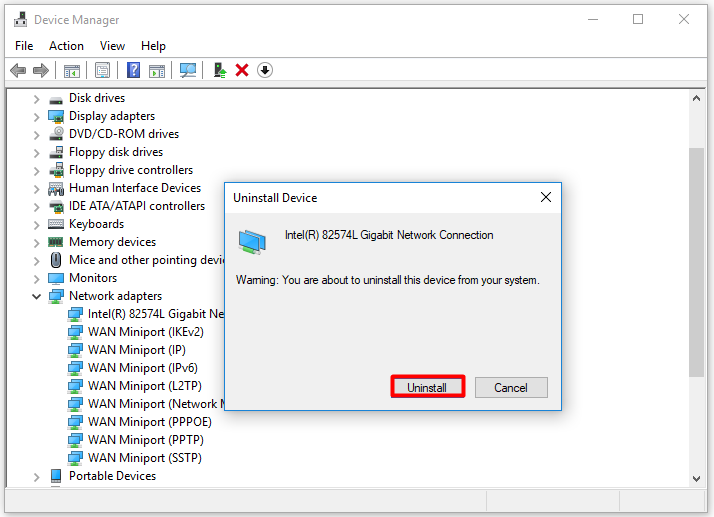
Step 4: In the pop-up window, click Uninstall to carry out the uninstallation operation.
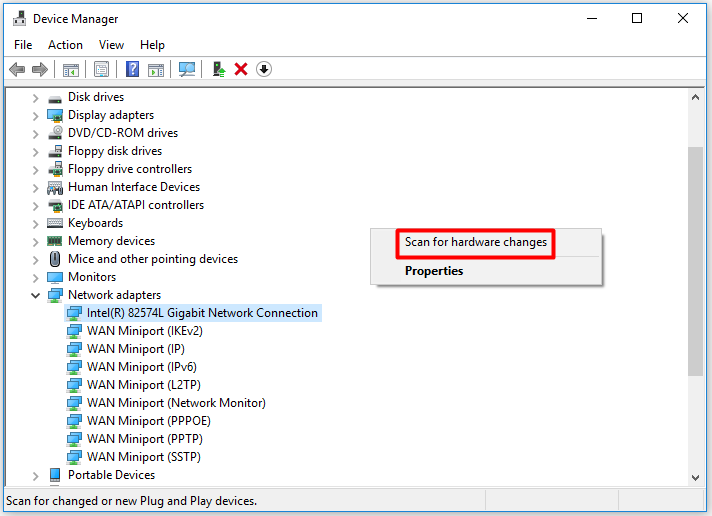
Step 5: Right click on any empty space and select Scan for hardware changes. After that, Windows will detect your hardware and install the default drivers automatically. Finally, restart your PC and check if the issue is fixed.
Solution 4: Run System Restore
When the Windows did not detect a properly installed network adapter issue occurs, you can consider running system restore. This operation enables your computer back to a previous state that the PC runs normally.
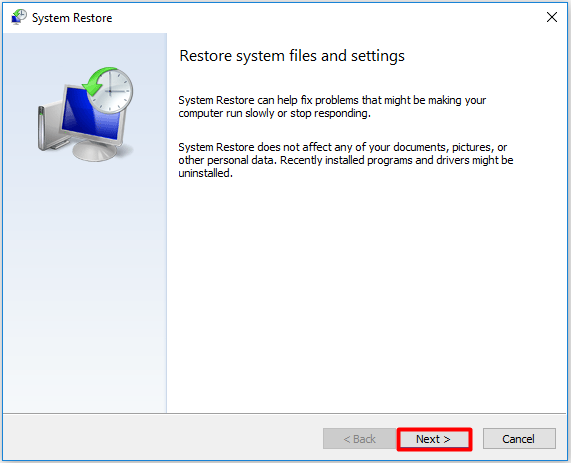
Step 1: Open the Run window by pressing Win and R keys. Then type rstrui and hit Enter.
Step 2: Click on Next to open the system restore points list.
Step 3: If you want to see more system restore points, check the Show more restore points box. After selecting a system restore point, you can click Scan for affected programs box to check what software will be removed.
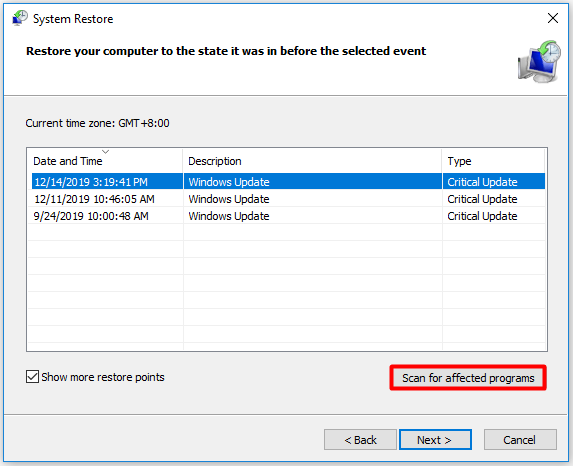
Step 4: After confirming the after-effect, click Next and follow the on-screen instruction to finish the whole operation.

User Comments :