Some users reported the issue “Windows can't stop your ‘Generic volume’ device because a program is still using it” when ejecting an external hard drive or a USB flash drive. If you are stuck in the issue, read the post from MiniTool Partition Wizard to see how to get rid of the issue.
Windows Can’t Stop Your ‘Generic Volume’ Device
To avoid data loss or data corruption, lots of Windows users will use the Safely Remove Hardware utility when removing an external storage device like an external hard drive or a USB flash drive.
However, they failed to eject their devices and received the error message as follows:
Windows can’t stop your ‘Generic volume’ device because a program is still using it. Close any programs that might be using the device and then try again later.
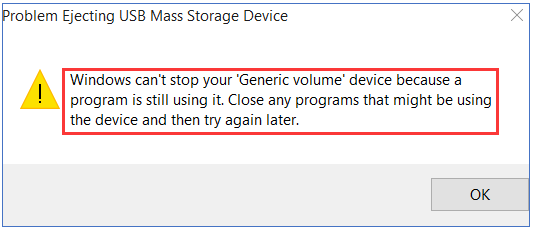
As the error message states, the cause of the issue is that the system is currently still using the drive. However, some users killed all programs and processes in Task Manager but still received the error message when ejecting their devices.
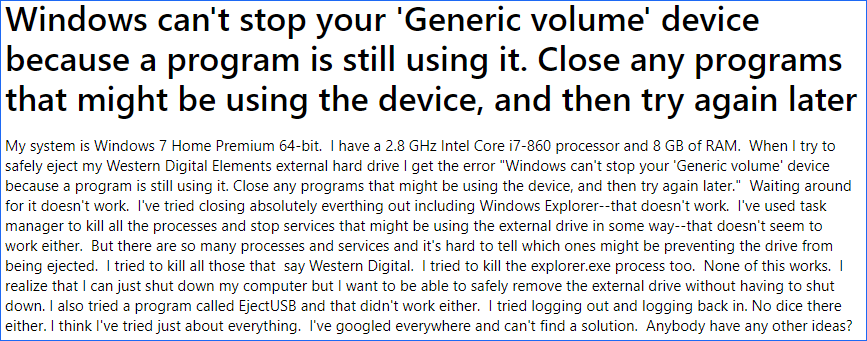
There might be some uncertain factors that prevent ejecting the drive. But do not worry. We collect several solutions to the issue. Some users have managed to solve the issue by carrying out them. Try them one by one now.
5 Solutions to “Windows Can’t Stop Your ‘Generic Volume’ Device Because a Program Is Still Using It”
- End the explorer.exe process via Task Manager
- Configure your USB drive for quick removal
- Force your USB drive to be in the offline mode
- Assign a new drove letter to the USB drive
- Change the file system to FAT32
Fix 1: End the Explorer.exe Process via Task Manager
First, try ending the explorer.exe process. If you have tried closing all processes but still received the error message, please move to the following solutions.
Step 1: Right-click the taskbar and then choose Task Manager from the menu.
Step 2: Under the Processes tab of the Task Manager window, locate the explorer.exe process.
Step 3: Once you locate it, right-click it and then choose the End task option.
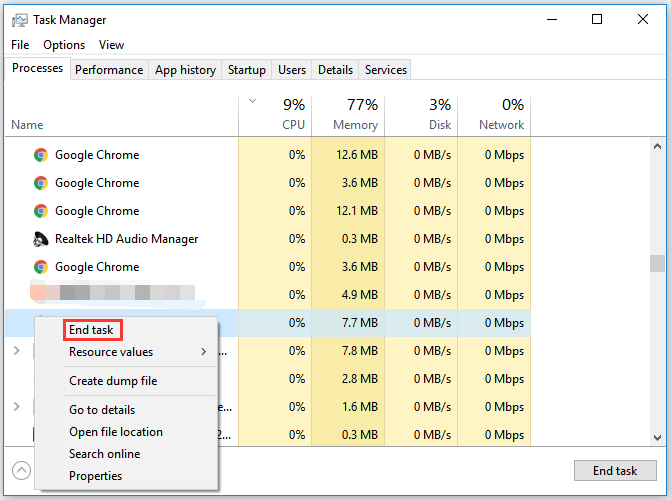
Now, check if the error message “Windows can’t stop your ‘Generic volume’ device because a program is still using it, the device is currently in use” persists when you eject your hard drive.
Fix 2: Configure Your USB Drive for Quick Removal
When your USB drive has not been configured for quick removal, you may be unable to eject the drive and receive the error message.
So, now configure your USB drive for quick removal.
Step 1: Open File Explorer and then right-click the USB drive to choose the Properties option.
Step 2: Switch to the Hardware tab of the Properties window. Next, choose the USB drive from the All disk drives list and click the Properties button.
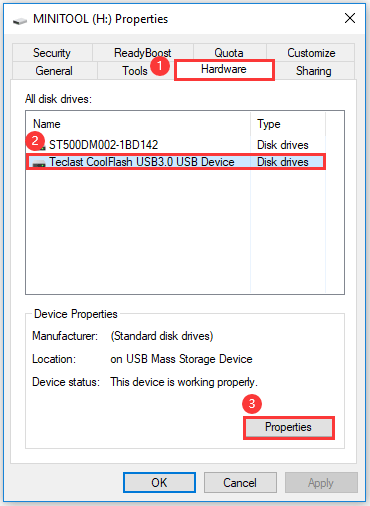
Step 3: Once you see the Properties window of the USB drive, click the Change settings button under the General tab.
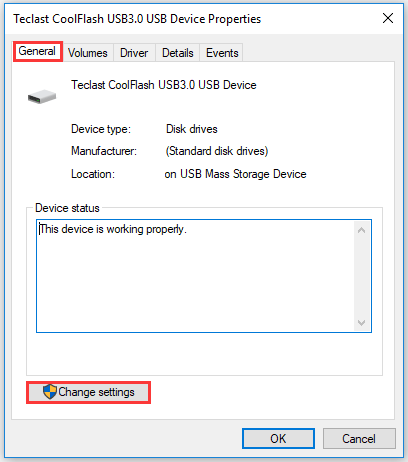
Step 4: Another similar mini window will show up. On this window, switch to the Policies tab and then select Quick removal (default) from the Remove policy section.
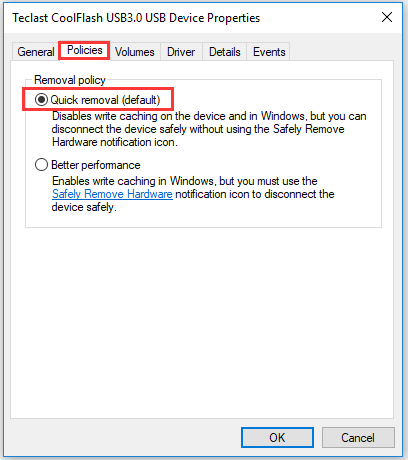
Step 5: Click the OK button to apply the change.
Try ejecting the USB drive again and see if the error message “Windows can’t stop your ‘Generic volume’ device because a program is still using it” will appear.
Fix 3: Force the USB Drive to be the Offline Mode
Many users have solved the issue after forcing their USB drives to be the offline mode. So, have a try.
To force a USB drive to be the offline mode, you can either use Disk Management or Diskpart. However, lots of users said that the Offline option was unavailable in Disk Management. So, to ensure the fixing process goes smoothly, here we would like to show how to force a USB drive in the offline mode using DiskPart.
Step 1: Run Command Prompt as an administrator.
- Type cmd in the Windows search bar.
- Right-click the search result and then choose Run as administrator.
Step 2: Once the Command Prompt window opens, type diskpart and then hit the Enter key to initiate the DiskPart utility.
Step 3: Then, run the following commands to force your USB drive to be in the offline mode. Note that you should hit the Enter key after typing each command.
list disk
select disk *
offline disk
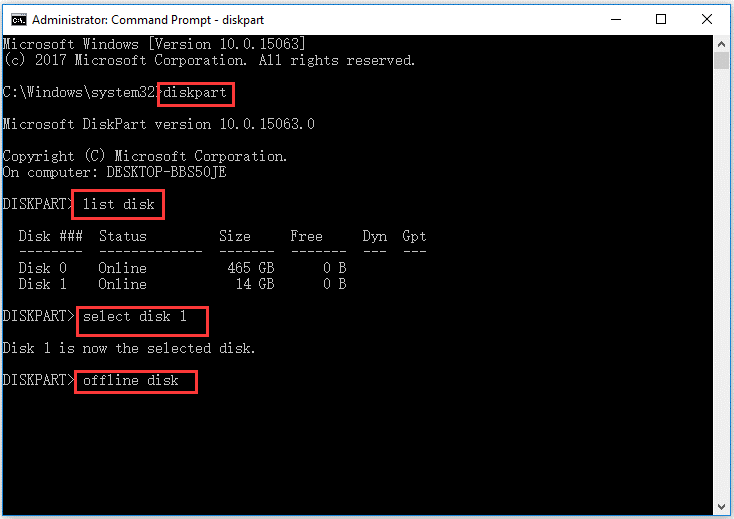
Now you can remove your USB drive from your computer physically. But you should get the USB drive back online when you plug it in again. To get it back online, you just need to follow the above steps but change the last command to online disk at this time.
Fix 4: Assign a New Drive Letter to the USB Drive
Another trick to fix “Windows can’t stop your ‘Generic volume’ device…” is changing the drive letter of the USB drive. That’s because when you change the drive letter, the USB drive will be disconnected from all processes that are currently using it.
There are many ways to change the drive letter. This post introduces one of the ways – using Disk Management.
Step 1: Right-click the Windows icon on your taskbar and then choose Disk Management from the menu.
Step 2: On the Disk Management window, right-click the USB drive and then choose the Change Drive Letter and Paths option.
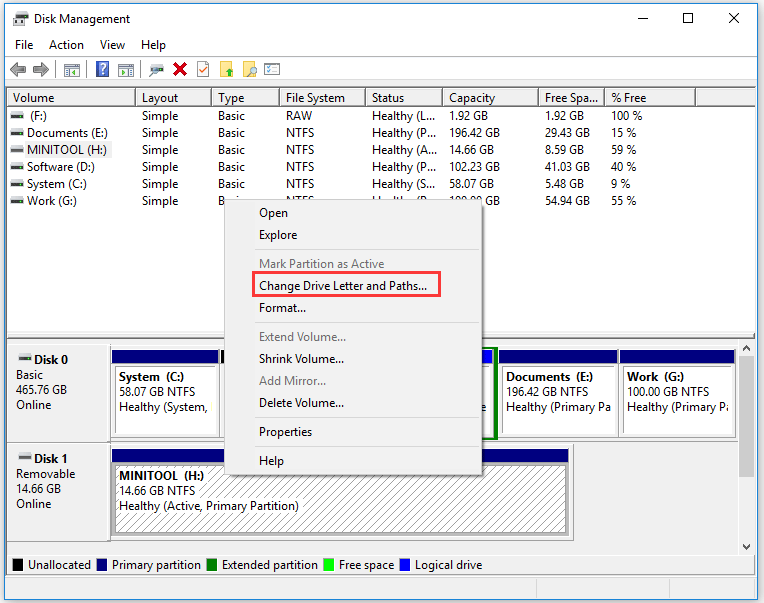
Step 3: You will see a mini window. Click the Change button on this window.
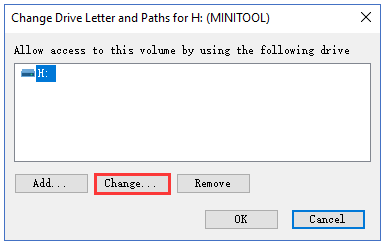
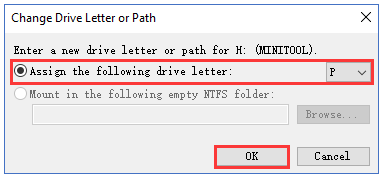
Step 4: Select Assign the following drive letter and then choose a new drive letter. Next, click the OK button to apply the change.
Step 5: You will receive a warning message. But don’t worry and click the Yes button.
Fix 5: Change the File System to FAT32
Some users have managed to eject their USB drives by changing the file system to FAT32.
So, try formatting the drive to FAT32. But notice that you should back up your drive before formatting the drive if there are some important files on it.
Windows has the function to help you format a drive to FAT32. However, the function will become useless when the drive is larger than 32GB. If your drive is larger than 32GB, we recommend that you try the FAT32 formatter called MiniTool Partition Wizard.
MiniTool Partition Wizard is a professional partition manager that does well in formatting/backing up disk and recovering data from formatted disk.
Here is the tutorial on how to format a USB drive to FAT32 using MiniTool Partition Wizard.
Step 1: Download MiniTool Partition Wizard through the following button.
MiniTool Partition Wizard FreeClick to Download100%Clean & Safe
Step 2: Once the download ends, locate the software executable file and double-click it to install the software.
Step 3: Follow the on-screen wizard to install the software on your computer.
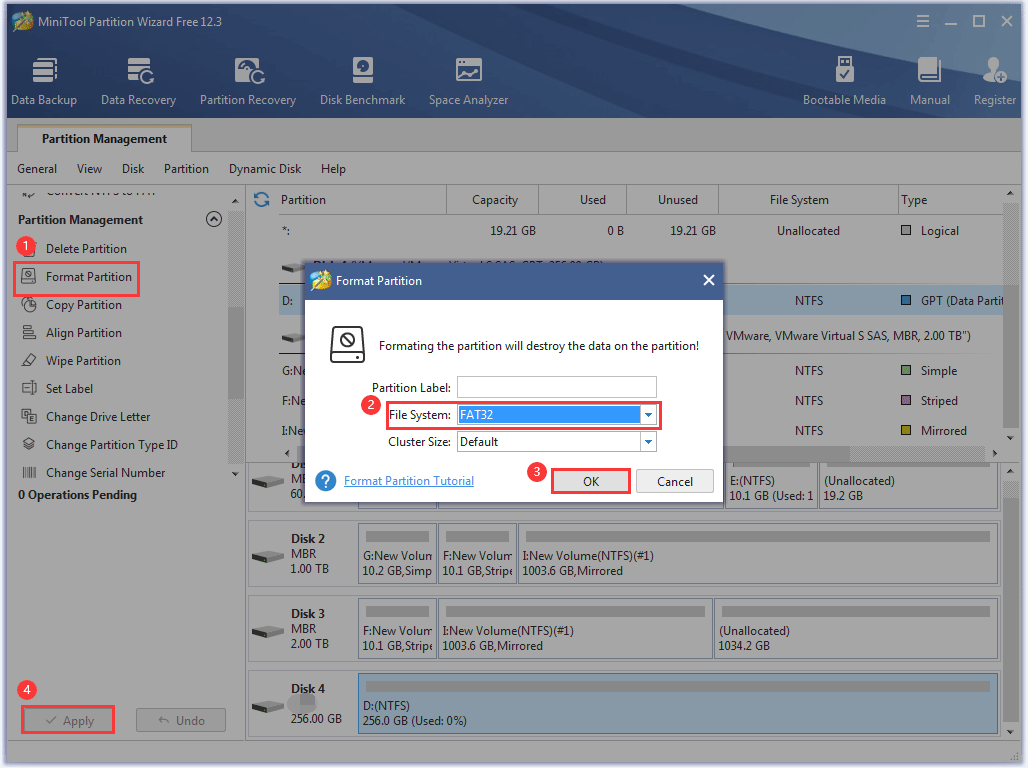
Step 4: Once the software gets installed, you can launch it to get its main interface and start to format the drive to FAT32.
- Highlight the drive in the disk map.
- Choose the Format Partition feature from the left panel.
- On the mini window, choose FAT32 from the File System menu and then click the OK button.
- Click the Apply button and the software will start formatting the drive to FAT32.
When the file system is changed to FAT32, try removing your drove from your computer and see if the error message will prompt.
Bottom Line
Have you solved “Windows can’t stop your ‘Generic volume’ device because a program is still using it” by following the above operations? If you have other solutions to the issue, please share them with us in the comment zone below.
If you encounter some issues when formatting your drive to FAT32 via MiniTool Partition Wizard, please feel free to let us know via [email protected]. We will reply to you as soon as possible.
Windows Can’t Stop Your ‘Generic Volume’ Device Because a Program Is Still Using It FAQ
The following solutions are helpful:
- Close all programs
- Scan computer for virus
- Disable computer security software
- Uninstall the driver of the drive via Device Manager.
- Format the drive to FAT32
- …
To get the detailed guide of each solution, please go to 12 Ways to Fix Problem Ejecting USB Mass Storage Device Win 10.
Try using the tool called Process Explorer that shows you information about which handles and ELLs processes have opened or loaded.
Refer to the tutorial to see how to use Process Explorer to find what program is using a device.
First, get the information of the device via Device Manager.
- Right-click the Windows icon on the taskbar and then choose Device Manager.
- On the Device Manager window, expand the category that includes the device.
- Right-click the device and then choose the Properties option.
- Switch to the Details tab on the Properties window.
- Under the Details tab, choose Physical Device Object name from the Property drop-down menu. Next, right-click the entry in the Value zone to choose the Copy option.
Second, check what program us using the device via Process Explorer.
- Download and install Process Explorer.
- Open Process Explorer.
- Select the Find or DELL menu.
- Paste the copied information into the menu and click Search.
The software will list the program(s) using the device.

User Comments :