You may notice the process Windows Audio Device Graph Isolation taking up high CPU usage in task manager. How to fix it? This article from MiniTool will show you some reliable solutions to fix Windows Audio Device Graph Isolation high CPU issue.
When opening task manager, you might notice the process Windows Audio Device Graph Isolation. And it may consume high CPU on your PC. At this time, you may wonder: what is Windows Audio Device Graph Isolation? Is it a virus? How can I fix Windows Audio Device Graph Isolation high CPU issue?
Well, don’t worry. this post will show you all the answers.
What Is Windows Audio Device Graph Isolation
Windows Audio Device Graph Isolation is the primary audio engine in Windows 10, which handles the advanced audio enhancement effects provided by Windows. Windows Audio Device Graph Isolation” is separated from the standard Windows Audio service, which makes third-party apps can run sound on your computer without touching Windows Audio service itself.
This process is always running in the background and you can find it in Task Manager. However, it caused problems sometimes. For example, many users reported that the Windows Audio Device Graph Isolation consumed high CPU on their operating system, affecting their computer performance.
How to fix Windows Audio Device Graph Isolation high CPU usage? The following has provided top 3 solutions that can help you fix the issue.
Solution 1. Reinstall Audio Driver
Windows Audio Device Graph Isolation high CPU could be caused by a faulty audio driver. To fix the issue, you can try reinstalling the audio drive on your PC. if you don’t know how to reinstall the audio driver, just follow the steps below.
Step 1. Right click Windows Start menu and choose Run. Then input devmgmt.msc in the Run box and hit Enter.

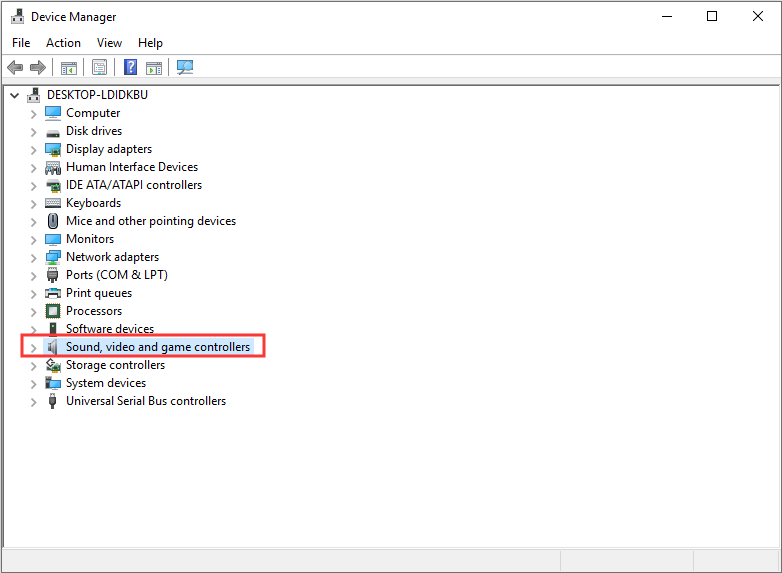
Step 2. Find and expand the Sound, video and game controllers category in Device Manager.
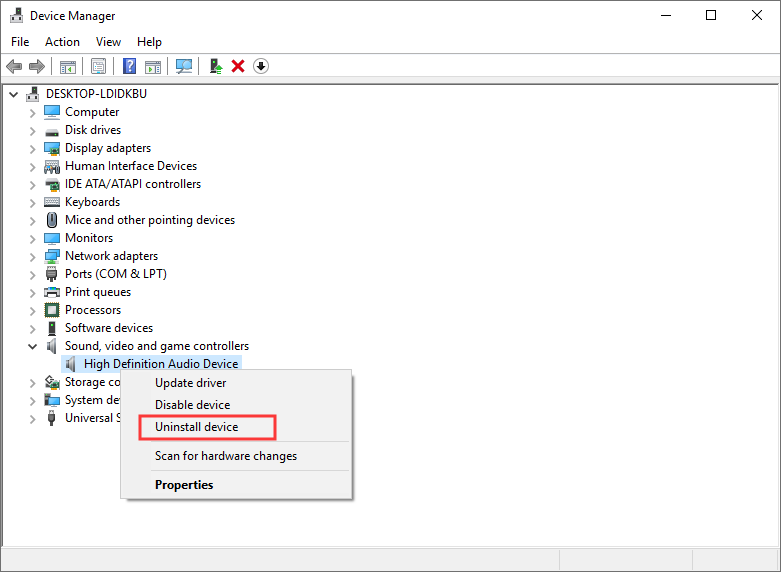
Step 3. Right-click the sound card device name and choose Uninstall from the menu.
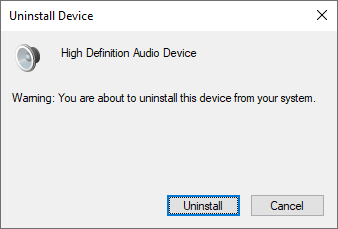
Step 4. Click Uninstall to start the uninstallation process.
Then you can restart your PC and check if the Windows Audio Device Graph Isolation high CPU issue gets fixed.
Solution 2. Disable All Sound Effects
Disabling some of the advanced audio effects may help you resolve the udiodg.exe Windows Audio Device Graph Isolation high CPU issue. If the above fix cannot help you, you can try this method to disable all sound effects.
Step 1. Right-click on the speaker icon in the Windows taskbar and select Playback devices from the menu.
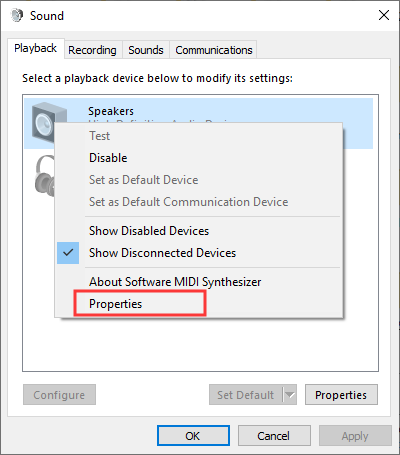
Step 2. Under the Playback tab, right- click on Speakers and choose Properties.
Step 3. On the Enhancements tab, check the box next to Disable all sound effects.
Step 4. Click Apply and OK to save the change.
Solution 3. Reinstall Skype
Some Windows users reported that they fixed Windows Audio Device Graph Isolation high CPU issue by uninstalling Skype and reinstalling it. So if the above fixes do not work for you, you can uninstall Skype from your computer and reinstall it. We recommend you to reinstall the latest version of Skype from the official site.
To uninstall Skype, you can follow the steps below:
Step 1.Press Windows + R keys on the keyboard to bring up the Run dialog box.
Step 2. Copy and paste appwiz.cpl to the Run box and then hit Enter.

Step 3. Find and right-click on Skype from the program list and select Uninstall.
Then you can download and install the latest version of Skype and check if Windows Audio Device Graph Isolation high CPU issue disappears.
Conclusion
After reading this post, you should know what Windows Audio Device Graph Isolation is and how to fix Windows Audio Device Graph Isolation high CPU issue. Which method works for you? If you have better solutions, please don’t hesitate to share it with us.


User Comments :