When upgrading to Windows 10 or performing a Windows update, you may get an error code 0x8007007e at times, which is very annoying if you are unable to fix it. But, you don't need to worry about that now, as this article will illustrate the reasons for error code 0x8007007e and show you how to fix your Windows 0x8007007e error using 7 methods.
Windows update is of great importance on every major release of Windows, as it allows the operating system to download and install the latest updates with bug fixes and security patches. However, when performing a Windows 10 update, you may find that things are not like the way you want.
Some users reported that they have encountered the error code 0x8007007e when updating Windows 10. Why would this code occur? How can we fix it?
The Reasons for Windows 10 Update Error Code 0x8007007e
The 0x8007007e Windows update error may be caused by the interference of third-party antivirus programs, software conflict, corrupt registry, and corrupted system files. Sometimes these will be accompanied by the error message “Windows has encountered an unknown error” or “Failed to install the update”. Then how can we fix error code 0x8007007e?
To fix Windows 10 error code 0x8007007e, you can try the following top 7 most effective methods.
Solution 1. Disable Third-party Antivirus Programs and Windows Firewall
Normally, you shouldn’t disable antivirus programs on your computer as they can protect your computer against viruses and other security threats. However, since the Windows 10 update error code 0x8007007e is possibly caused by the interference of antivirus software, you can temporarily disable them. After the Windows 10 update is completed, you can re-enable them.
Step 1. In the system tray (on the bottom right corner), you can right-click the antivirus program icon and disable it.
Step 2. In the Windows Cortana search box, type Control Panel and select the best match.
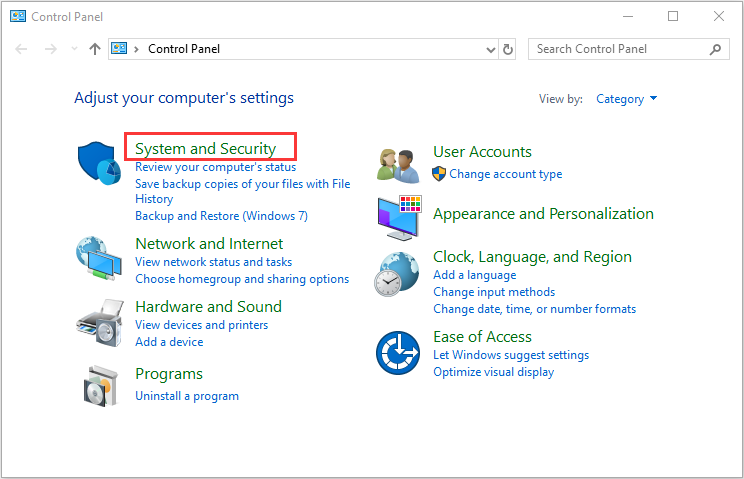
Step 3. When you open the Control Panel, click on System and Security.
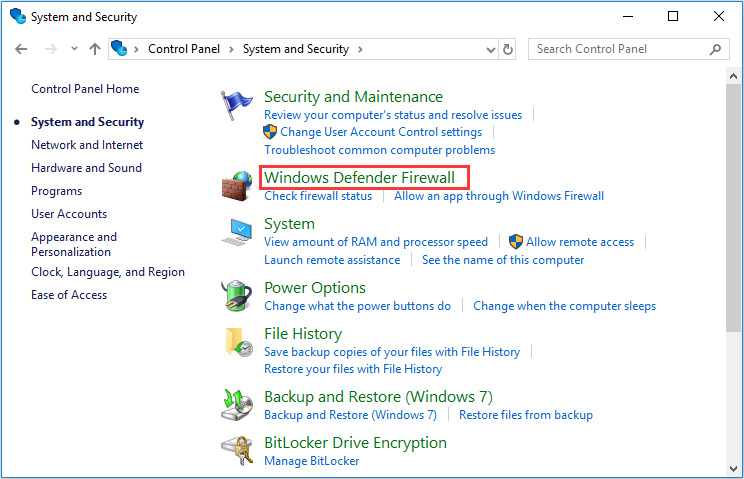
Step 4. Then click on Windows Defender Firewall (Windows Firewall).
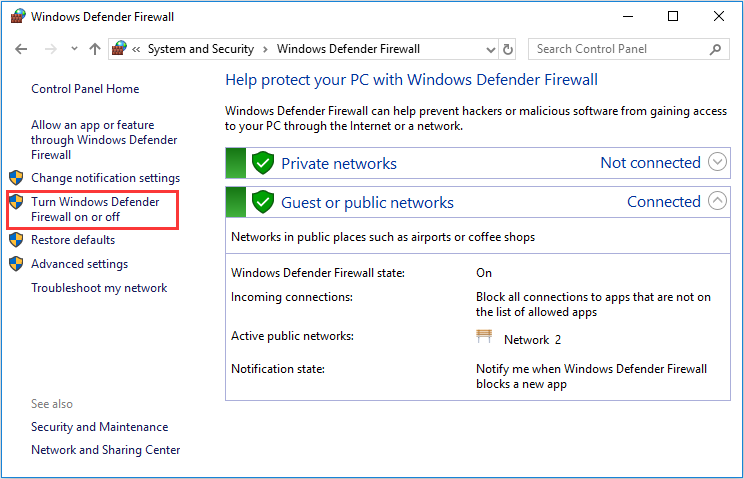
Step 5. Now from the left window click on Turn Windows Firewall on or off.
Step 6. Select Turn off Windows Firewall and restart your PC. Again try to open Windows Update and see if you’re able to Fix Windows Update Error 0x8007007e.
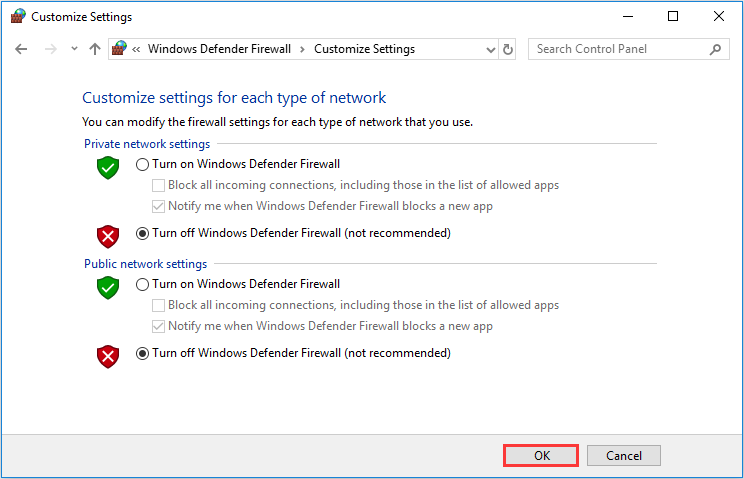
If you find this method doesn’t work for you, follow the above steps to turn on your Firewall and enable the antivirus software again. This step is necessary because your computer is vulnerable to attacks when it is connected to the Internet.
Solution 2. Run Windows Update Troubleshooter
The Windows Update Troubleshooter resolves many of these update errors. Some users have said that they solved the error code 0x8007007e Window update problem by running Windows Update Trouble Shooter.
If you’re having problems with Windows Update, you may try using Windows Update Troubleshooter to fix it. Detailed steps are shown as below:
Step 1. Download Windows Update Troubleshooter from Microsoft’s official site.

Step 2. Install Windows Update Troubleshooter and run it. When you get the following interface, select Windows Update and click Next.
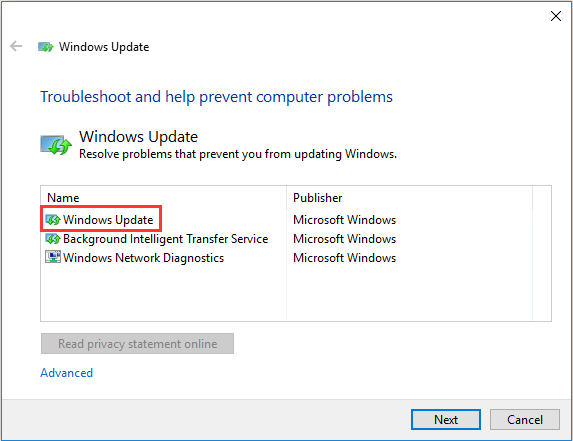
Step 3. Wait for the troubleshooter to detect any problems and follow its instructions to fix them.
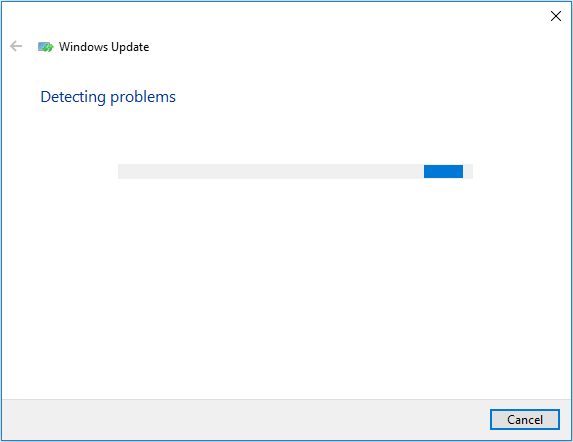
If any Windows Updates problems are found, the troubleshooter will fix them automatically. When the process is done, you can try Windows Update to see if error code 0x8007007e disappears. If Windows Update Troubleshooter cannot help you resolve this issue, try the next method.
Solution 3. Perform a Clean Boot
The software conflict could also lead to the Windows Update error 0x8007007e in Windows 10. You can perform a clean boot to see if the Windows update error 0x8007007e is caused by a third-party software or a service. With the help of performing a clean boot, you can eliminate software conflicts.
Step 1. Right-click the Windows Start menu and choose Run.
Step 2. Input msconfig and press Enter. Then you will get the following interface.
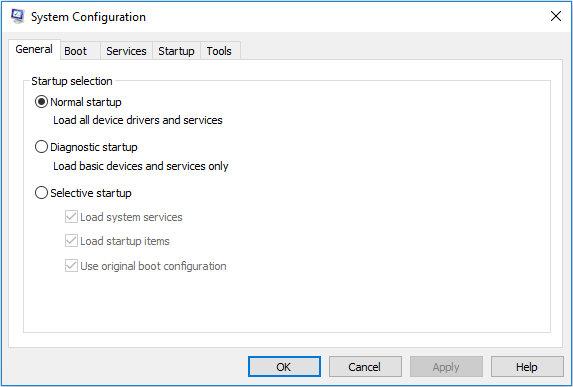
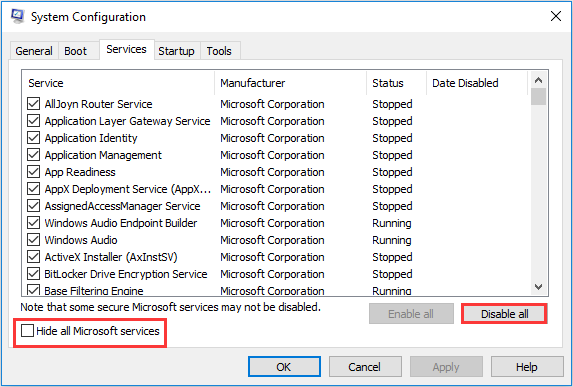
Step 3. Click the Services tab. Then check Hide All Microsoft Services and click Disable All (if the button is not greyed out)
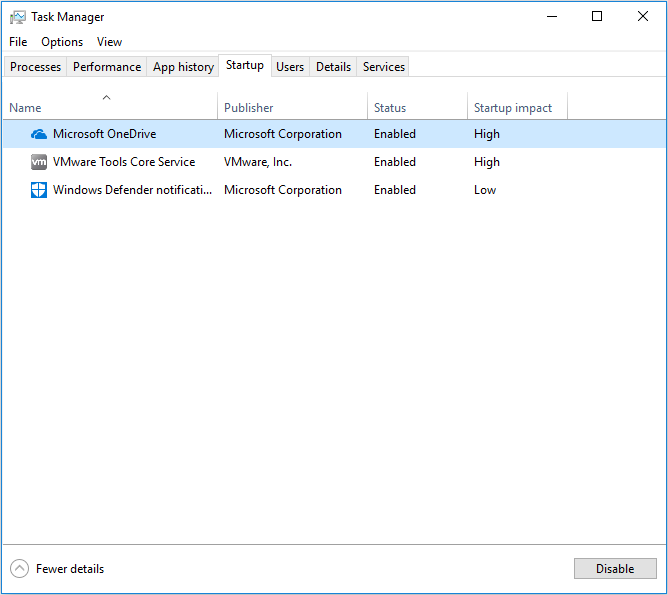
Step 4. Click the Startup tab and select Disable All. If there is no disable all option, then click the Open Task Manager.
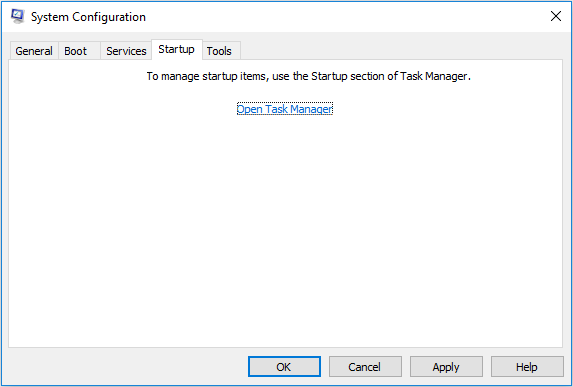
Step 5. Now select each task and click Disable.
Step 6. Restart your computer.
Step 7. Check Don’t show this message or launch the System when the System Configuration Utility window appears.
Solution 4. Repair Corrupted System Files
Corrupted system files could also cause Windows 10 update error code 0x8007007e. You can fix system file corruption to repair Windows Update using these steps:
Step 1. Input cmd in the Windows Cortana search box, right-click the top result, and select Run as administrator.
Step 2. Input the following DISM command to repair corrupted system files and press Enter.
dism.exe /Online /Cleanup-image /Restorehealth
Step 3. After it’s done, input the following SFC command to repair system files and press Enter.
sfc /scannow
After completing the steps above, the corrupted system files should have been repaired and Windows update issue should have been fixed. And you can update Windows 10 again to verify if the error 0x8007007e disappears.
Solution 5. Reset Windows Update Components
This method can help you restart the BITS (Background Intelligent Transfer Service), Cryptographic, MSI Installer and the Windows Update Services and rename the Software Distribution and Catroot2 folders, which will fix error code 0x8007007e. Now follow the steps as below carefully.
Step 1. Input cmd in the Windows Cortana search box. Find the best match and right-click it to choose Run as Administrator.
Step 2. Input net stop wuauserv and press Enter.
Step 3. Input net stop cryptSvc and press Enter.
Step 4. Input net stop bits and press Enter.
Step 5. Input net stop msiserver and press Enter.
Step 6. Input ren C:WindowsSoftwareDistribution SoftwareDistribution.old and press Enter.
Step 7. Input ren C:WindowsSystem32catroot2 Catroot2.old and press Enter.
Step 8. Input net start wuauserv and press Enter.
Step 9. Input net start cryptSvc and press Enter.
Step 10. Input net start bits and press Enter.
Step 11. Input net start msiserver and press Enter.
Step 12. Close the Command Prompt.
Make sure you type the correct command in the Command Prompt window. After completing all steps, try to update Windows again and it should work without any problems.
Solution 6. Download NET Framework 4.7 Offline Installer Package
0x8007007e error Windows 10 may be caused by the missing or damaged Microsoft NET Framework 4.7 package. In this case, you should download the Microsoft NET Framework 4.7 offline installer package.
Step 1. Download NET Framework 4.7 offline installer package from the Microsoft Download Center.
Step 2. Follow the on-screen instructions to install the package.
Step 3. Restart your computer. After that, try to install the required update. The problem should be solved.
Solution 7. Reinstall Windows 10 to Its Latest Version
If none of the above methods can help you, you may reinstall Windows 10 to the latest version with the Windows 10 Media Creation Tool. Anyway, there is no harm in reinstallation and it will only update your computer system to the latest version.
However, before you reinstall Windows 10, you should backup the disk in case of data loss. To backup a disk, it is highly recommended to use MiniTool Partition Wizard Pro Ultimate Edition.
MiniTool Partition Wizard Pro Ultimate Edition is an all-in-one partition manager, which can help you format partition, resize partition, extend partition, check file system, convert MBR to GPT, wipe disk, migrate OS to SSD/HD and so on. It is also a disk cloning software. To copy disk with MiniTool Partition Wizard is very simple. Now follow the step-by-step tutorial.
Step 1. Get MiniTool Partition Wizard Pro Ultimate Edition by clicking the following button. Install it on your computer and launch it to get the main interface.
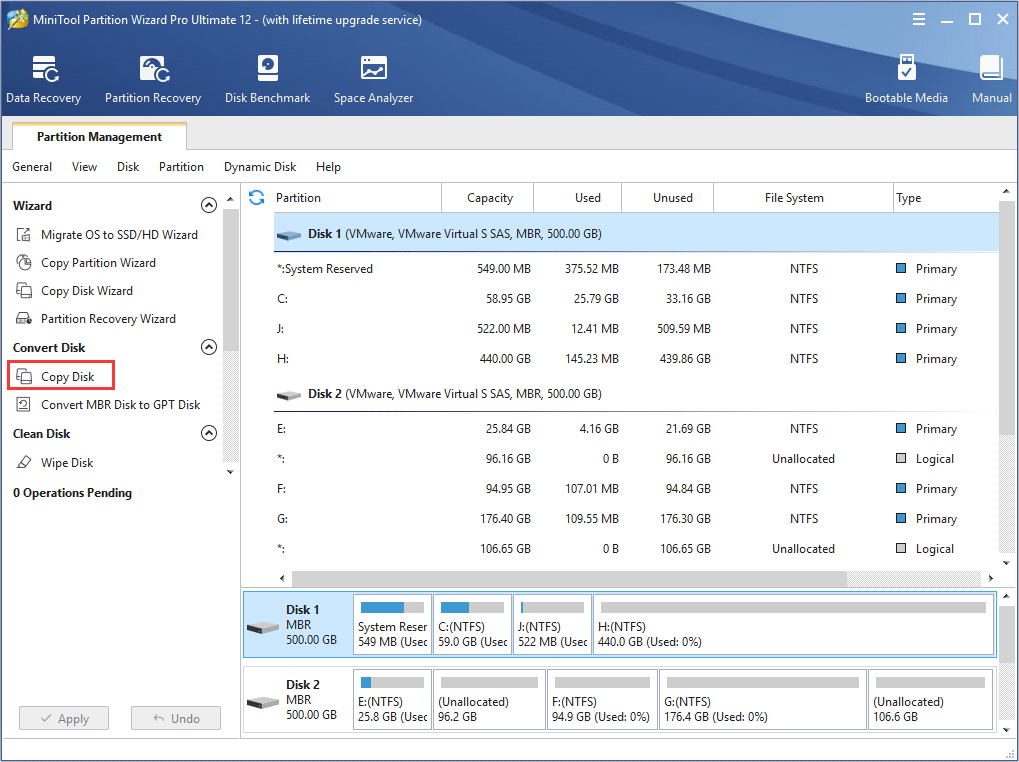
Step 2. Then choose Copy Disk from the left action panel.
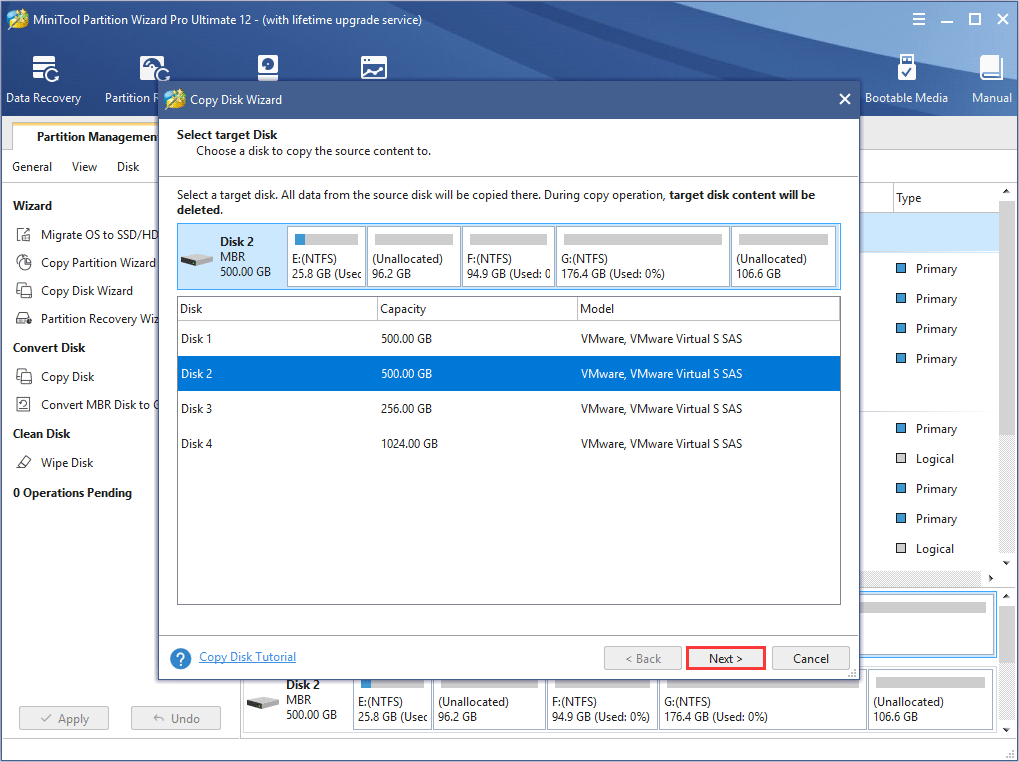
Step 3. Choose a disk to copy the source content to and click Next. And click Yes on the pop-up window to continue.
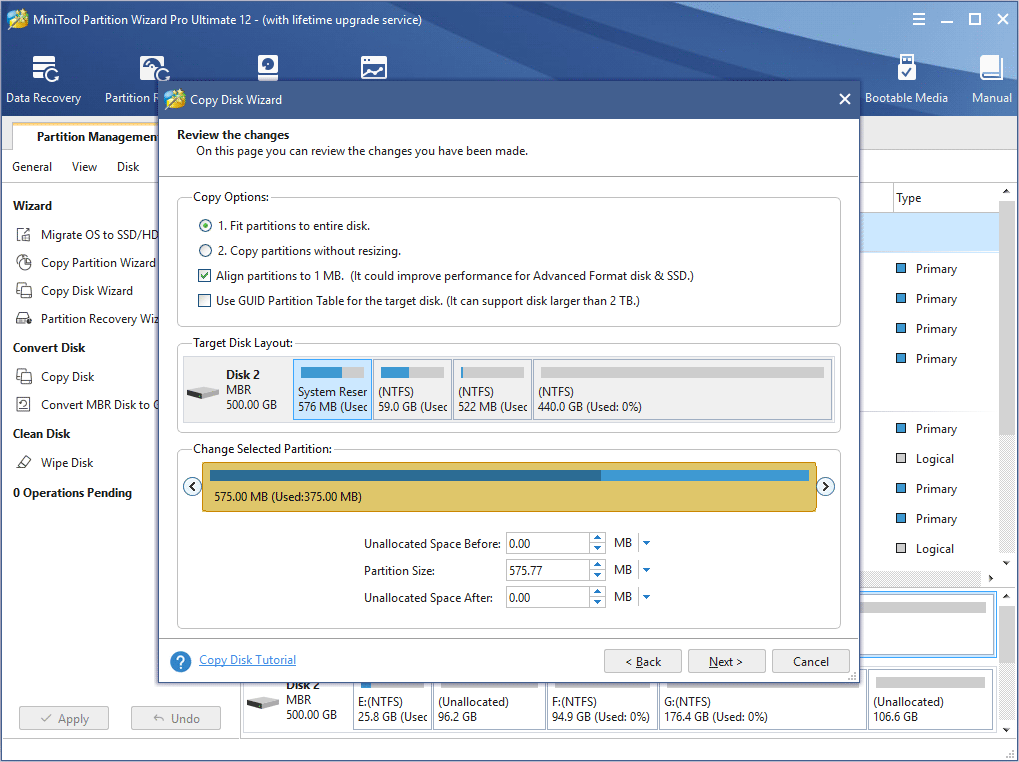
Step 4. Review the changes you are going to make on the target disk. You may also change the copy options by yourself if necessary. And you can also change the partition size by dragging the handle bar. Then click Next to continue.
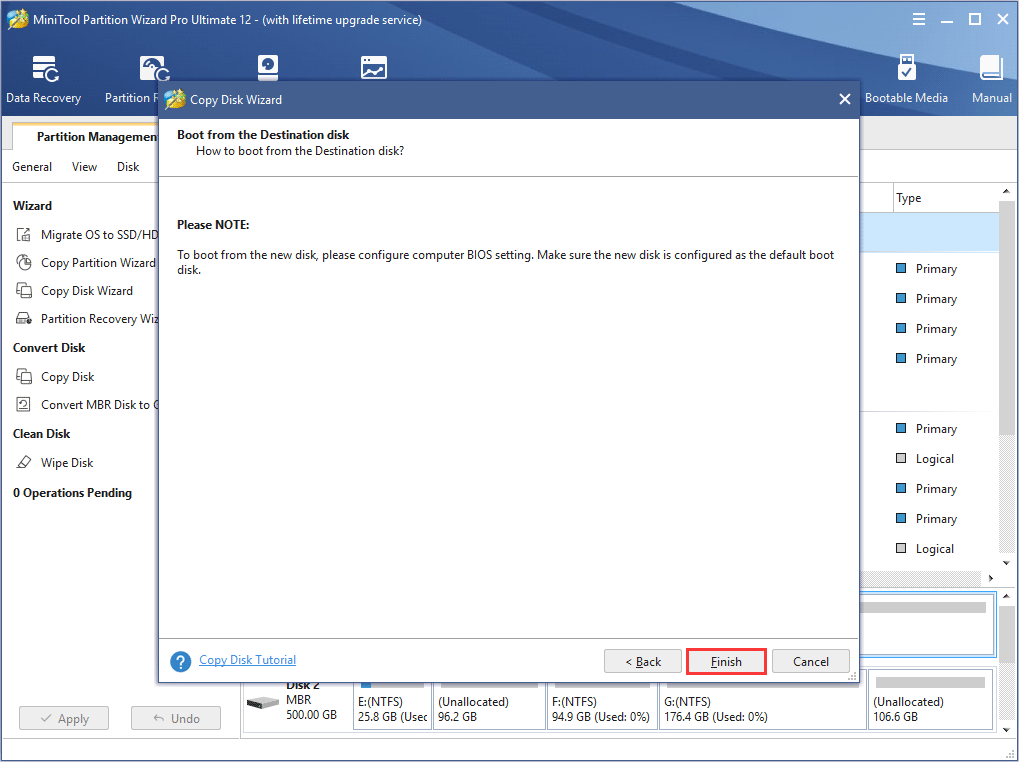
Step 5. On this page, MiniTool Partition Wizard will tell you how to boot from the destination hard drives if you are cloning a system disk. Then click Finish.
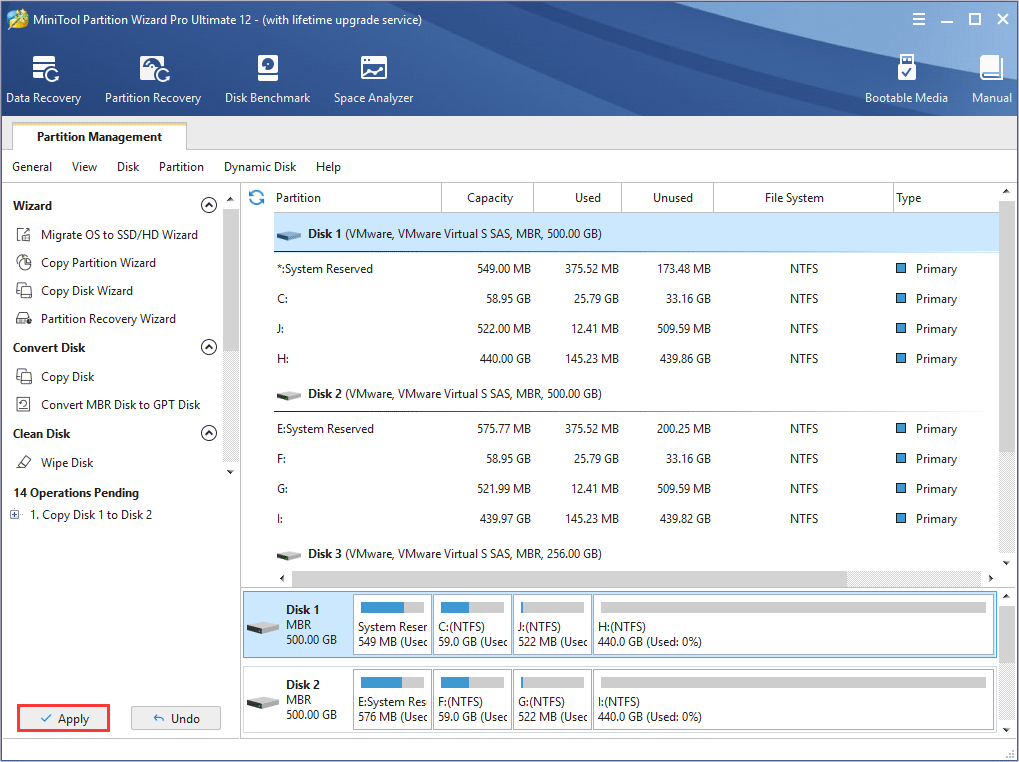
Step 6. On this page, you can preview the changes to be made on the target disk. As you can see, disk 2 has the same disk layout as disk 1. Lastly, you need to click Apply to allow the pending operations.
Now, follow the steps as below to do a clean install of Windows 10.
Step 1. Create a Windows 10 installation media via Microsoft’s Media Creation Tool.
Step 2. Insert the Windows10 installation media USB drive or DVD/CD disc to your computer with error code 0x8007007e and boot from it.
Step 3. Select your language preferences, and click on Next button to continue.
Step 4. Click on Install now.
Step 5. Follow the on-screen instructions to complete the setup configurations.
Step 6. Let it install. The installation process will start and your PC will reboot. When it’s finished, you just need to log in with your account.
Bottom Line
After reading this post, you may find that it’s not so difficult to fix Windows update issues, as there are so many methods to help you. If you get a Windows update error code 0x8007007e, you may try the above 7 methods to fix it. Hope this post helps you out.
If you have any have any question about how to fix Windows 10 update error code 0x80070070 or if you have a better solution, you can leave a message in the following comment zone and we will reply as soon as possible. If you need any help when using MiniTool software, you can contact us via [email protected].

User Comments :