Many users are experiencing the standby memory issue even when they have a large size of RAM. Sometimes the standby memory cache can pile up to several gigabytes, causing a low memory warning, slow computer, or a program crashing. What’s standby memory? How to clear it? Let’s start exploring them.
MiniTool System Booster TrialClick to Download100%Clean & Safe
What Is Standby Memory
Standby memory is a page of physical RAM that is not actively used. When writing a series of frequently used information in the memory area, the programs and services running on Windows 10 will use part of RAM as cache. The cache should be released and made available after executing programs and services. Sometimes, however, the cache may not be deleted due to some bugs.
When the bugs occur, the data stored in the cache memory stays in a permanent waiting state, becoming inactive memory or standby memory. What’s worse, too much standby memory can slow down your computer. This is because Windows will be forced to use the paging file on the hard disk, which should be avoided, especially on an SSD drive. So, it’s necessary to clear the standby memory timely.
How to Check the Windows 10 standby memory Issue
According to user reports, the standby RAM issue can occur when running Windows 10 updates, games, or other programs. Some users also receive the error messages like “memory fault” or “the program cannot allocate the necessary RAM”. How to check if there is a Windows 10 standby memory issue? For that:
Step 1. Press Ctrl + Shift + Esc keys at the same time to open the Task Manager window.
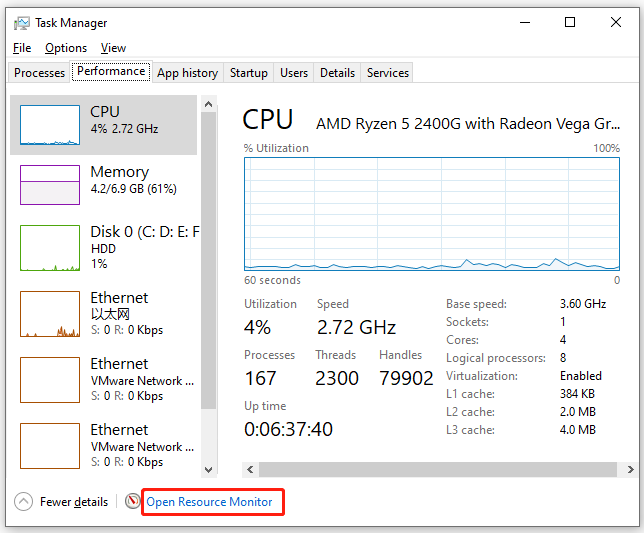
Step 2. Go to the Performance tab and click on Open Resource Monitor at the bottom of the window.
Step 3. Go to the Memory tab and you can view the standby memory Windows 10 you are using. The Blue column represents the standby RAM as the following picture shows. If the standby memory is full, you may encounter the issue.
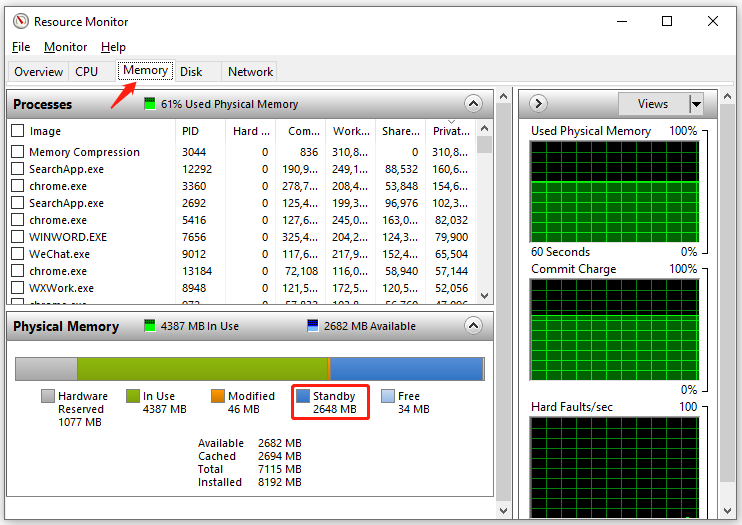
If the standby memory is full, you can proceed with the following part on how to clear standby memory Windows 10.
How to Clear Standby Memory Windows 10
How to clear standby memory Windows 10? The most effective way is to use the RAMMap. It is a practical physical memory usage analysis program that can analyze and manage application memory usage. With this utility, you can empty or reduce the Windows 10 standby memory. Here’s how to use it to clear standby memory.
Step 1. Click here to download the RAMMap program from the Microsoft official website.
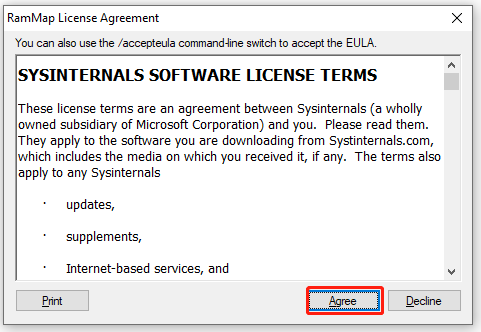
Step 2. Unzip the installation folder, and then right-click the RAMMap.exe file and select Open. Then click on Agree to start installing the program.
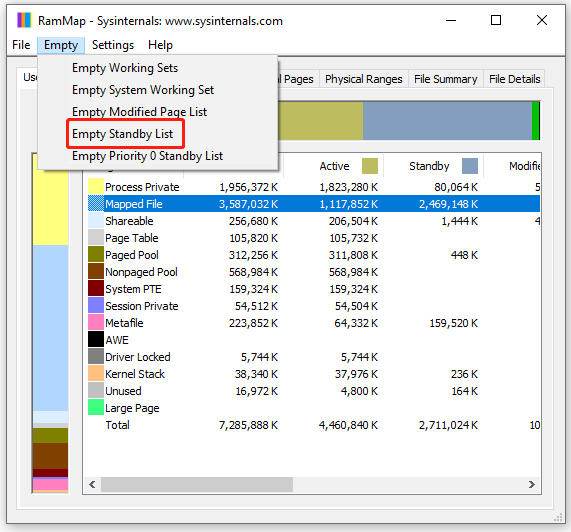
Step 3. Now, the main interface will open and display you a detailed graphical representation of the RAM usage. With the User Counts option selected, select the Mapped File category that represents both active and standby cache memory.
Step 4. Click on Empty from the top menu and select Empty Standby List to free up the standby memory Windows 10.
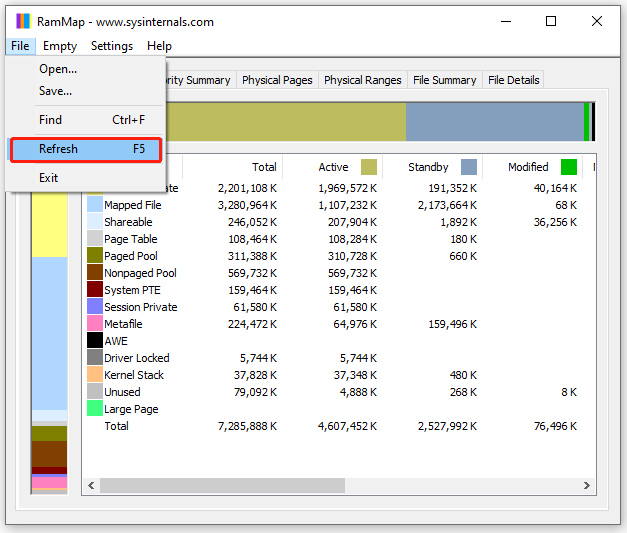
Step 4. Click on File from the top menu and select Refresh to update the panel, then you can check if the standby memory was reduced and the unused one was increased.

![How to Turn off Low Disk Space Warning Windows 10 [Full Guide]](https://images.minitool.com/partitionwizard.com/images/uploads/2021/08/how-to-turn-off-low-disk-space-warning-win10-thumbnail.jpg)
User Comments :