Have you encountered the Windows 11 voice typing not working issue? If you are bothered by it, this post of MiniTool is worth reading. Five solutions to the voice typing not working Windows 11 issue are offered.
Though voice typing won’t working due to various reasons, it can be fixed by the following solutions.
Solution 1: Check If the Microphone Is Enabled
Windows 11 voice typing won’t work if the microphone is not enabled. If you receive the discussed issue, you can check that in Windows Settings using the steps below.
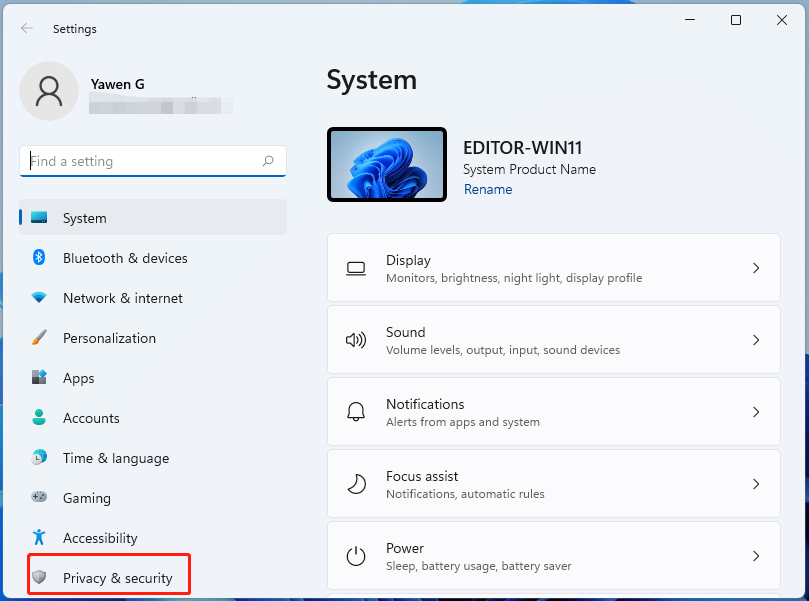
Step 1: Open Settings by holding Windows and I keys, and then click Privacy & security in the left panel.
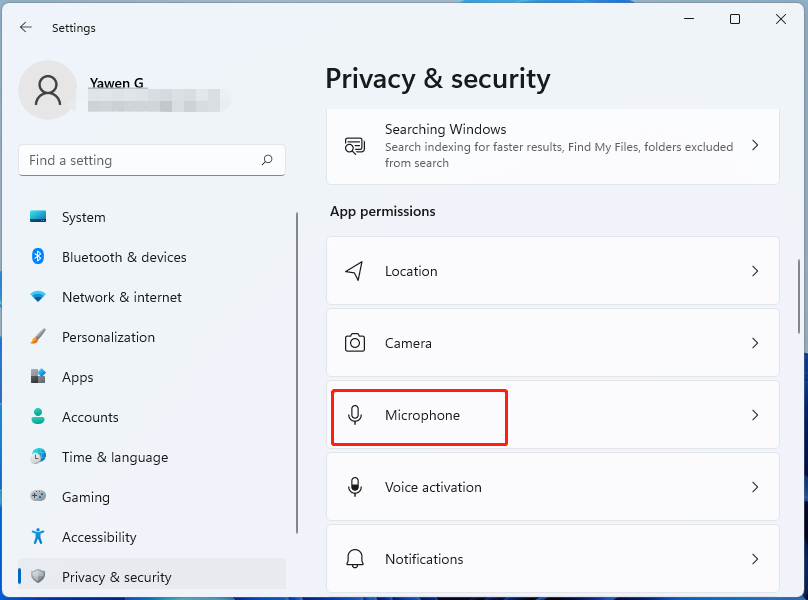
Step 2: Scroll down the content on the right side of the next window to find and click Microphone.
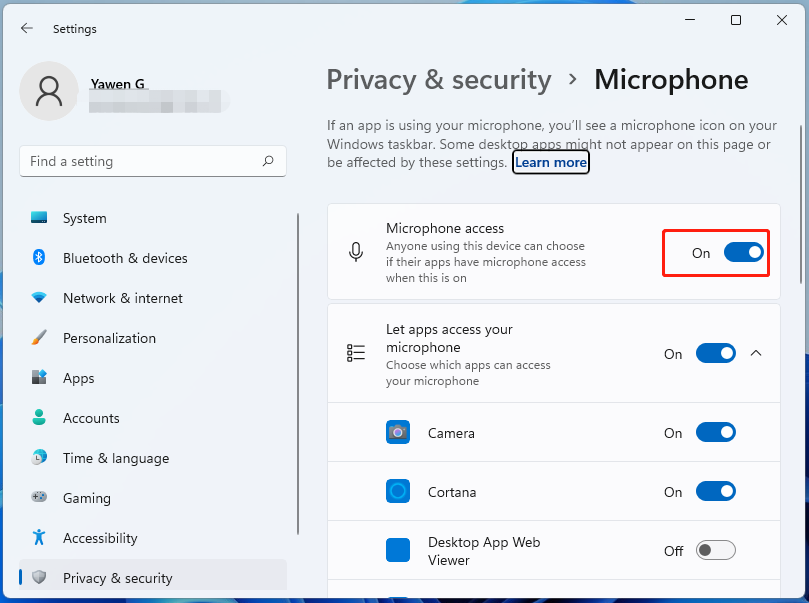
Step 3: Set the status of Microphone access to On.
Solution 2: Check the Connection of Microphone
It is necessary to check the connection of the microphone if you use an external one. It is very likely that the voice typing not working Windows 11 issue is caused by the messy connection order. You can fix that by removing the jack or USB whichever your microphone uses, and then cleaning and reconnecting it.
After that, check if the voice typing not working issue is solved. If not, connect the same microphone to another system and check if works properly. If so, the fault lies with your computer and you should try other solutions to fix the issue.
Solution 3: Pick the Correct Language for Speech
If the words are not entered correctly, you should check if you choose the correct language for voice typing.
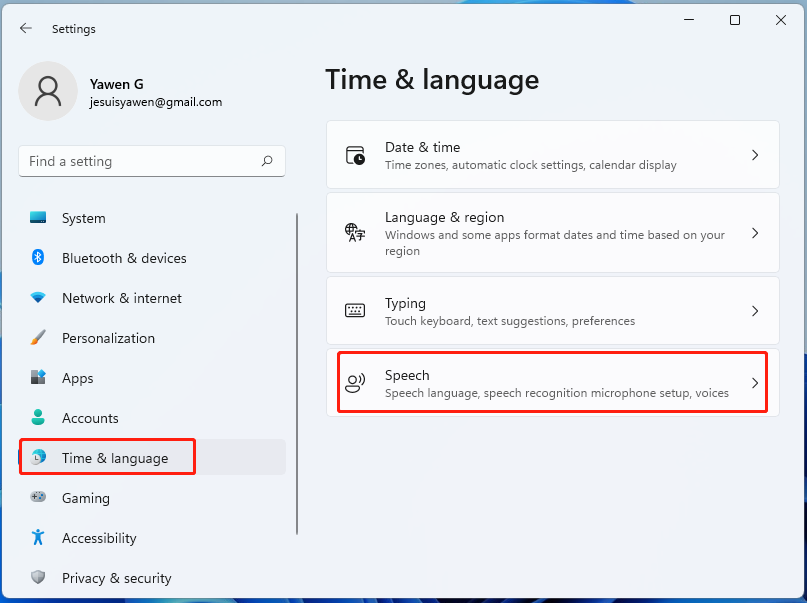
Step 1: Likewise, open Settings by pressing Windows and I keys. Then choose Time & language.
Step 2: In the next window, scroll down the content on the right panel to find and click Speech.
Step 3: Pick the desired option from the Choose the language you speak with your device drop-down menu and check the Recognize non-native accents for this language option.
Step 4: Under the Microphone section, click Get started.
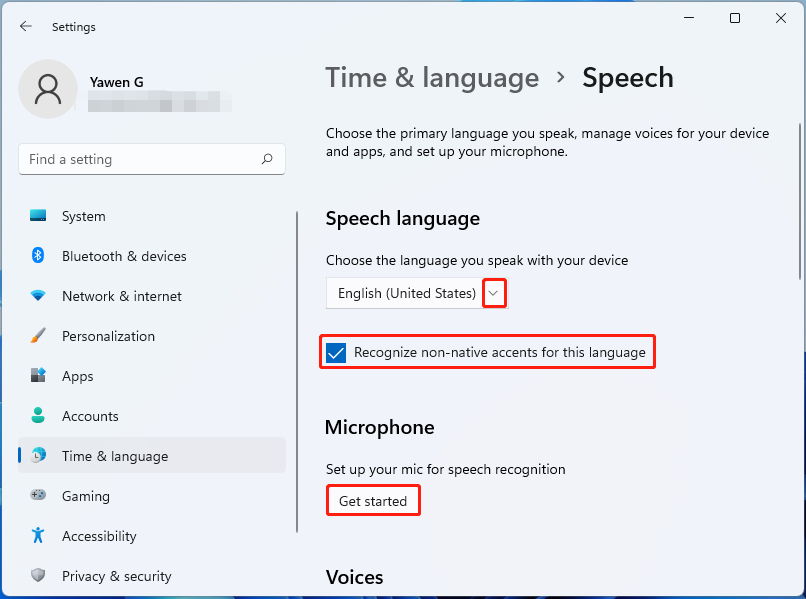
Step 5: Follow the on-screen instructions to finish the operation.
Solution 4: Run the Troubleshooter
Windows built-in troubleshooter can also help you fix the Windows 11 voice typing not working issue. You can execute the operation with the given steps.
Step 1: Open Settings and click System.
Step 2: Click Troubleshoot on the right side of the window.
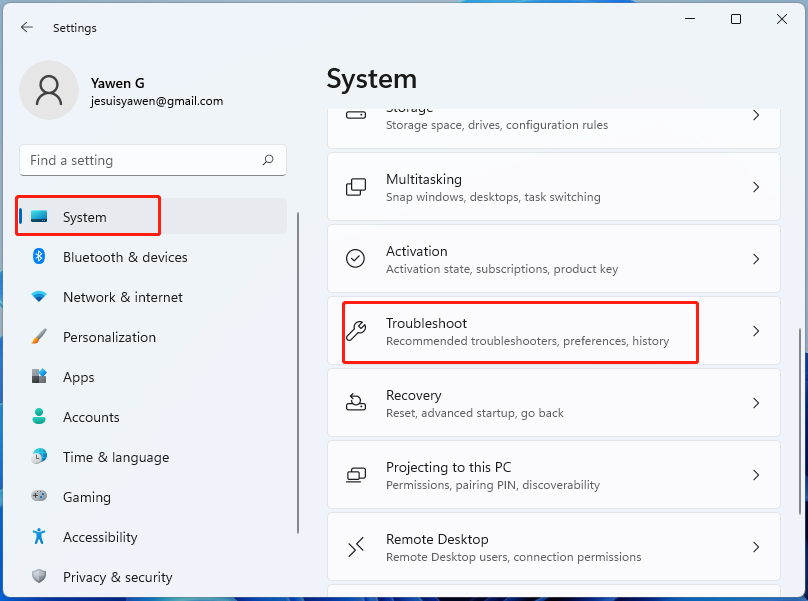
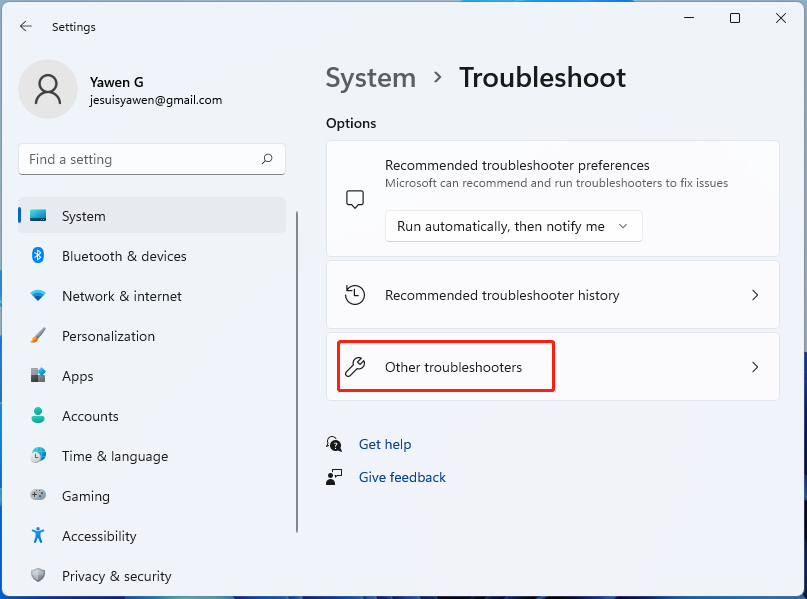
Step 3: In the next window, click Other troubleshooters.
Step 4: Find Recording Audio and click on its Run button.
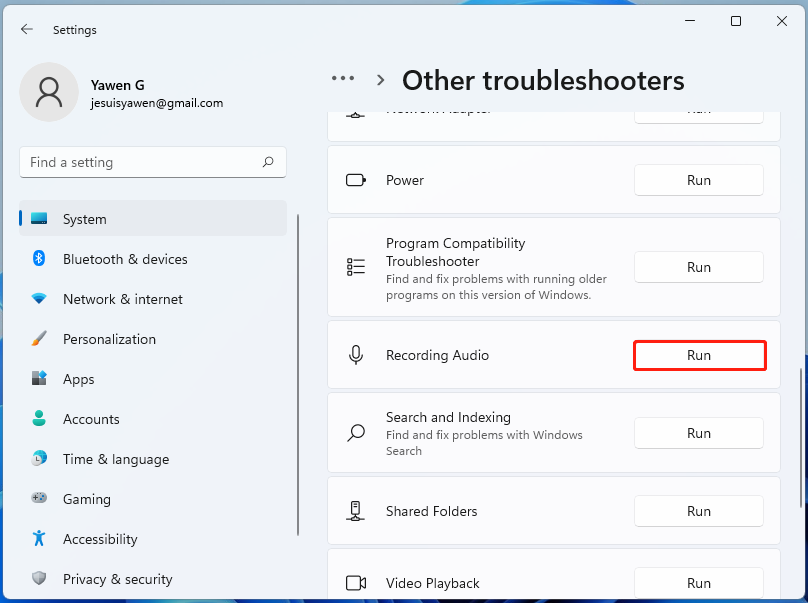
Step 5: Then the troubleshooter will automatically run. Simply follow the prompted instructions to complete the operation.
Solution 5: Update Windows 11
Sometimes, updating OS to the latest version fixes the Windows 11 voice typing not working issue. To update Windows 11, you can follow these steps.
Step 1: Press Windows and I keys to open Settings and then click the Windows Update tab in the left panel.
Step 2: Click Check for updates to scan for an update.
Step 3: If there is an update listed after scanning, click the Download & install button to move forward.
Step 4: Follow the prompted instructions to finish the operation.
Are you still seeking methods to fix the Windows 11 voice typing not working issue? Here are 5 solutions for you. Pick one according to your condition to solve the error.

User Comments :