If you installed Windows 10 version 1903, the night light Windows 10 not working issue may happen to you. The light wont’ turn on even you click the Turn on now button or Schedule night light option. Here, MiniTool will illustrate some solutions to turn on the Windows 10 night light.
Night light is a feature on Windows 10 that can reduce the blue light on the screen to ease eye strain and improve sleep quality. The feature is similar to Apple’s Night Shift and Android’ Night mode.
Once the Windows 10 night light not working issue occurs, you may feel inconvenient. So, how to fix Windows 10 night light not working? Here, four methods will be given to you. Keep reading the following part to obtain detailed information to turn on your Windows 10 night light.
Fix 1: Update Graphics Driver
To solve the Windows 10 night light not working issue, you should manually install the latest video driver by visiting your PC manufacturer’s support website to download it. Then follow the given instructions to update your driver.
As for the Intel graphics, you can get the latest driver with the help of Intel® Driver & Support Assistant tool. For DEM system like Dell and HP, you can also utilize its supporting tool (Dell SupportAssist) to get the latest driver.
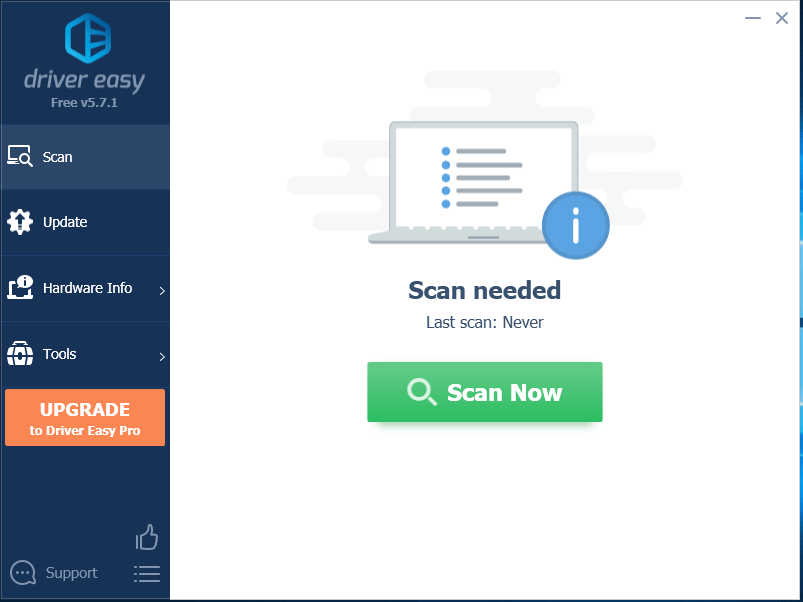
If you don’t know how to update the driver, you can also a professional third-party program to do that. Driver Easy Pro can detect all outdated drivers and update them with just one click. Here is the guide:
Step 1: Install Driver Easy and launch it. Click the Scan Now button.
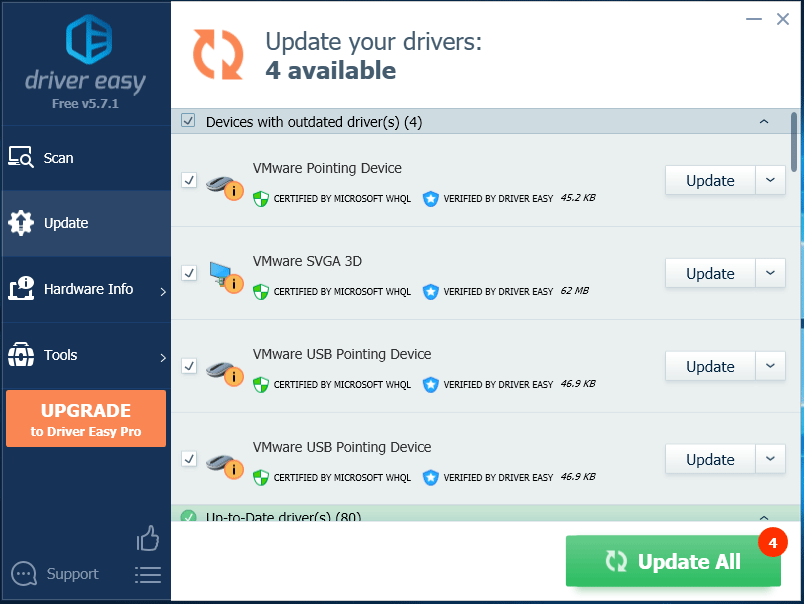
Step 2: After the scanning process is completed, click the Update All button to download and install the latest drivers for all devices with outdated drivers.
Fix 2: Reset Night Light Settings Manually
Resetting night light settings manually in registry editor is also helpful for fixing the Windows 10 night light not working issue. There is one thing you need to notice is that improperly modifying the Registry can lead to serious problems.
So, it is strongly recommended to make a complete system backup before starting the follow operation.
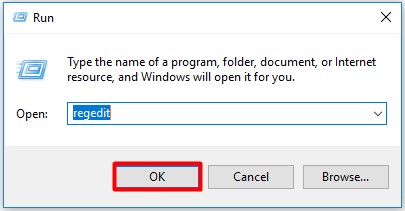
Step 1: Press Win plus R key to open the Run window. Type regedit in the window, and then click the OK button to open the registry editor.
Step 2: Navigate to the destination by following the path below:
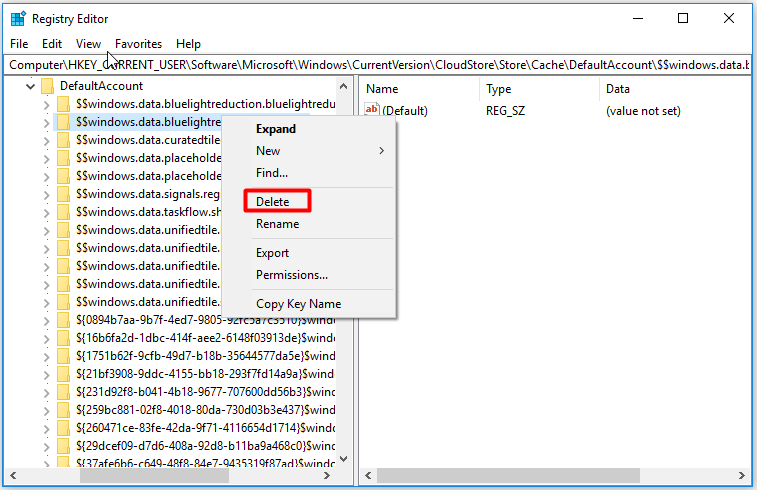
ComputerHKEY_CURRENT_USERSoftwareMicrosoftWindowsCurrentVersionCloudStoreStoreCacheDefaultAccount
Step 3: Right click and select the Delete option to remove the following two folders
$$ windows.data.bluelightreduction.bluelightreductionstate
$$ windows.data.bluelightreduction.settings
Step 4: Reboot your computer to check whether the night light Windows 10 not working is solved or not.
Fix 3: Disable Fast Startup to Bring Back Night Light
Fast startup is a combination of cold startup and the hibernate. If you turn off the computer with fast startup enabled, the user accounts will be logged off completely. The way system enters the hibernate mode is not the traditional cold shutdown form. In this way, the next boot up till the login screen will be faster (30-70﹪).
Therefore, disabling Fast Startup and rebooting the system can help you bring back the Night Light.
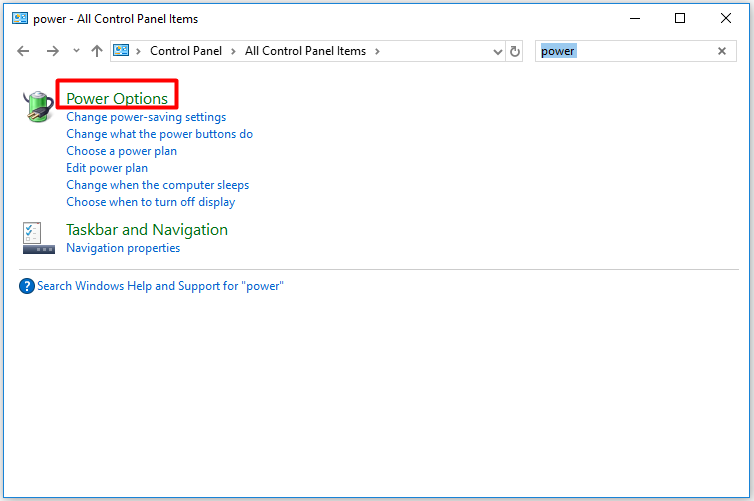
Step 1: Find and open Control Panel in the search box, and then find Power Options in the Control Panel page.
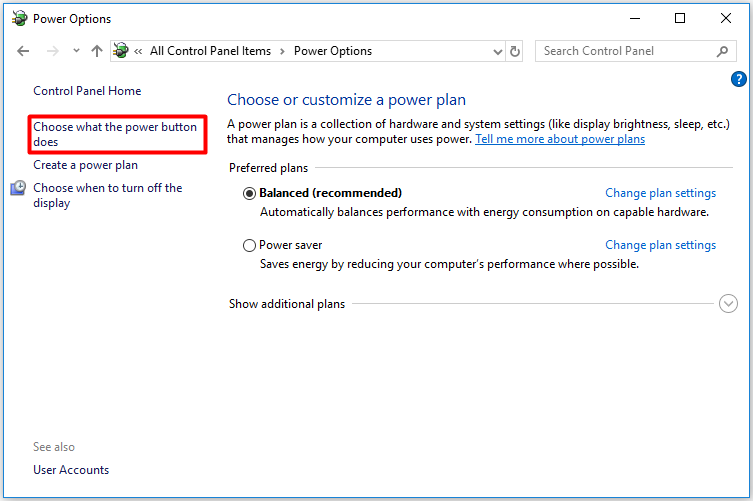
Step 2: Click on Choose what the power button does.
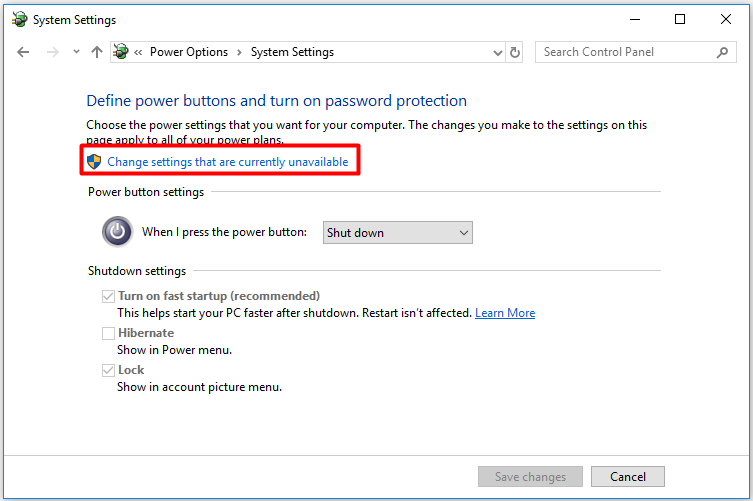
Step 3: Click Change settings that are currently unavailable to go on.
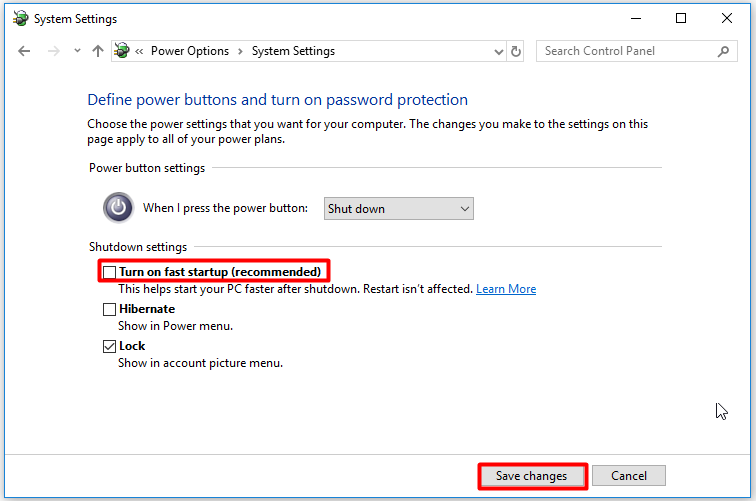
Step 4: Uncheck the Turn on fast startup (recommended) box, and then click Save changes.
Fix 4: Reinstall Windows 10
If all the above fixes fail to work, reinstalling Windows 10 will be a trump card for you. Alternatively, update your Windows to the KB4501375 version. The Windows 10 update version KB4501375 has patches to fix the Windows 10 night light not working issue, so you can install this version on your computer.


User Comments :