Wi-Fi Direct Windows 10 is a type of wireless connection that allows you to communicate wirelessly like using Bluetooth. Is Wi-Fi Direct supported by your Windows 10 PC? How to use Wi-Fi Direct Windows 10? Now, Pick up this full guide of MiniTool.
What Is Wi-Fi Direct Windows 10
Apart from using Bluetooth, any alternative feature to help you establish a wireless communication? Yes, it is. Wi-Fi Direct Windows 10 provides the peer-to-peer wireless connections that enable 2 devices to establish a direct Wi-Fi connection without using a wireless router.
It’s much like using Bluetooth. With Windows 10 Wi-Fi Direct feature, you can share files, browse the Internet, and communicate with one or more devices at the same time. Even though these devices come from different manufacturers.
Wi-Fi Direct for PC is supported on Windows 10 IoT Core devices by using a Wi-Fi Direct enabled USB Wi-Fi adapter. Thus, you need to make sure that your USB Wi-Fi adapter and its corresponding driver is supported by Wi-Fi Direct.
How to use Wi-Fi Direct Windows 10? Please keep reading the following context.
Check the Compatible Support for Wi-Fi Direct Windows 10
To set up Windows 10 Wi-Fi Direct on your PC smoothly, the first thing you need to do is to check if this feature is supported by your Windows 10 PC. Now, follow this quick guide below to check the support compatibility of the Wi-Fi Direct feature.
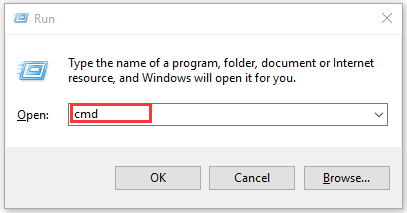
Step 1. Press Win + R keys to call out the Run dialog box, and then type cmd in the box and hit Enter.
Step 2. In the command prompt, type the ipconfig/all command and hit Enter.
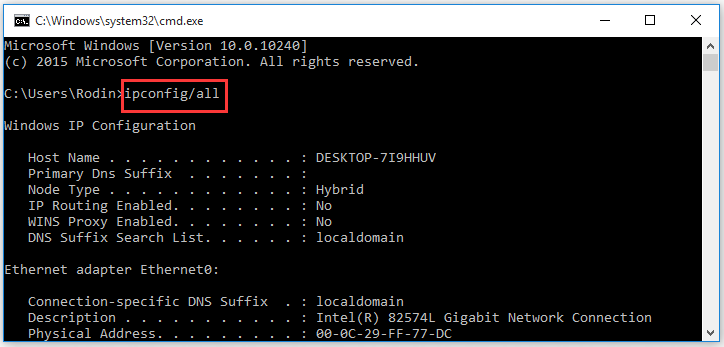
Now, you can check the support compatibility in the command prompt screen. If the device is compatible with the Wi-Fi Direct for Windows 10, you can follow the guide below to set up this feature on Windows 10 PC.
How to Use the Wi-Fi Direct Windows 10
To use Wi-Fi Direct Windows 10 for your desired devices, you can follow the steps below to connect the Wi-Fi Direct network to your PC. For that:
Step 1. Turn on the desired device and connect it to your computer.
Step 2. Press Win + I keys to open the Settings window, and then navigate to the Network & Internet option and select Manage WiFi Settings.
Step 3. Find the Wi-Fi Directive alternative through the menu. Here note the network name (SSID) and its passcode. You will need them later.
Step 4. Restart your computer, and then type wireless in the Windows search bar and click on the Manage Wireless Networks from the context menu.
Step 5. In the pop-up window, click on the Add button and select the Wi-Fi network of your Wi-Fi Direct device and enter its passcode.
Now, your Windows 10 PC should be connected to the Wi-Fi Direct network. If you want to connect the Windows 10 Wi-Fi Direct Printer for file sharing, you can follow the instruction below.
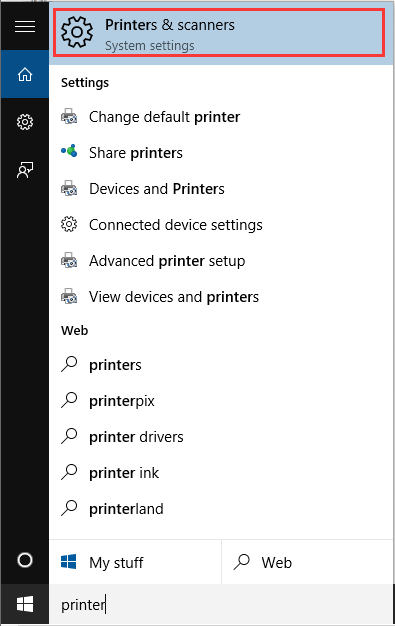
Step 1. Type printer in the search bar and select Printers & scanners from the context menu.
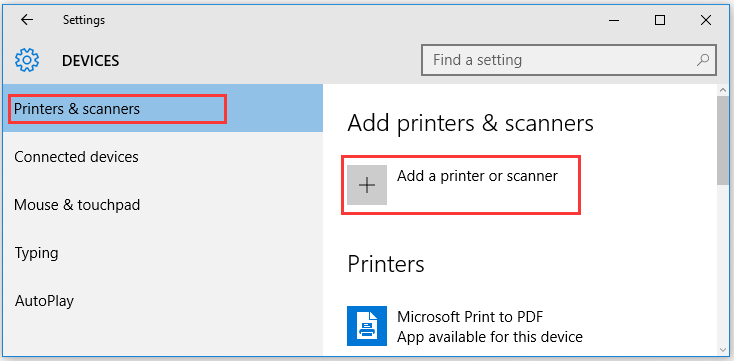
Step 2. Click the Add a printer or scanner option on the right pane.
Step 3. After a moment, select the Show wifi direct printers option.
Step 4. Then select the required printer that you want to connect from the list of printers or scanners displayed.

![How to Connect to 5GHz Wi-Fi on Your Laptop [Complete Guide]](https://images.minitool.com/partitionwizard.com/images/uploads/2020/02/how-to-connect-to-5ghz-wifi-thumbnail.jpg)
User Comments :