When you install Windows with USB, you may need to delete some partitions for some reason. However, you may fail to do that, and Windows Setup tells you “We couldn't delete the selected partition”. This post from Partition Magic shows you how to solve the issue.
If there is something wrong with your computer, you may need to clean install or reinstall Windows using a USB drive. Then, when Windows Setup asks you where you want to install Windows, it offers you tools to delete, format, or extend the partitions, or create a new partition.
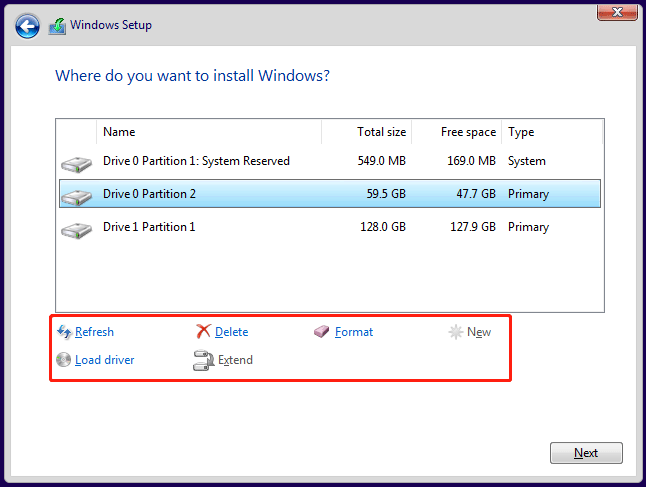
However, when you delete a partition, you may receive the “we couldn’t delete the selected partition” error. In addition, the error codes may be various, including 0x80070017, 0x800701b1, 0x8007045d, 0x80070032, 0x80070057, 0x80070001, etc.
The causes of the “Windows Setup we couldn’t delete the selected partition” error may be various, but you can try the following ways to fix it.
Way 1. Format the Selected Partition
If you can’t delete the selected partition, format it first. On the same page, select the partition you want to delete and then click the Format button. Follow the wizard to complete the formatting process. Then, try deleting the partition again. If this method doesn’t work, keep going on.
Way 2. Recreate the Windows Installation Media
First, you should make sure you are using the Microsoft official tool to create the Windows installation media. Second, make sure the Windows installation media creation process is correct and smooth. No accident corrupts the Windows installation image. Third, make sure the USB drive is fine. You can try another USB drive if necessary.
Way 3. Delete the Partition Using MiniTool Partition Wizard
MiniTool Partition Wizard is a professional disk and partition management tool. Sometimes, if Windows fails to delete or format a partition, it may solve the issue. Besides, it can create a bootable USB and then you can use this USB to manage the disks and partitions when the PC won’t boot.
How to use MiniTool Partition Wizard to delete a partition when there is no OS or the PC won’t boot? Here is the guide:
MiniTool Partition Wizard DemoClick to Download100%Clean & Safe
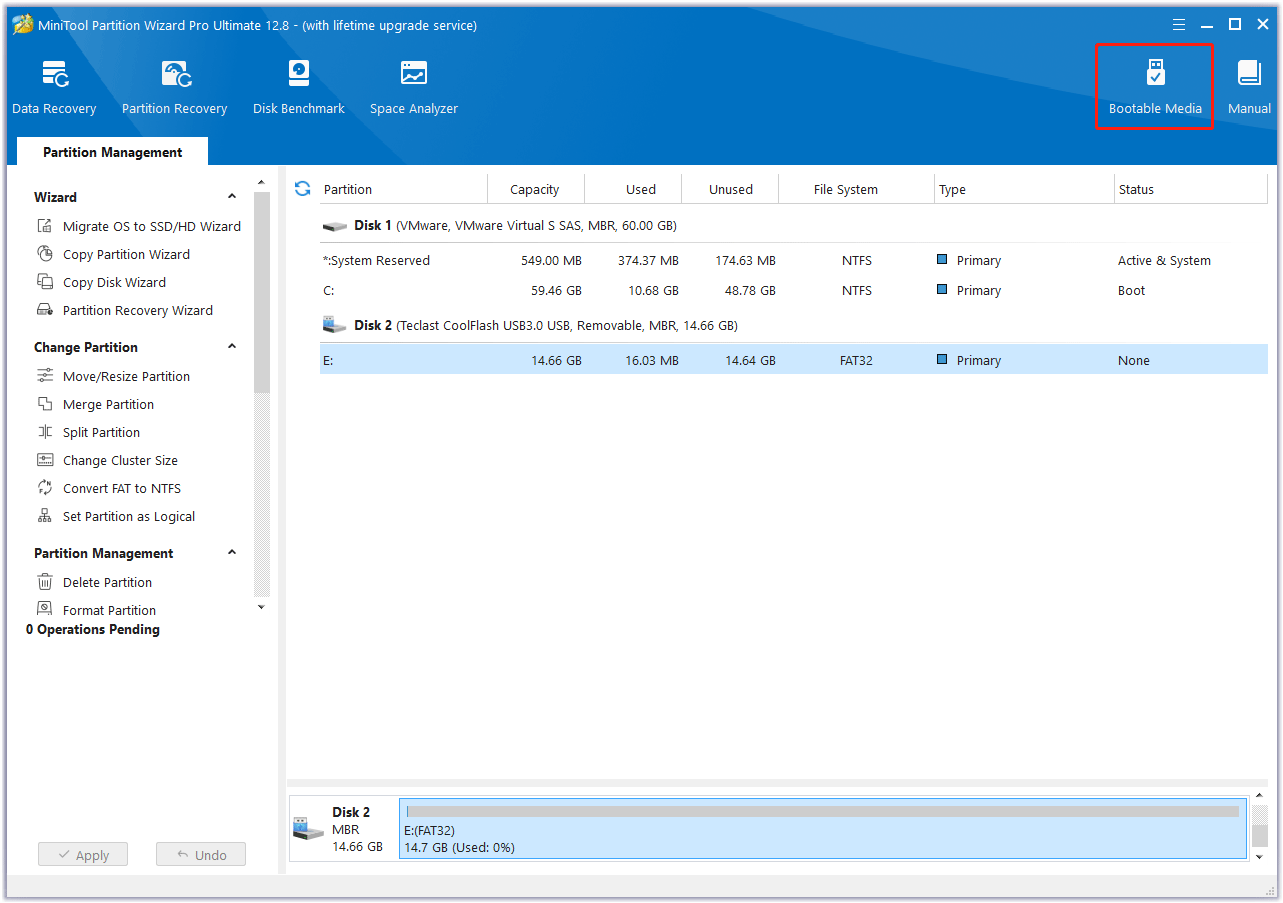
Step 1: Connect a USB drive to a well-running computer. Download and install MiniTool Partition Wizard on this computer. Launch this software and click Bootable Media in the top right corner.
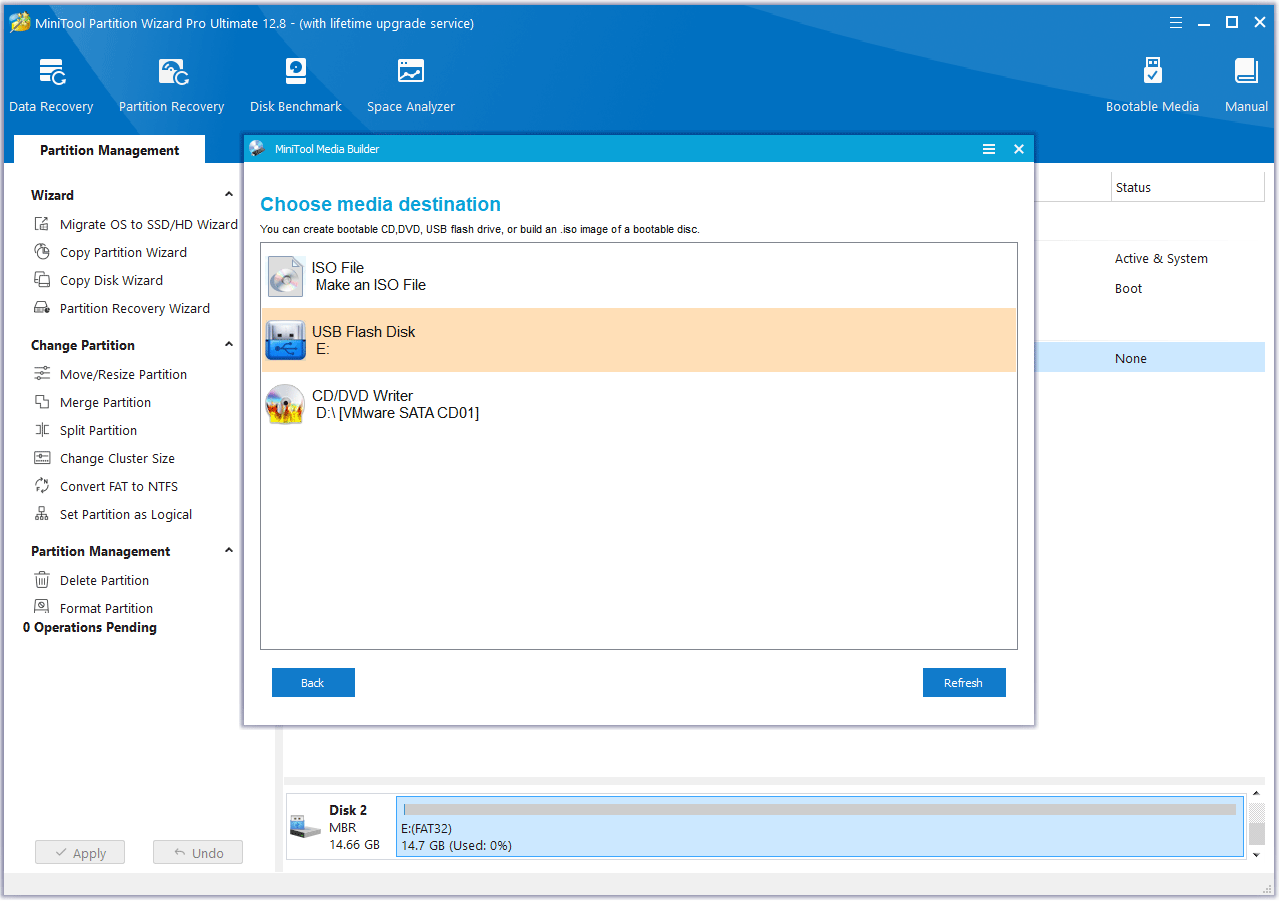
Step 2: On the pop-up window, click WinPE-based media with MiniTool plug-in and then select the USB drive as the media destination. A note window will pop up. Read it and click Yes. The bootable USB will be created and you just need to wait until the process is completed.
Step 3: Connect the bootable USB to the computer where the “Windows Setup we couldn’t delete the selected partition” error occurs. Make sure this computer is shut down. Then, power on the computer and press the boot menu key immediately (Esc, F2, F10, or F12) once the PC logo appears. On the pop-up window, select the USB drive to boot your computer.
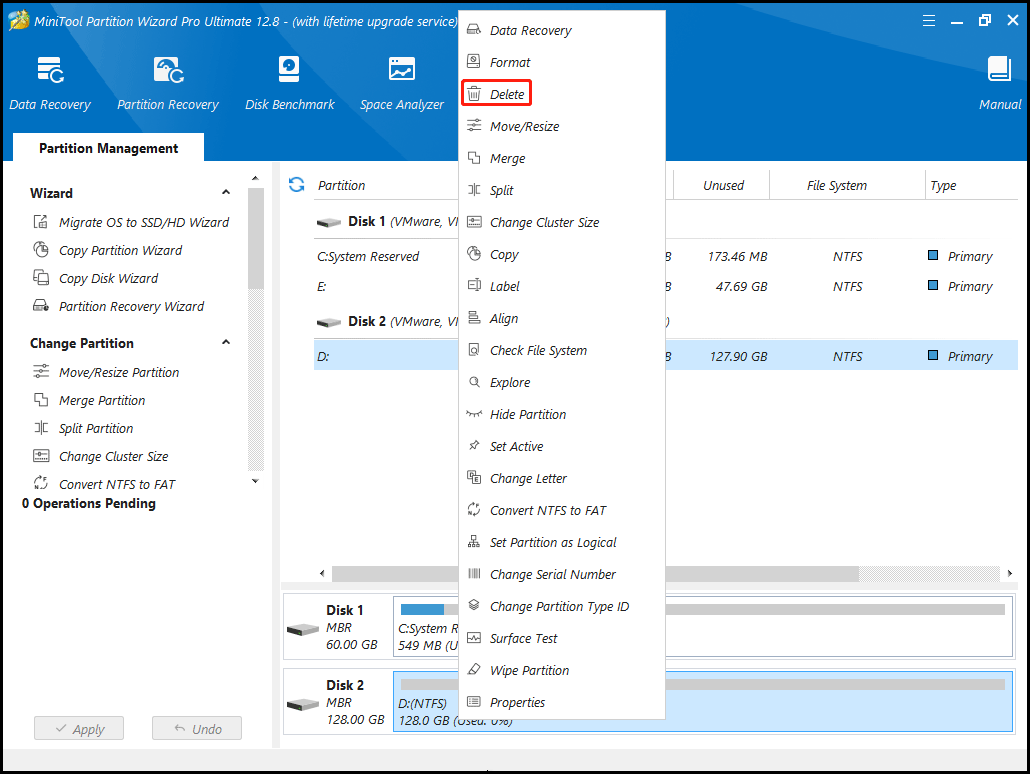
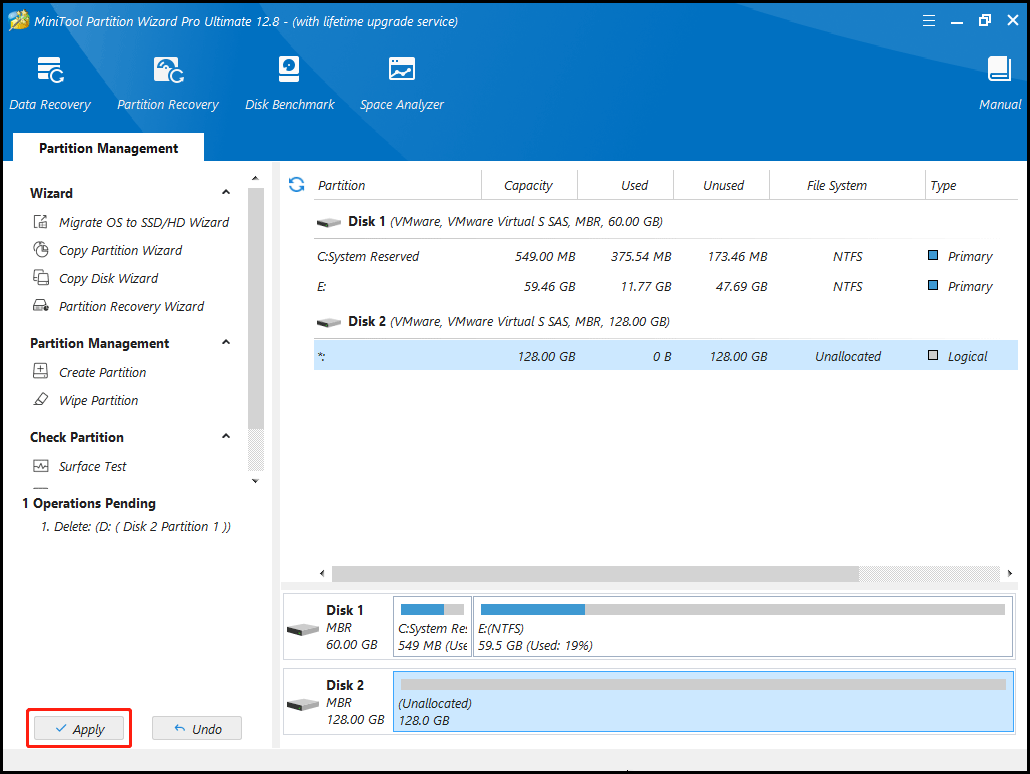
Step 4: After the computer booting from the bootable USB, click the OK button twice. Then, wait until the MiniTool Partition Wizard’s main interface opens automatically. Now, right-click on the partition you want to delete and then select Delete from the context menu.
Step 5: Click the Apply button to execute the pending operation.
Way 4. Clean the Entire Disk
If all the above methods don’t work, you can try cleaning the entire disk. Note that this method will delete all data and partitions on the disk. If you have important files on the disk, back up or recover them in advance. To clean the disk, you can use the following 2 ways.
Way 1. Use Windows Installation Media
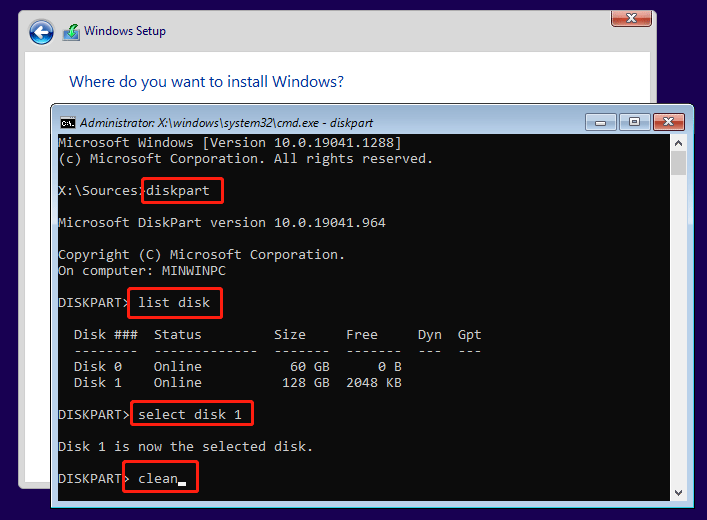
Step 1: When you get the “Windows Setup we couldn’t delete the selected partition” error, press Shift + F10 or Shift + Fn + F10 to open Command Prompt.
Step 2: Execute the following commands one by one to clean the disk.
- Diskpart (this will open the DiskPart tool)
- List disk
- Select disk * (* is the disk number of the hard drive that you want to clean)
- Clean
Way 2. Use MiniTool Partition Wizard
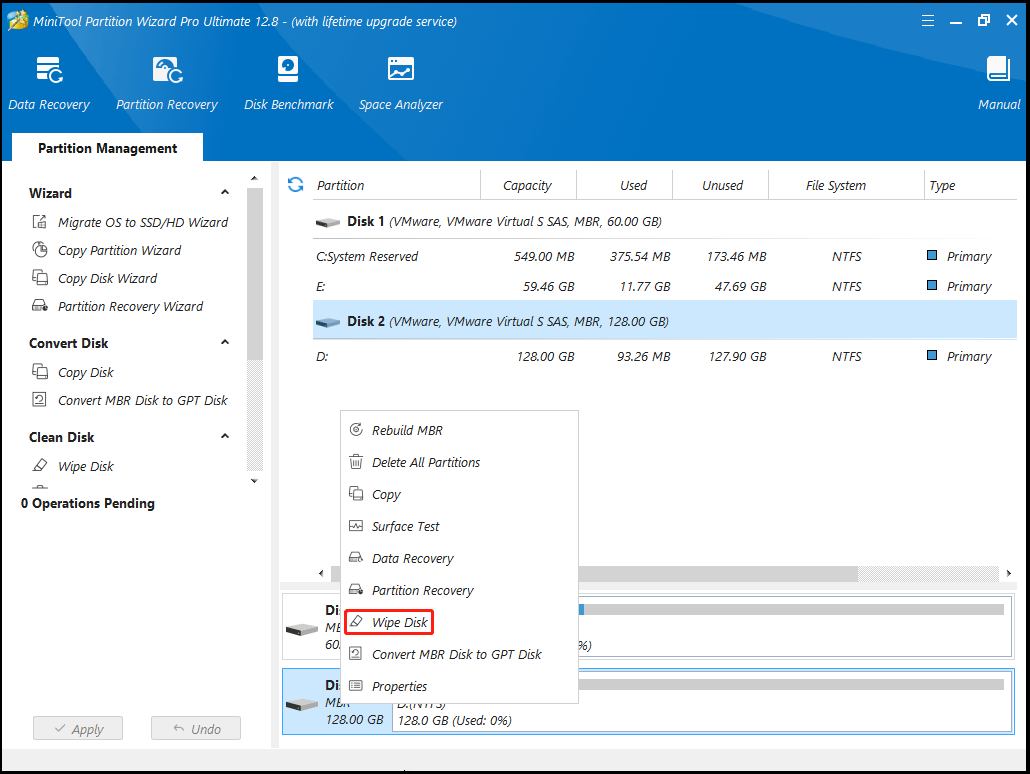
Step 1: Boot the computer with the bootable USB and wait until MiniTool Partition Wizard opens. Right-click the disk you want to clean and choose Wipe Disk.
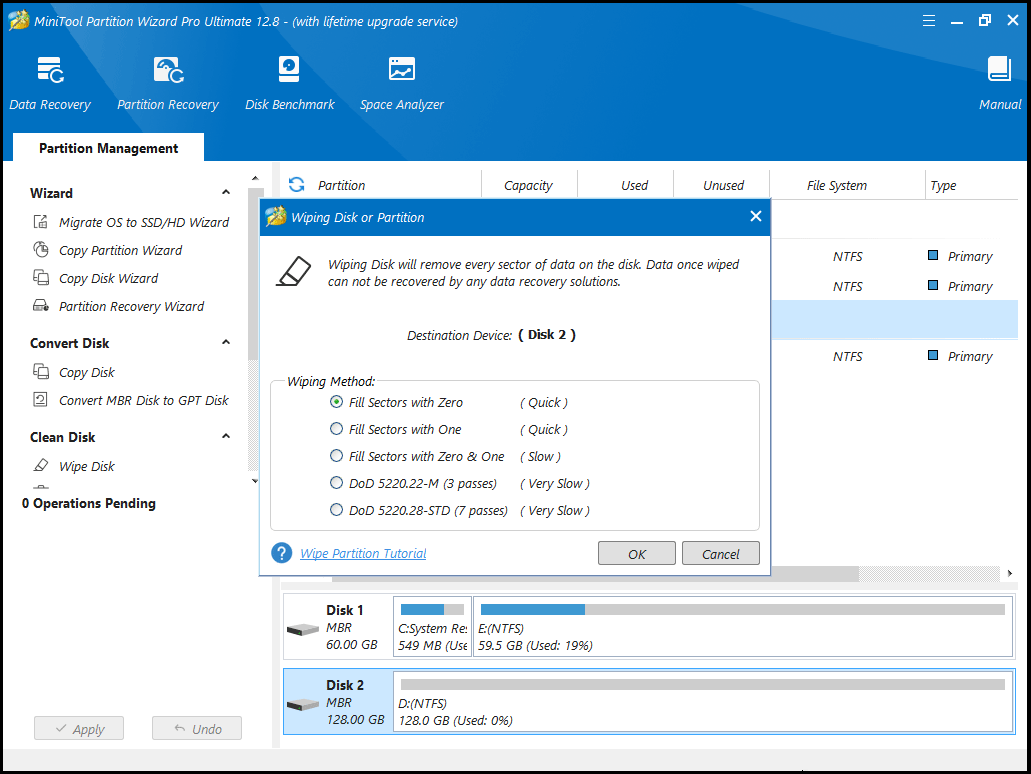
Step 2: On the pop-up window, keep the default option and then click OK.
Way 5. Check for the Hardware Errors
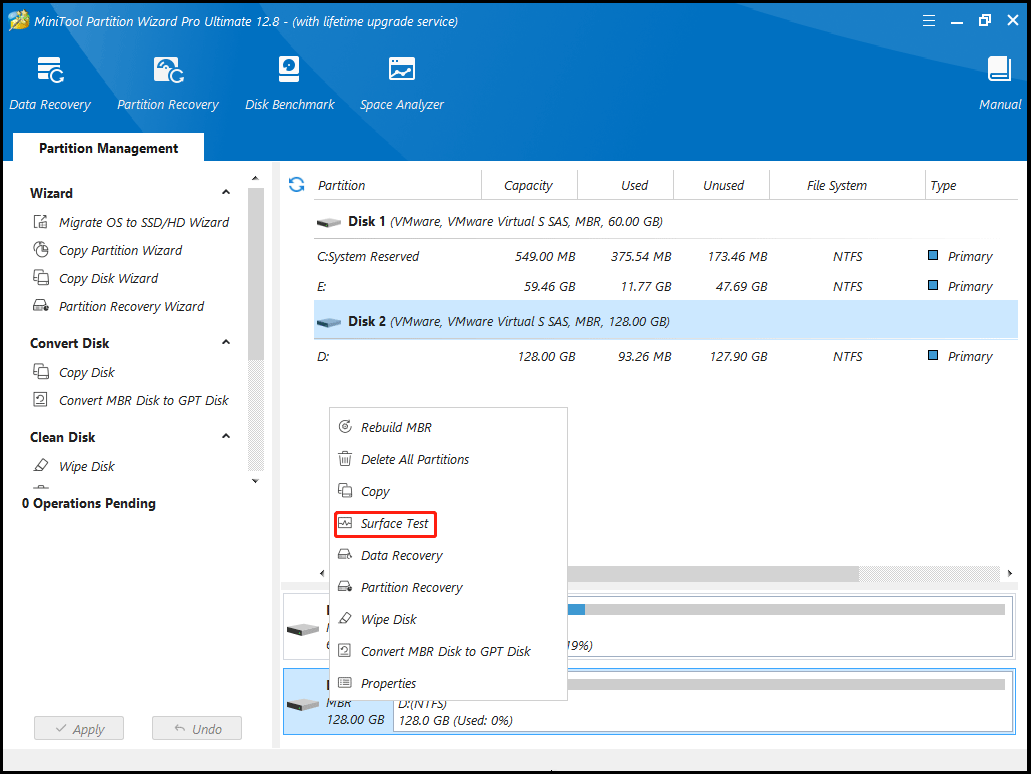
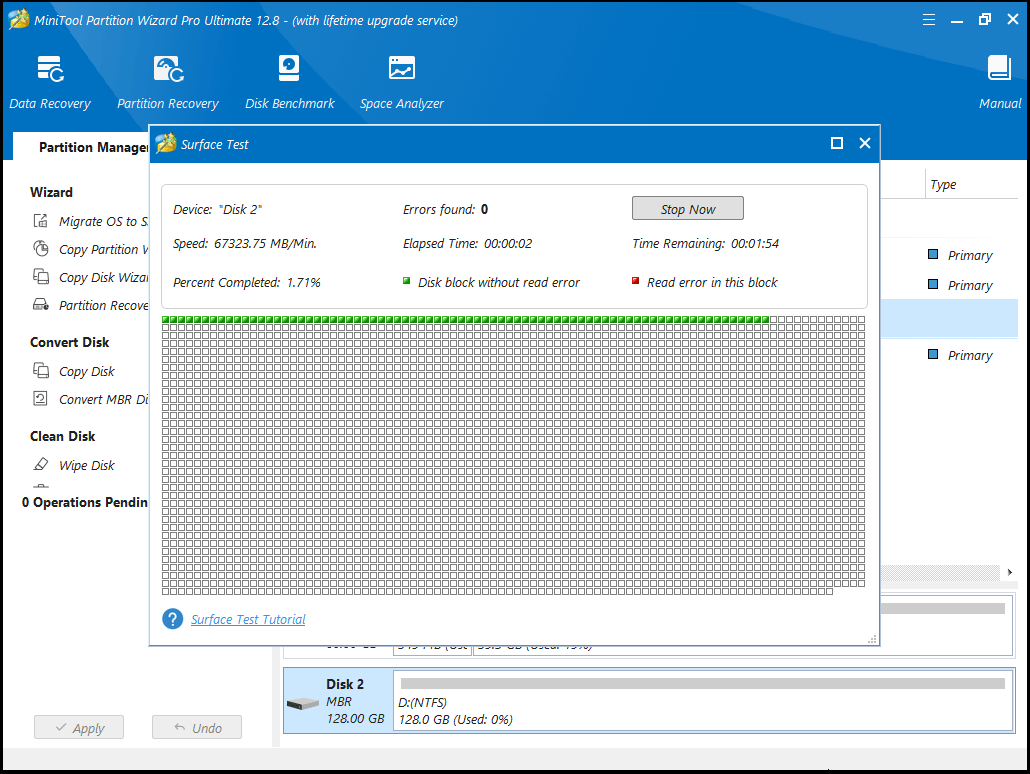
If all the above methods fail to solve the issue, the reason may be that the hard drive is failing. You can check that using S.M.A.R.T tools. You can also use MiniTool Partition Wizard to check that. If this software detects bad sectors or blocks, the hard drive is failing and you need to replace it.
How to check for hard drive errors using MiniTool Partition Wizard? Here is the guide:
Step 1: Boot the computer with the bootable USB and wait until MiniTool Partition Wizard opens. Right-click the disk that you want to check and choose Surface Test.
Step 2: On the pop-up window, click Start Now. If bad sectors or blocks are found, they will be marked with red color.
Bottom Line
Windows Setup may tell you “We couldn’t delete the selected partition” when you delete a partition during the Windows installation. This post offers you 5 solutions to this issue. If you encounter issues when using MiniTool Partition Wizard to solve the error, contact us via [email protected]. We will get back to you as soon as possible.

User Comments :