The DiskUsage.exe tool can be used to analyze the contents of any drive or folder on Windows 11. This post from MiniTool Partition Wizard will provide readers a detailed guide on how to use DiskUsage command to analyze drive space.
Introduction to DiskUsage
Efficient disk space management is crucial for maintaining the performance and health of any computer system. Windows operating systems offer several built-in tools for monitoring and managing disk usage. One of the powerful yet often underutilized commands is DiskUsage.
Introduced in Windows 11, DiskUsage is a command line tool designed for viewing disk usage. It offers a wealth of options that allow you to customize the display, including choosing units (e.g. Bytes, KB, MB, GB, TB), filtering for specific types of files, and more. It also supports color output, making viewing data in the terminal more intuitive.
DiskUsage has the following features:
- Ease of Use: You can get disk usage with just one simple command line without complicated configuration.
- Customization: Provides multiple parameters for users to customize the display information to meet different needs.
- Color Output: Enhances the visual effect of terminal output, making the data clear at a glance.
- Open Source Code: Based on the MIT license, users can freely view, modify and share the source code.
These features allow DiskUsage to play its best role in the following technical application scenarios:
- System maintenance: DiskUsage can regularly check disk space, clean up useless files, and ensure smooth system operation.
- Development environment: DiskUsage can quickly locate large files, such as log files or uncompressed resources, to free up valuable space.
- Data mining: DiskUsage helps users count the size of specific types of files and help understand data usage.
- Teaching and learning: By using DiskUsage, you can grasp the practicality and efficiency of command line tools, as well as the practical application of regular expressions.
Getting Started with DiskUsage
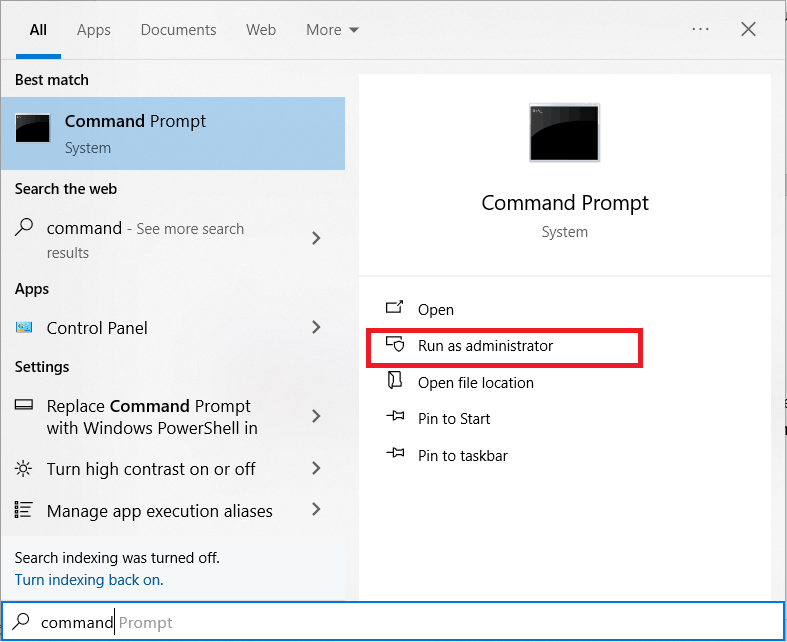
DiskUsage can be accessed through the Command Prompt or PowerShell. To get started, open a Command Prompt or PowerShell window with administrative privileges.
You can search for Command Prompt in the search bar and select Run as administrator when the relevant results appear.
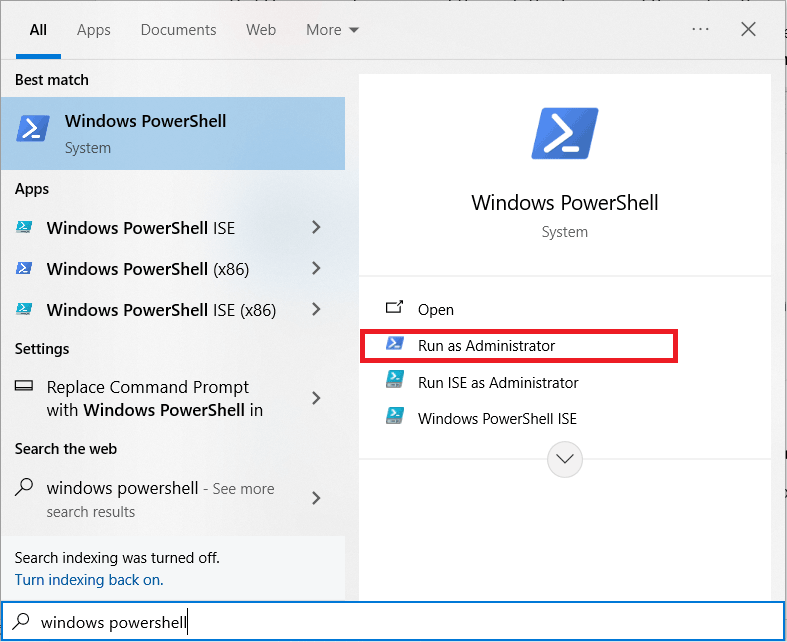
To run Windows PowerShell for Administrator, just repeat the similar steps.
The basic syntax of the DiskUsage command is as follows:
diskusage [options] [directory]

- options: Enter different options here to modify the command behavior.
- directory: Specify the directory you want to analyze.
DiskUsage offers several options that can be used to customize the output, which you can enter in [options]:
- /a or /systemFile: Displays size for system files.
- /b or /reserved: Displays size for reserved space.
- /c or /csv: Displays in csv format.
- /d or /maxDepth:N: Displays directory information only if it is N or fewer levels below command line argument.
- /e or /minFileSize:SIZE: Displays directory information only if its FileSize is greater or equal than SIZE.
- /f or /minSizeOnDisk:SIZE: Displays directory information only if its SizeOnDisk is greater or equal than SIZE.
- /g or /displayFlag:FLAG: Specifies the flags value to determin which column(s) to display.
- /h or /humanReadable: Displays size in human readable format.
- /i or /iniFile:FILE: Takes all the parameters from an INI file.
- /j or /secnario:SCENARIO: Specifies the scenario name for the INI file.
- /l or /allLinks: Count all hardlinks separately.
- /m or /multipleName: Count only files with more than one link names.
- /n or /nameFilter:FILTER: Count only files whose name matches the name filter.
- /p or /preferredPath:PATH: Count files with multiple link names towards the first link that’s under PATH if it exists.
- /q or /virtual: Recurse into virtual directories.
- /r or /skipReparse: Skip recursing into reparse directories.
- /s or /skipResurse: Skip recursing into child directories when calculating sizes.
- /t or /TopDirectory:N: Displays Top N directories by SizeOnDisk in descending order.
- /u or /TopFile:N: Displays Top N files by SizeOnDisk in descending order.
- /v or /verbose: Displays verbose error information.
- /x or /clearDefault: Do not display the default selected columns.
To help you understand better, here are some practical examples using DiskUsage command to analyze drive space:
1. Analyzing a Specific Directory
To analyze drive space with DiskUsage of a specific directory, you can simply provide the path to that directory. Here, for example, to view the C:\Users directory, you can enter the following line of command:
diskusage C:\Users
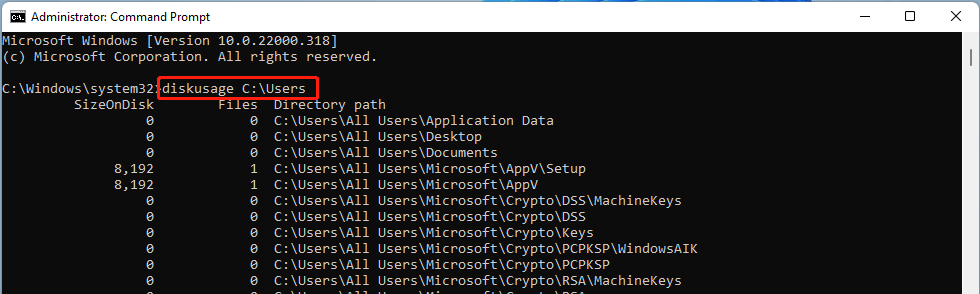
This command will display the disk usage of the C:\Users directory, showing the size of each subdirectory within it.

2. Human-Readable Format
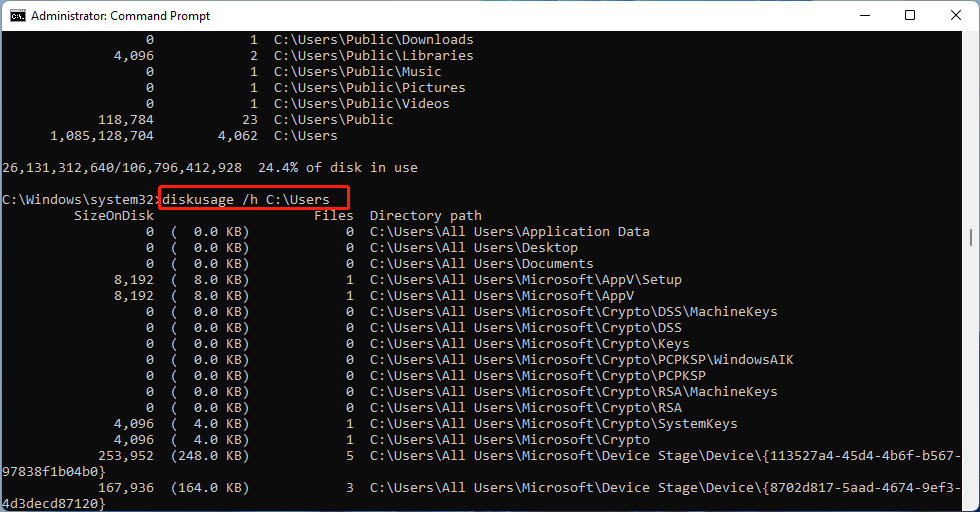
By default, DiskUsage displays sizes in bytes, which can be difficult to read. To make the output more readable, use the /h option:
diskusage /h C:\Users
This command will display the disk usage in a human-readable format (such as KB, MB, or GB).
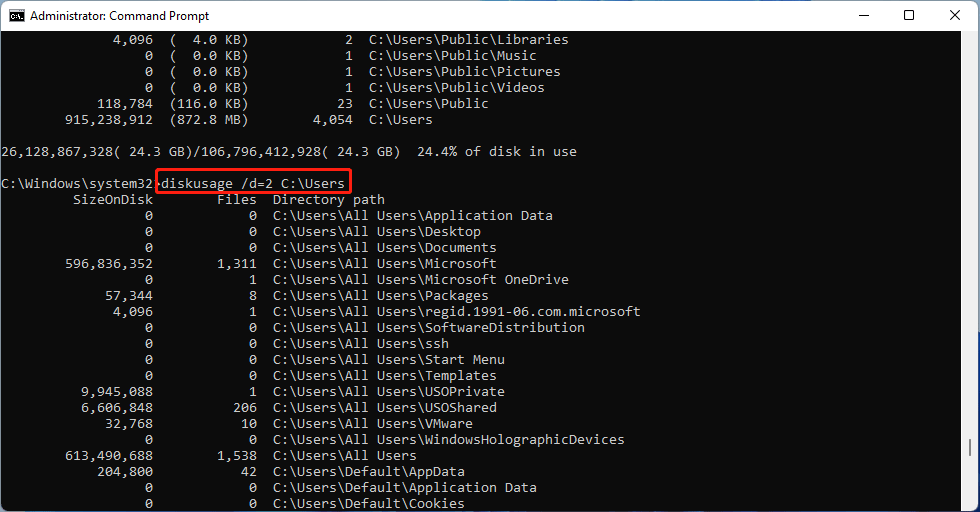
3. Setting a Depth Level
If you want to limit the depth of the directory tree displayed, you can use the /d option followed by the desired depth level. For example:
diskusage /d=2 C:\Users
This command will show the disk usage up to two levels deep within the C:\Users directory.
4. Setting a Size Threshold
If you want to focus on larger files and directories, you can set a size threshold using the /e option. For example, if you only want to check files over 500MB, you can set it to ignore smaller files. You can enter the following command. Remember that the file size number must be entered in bytes, so you may need to convert MB to bytes.
diskusage /e=524288000 C:\Users
This command will display only those files and directories within C:\Users that are larger than 500MB.

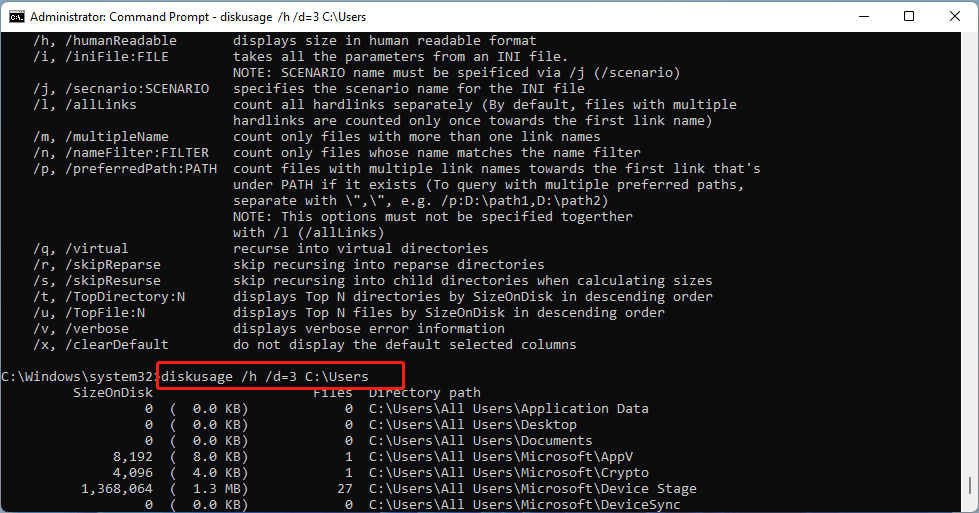
5. Combining Options
You can combine multiple options to tailor the output to your needs. For example, to analyze the C:\Users directory, display the output in a human-readable format, and limit the depth to three levels, you can use:
diskusage /h /d=3 C:\Users
This command will provide a clear and concise overview of disk usage within the C:\Users directory up to three levels deep, making it easier to identify which subdirectories are consuming the most space.
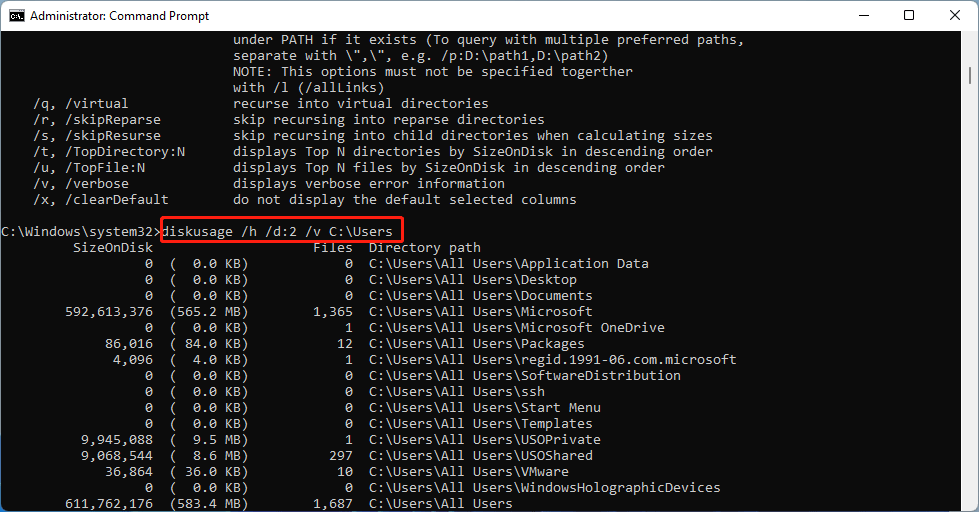
6. Analyzing Large Directories
One of the key benefits of DiskUsage is its ability to analyze large directories efficiently. For example, if you want to analyze the C:\Users directory, which typically contains numerous files and subdirectories, you can use the following command:
diskusage /h /d:2 /v C:\Users
This command will provide a detailed, human-readable output of the disk usage within C:\Users, up to two levels deep, helping you identify any large files or directories that may be consuming excessive space.
Use Disk Space Analyzer
The DiskUsage command is a powerful tool for analyzing disk space usage on Windows systems. Its versatility and range of options make it suitable for both simple and complex disk management tasks. However, since DiskUsage is only available on Windows 11, users of lower versions are not able to experience this tool.
Therefore, in addition to use DiskUsage command to analyze drive space, I’ll introduce two disk space analyzers that are just as powerful as DiskUsage and can help you quickly view and analyze your disk usage.
MiniTool Partition Wizard
MiniTool Partition Wizard is a professional partition master for Windows computers, it can be used to convert MBR to GPT, rebuild MBR, clone hard drive, migrate OS to SSD/HDD, recover hard drive data, etc.
This professional partition management tool offers Space Analyzer feature which is ideal for checking disk space usage. Now, follow the guide below to check your disk space usage:
MiniTool Partition Wizard FreeClick to Download100%Clean & Safe
Step 1: Download MiniTool Partition Wizard and launch it to get its main interface. And then click Space Analyzer on the toolbar.

Step 2: Select the partition that you want to check and then click Scan.
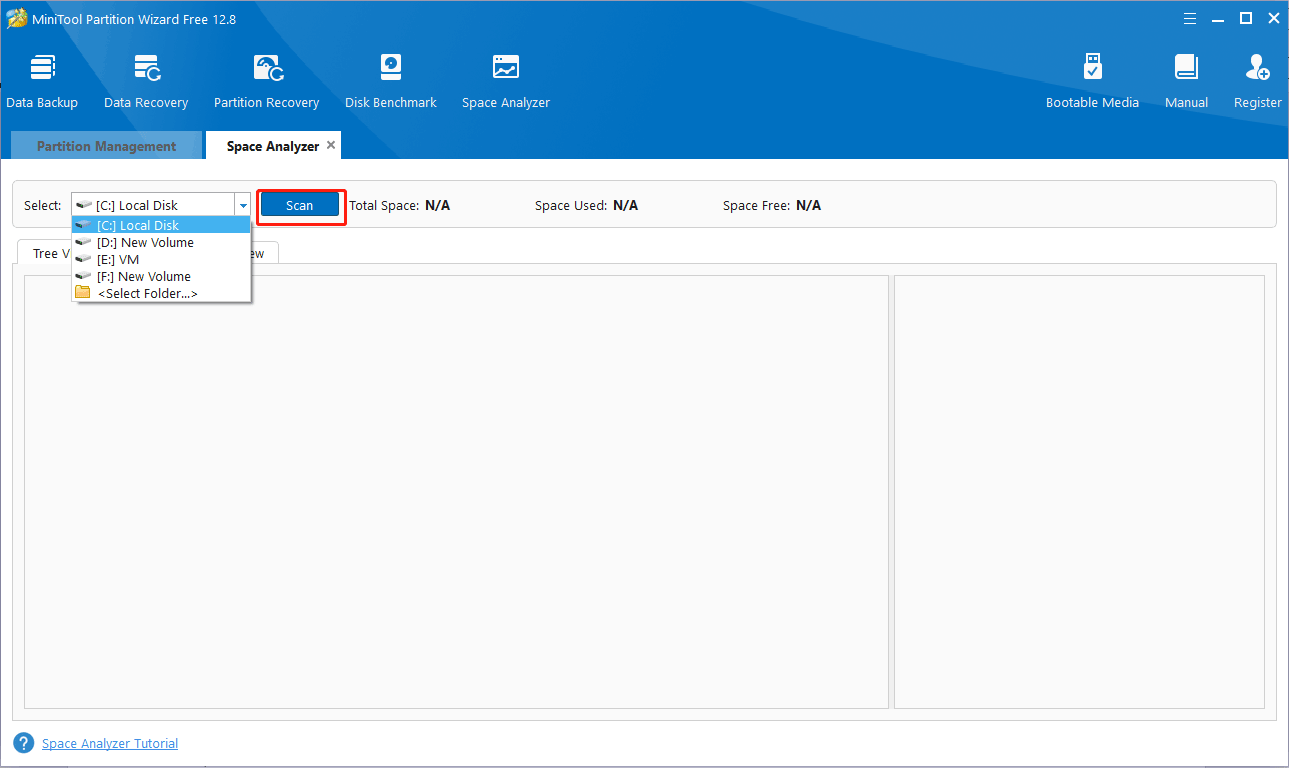
Step 3: After scanning the drive, MiniTool Partition Wizard will tell you the disk usage situation of the selected drive.
By default, MiniTool Partition Wizard displays the scan results in a Tree View. You can also navigate to File View and Folder View to find out the largest files/folders saved in the drive directly without having to browse each parent folder.
Scan results mainly include Total Space, Used Space, and Unused Space, showing exactly the size of each file/folder and its percentage of the total space.
In addition, Space Analyzer displays file sizes in more intuitive units such as GB, MB, KB, and B, with all file types in the selected drive/folder sorted and listed in the right panel. Just double-click on an extension and you will be taken to the File View, which shows all such files.


Windows Storage
In addition to MiniTool Partition Wizard, you can also use Windows Space Analyzer – Windows Storage, which is a built-in feature in Settings that helps you quickly check disk space usage.
To find hard disk space usage through Windows Storage, refer to the following steps.
Step 1: Right-click on the Windows Start menu and select Settings.
Step 2: Select System in the pop-up window.
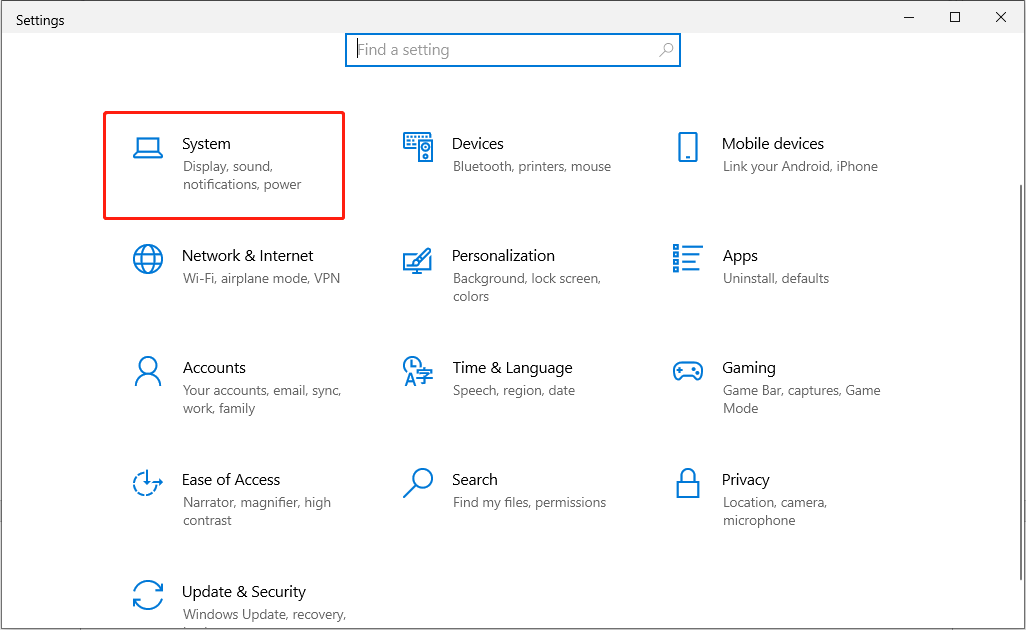
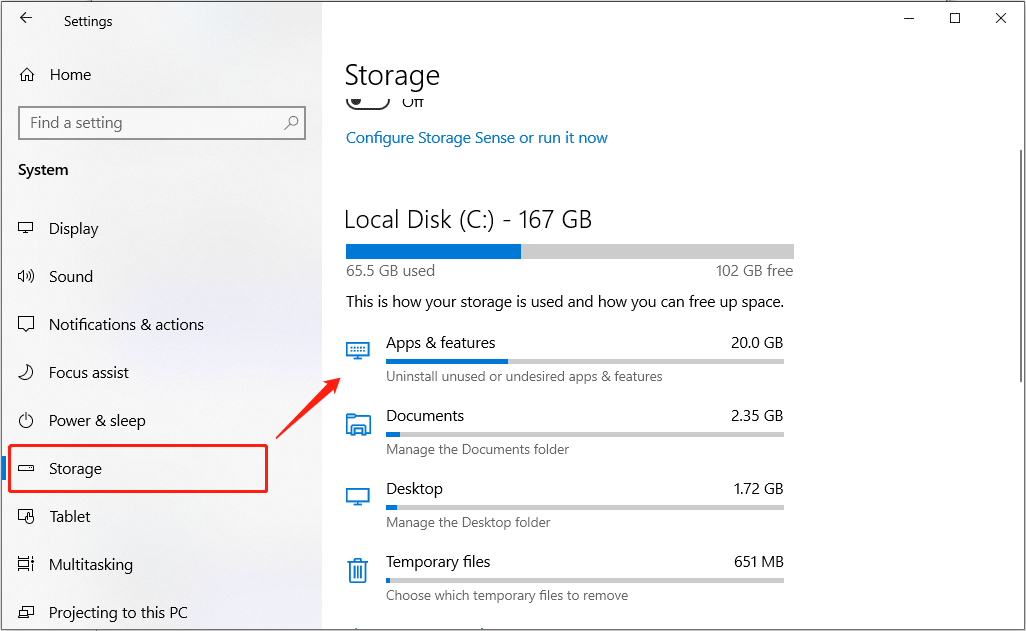
Step 3: Navigate to Storage where you can view the used and free space for each drive.
Bottom Line
Constant supervision of disk space usage is essential to maintain the performance of the computer system. This post introduces a very useful command line tool – DiskUsage, which provides detailed information about disk space usage, making it a useful tool for system administrators and advanced users.
In addition, this post also introduces two powerful disk space analyzers that can also help you to get your disk space usage. Also, if you have any problems when using MiniTool Partition Wizard, you can always contact us via the email [email protected]. Thanks in advance.
User Comments :