Why is “USB Loader GX not showing games”? How to solve the issue? If you are looking for solutions to this issue, this post is what you need. Here, Partition Magic analyzes the possible causes of the issue and provides several effective solutions to fix it.
USB Loader GX is a Wii application that allows you to play games from a USB drive or SD card. However, some people report that they encounter the “USB Loader GX not showing games” issue on their devices. This issue bothers them a lot. Have you also encountered the same issue? If so, continue reading to get a full guide.
Possible Causes of “USB Loader GX not showing games” Issue
After investigating extensive user reports and posts, I find that the “USB Loader GX not showing games” issue can often be triggered by these reasons:
- Incorrect USB format
- Improper file organization
- Missing or corrupted cIOS
- Game files in the wrong format
- USB drive compatibility issues
- Incorrect settings in USB Loader GX
- Outdated USB Loader GX version
How to Fix “USB Loader GX not showing games”
How to fix “USB Loader GX not showing games”? Here, I summarize some useful ways to help you get rid of the issue. You can try these ways one by one until you fix the USB Loader GX not loading games issue successfully.
Way 1. Convert USB to NTFS from FAT32
A prevalent cause of the “USB Loader GX not showing games” problem is the incompatibility of USB formats. Typically, USB drives are formatted as FAT32 or NTFS, which USB Loader GX can easily recognize.
However, since FAT32 divides large game files, switching to NTFS may be more effective. As mentioned earlier, if your USB drive is FAT32 and you’re facing the “USB Loader GX not showing games” issue, converting it to NTFS can resolve the problem.
To do that, I highly recommend you use MiniTool Partition Wizard. It is a professional free partition manager that offers the Convert FAT to NTFS feature to help you convert USB from FAT32 to NTFS without data loss. Besides, this feature-rich tool can also be used as a USB formatter, FAT32 formatter, disk clone software, etc.
Here’s how to use MiniTool Partition Wizard to convert USB from FAT32 to NTFS:
Step 1. Click the Download button to get the MiniTool Partition Wizard installation package. Then, run the execute file and follow the on-screen instructions to install it on your PC.
MiniTool Partition Wizard FreeClick to Download100%Clean & Safe
Step 2. Launch this app to enter the main interface, and choose the partition of USB from the disk map.
Step 3. Select the Convert FAT to NTFS feature from the left panel. Then, click the Start button in the pop-up Convert File System window.
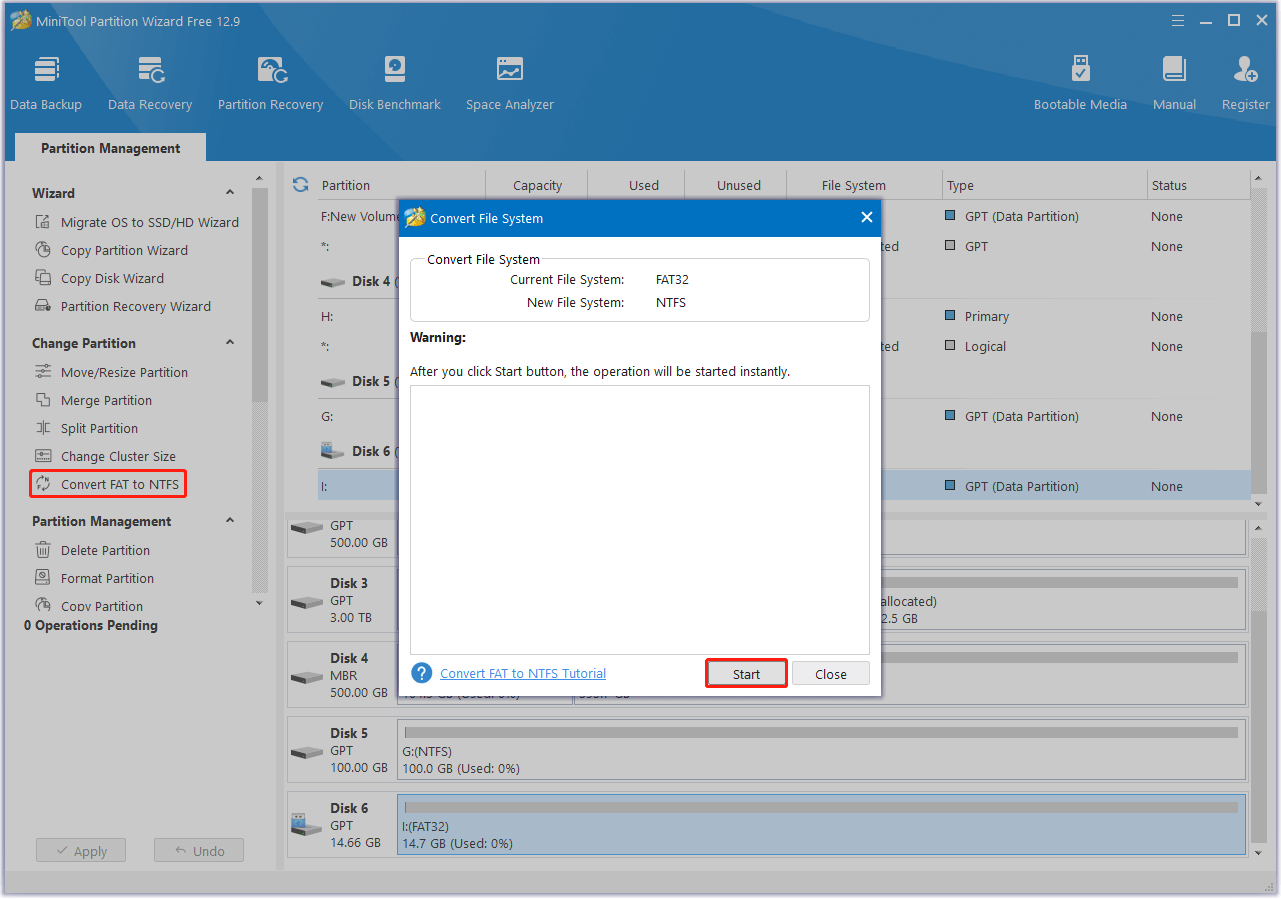
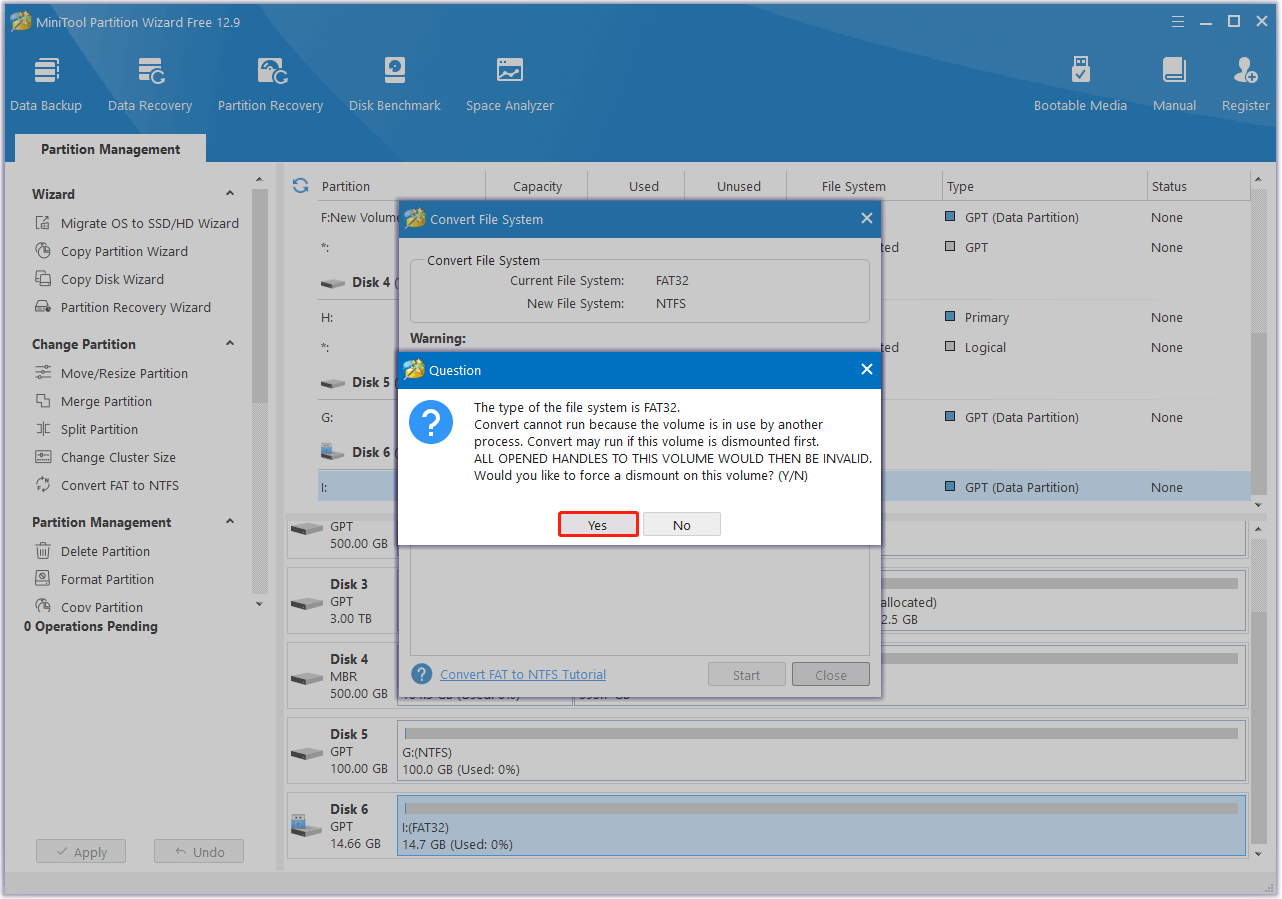
Step 4. If a Question window pops up, click Yes to continue.
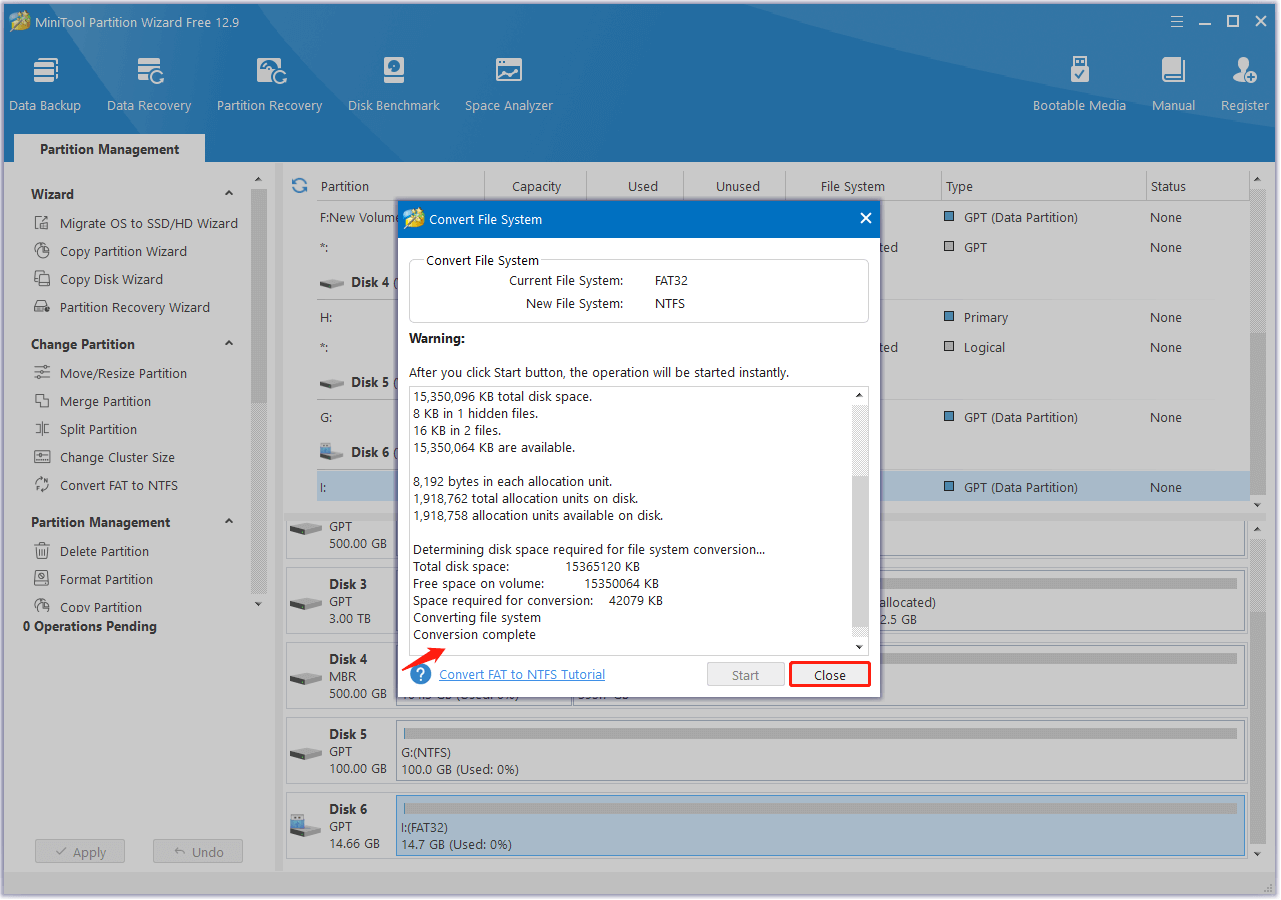
Step 5. Wait for the converting process to end. Once done, you can see the message “Conversion complete” in the window. Then, click Close to back to the main interface, and you can see the file system of USB is shown as in the disk map.
If your USB file system is NTFS and you encounter the issue of “GameCube games not showing up in USB Loader GX,” converting the USB from NTFS to FAT32 is recommended since GameCube games do not support the NTFS file system. In this situation, you can download MiniTool Partition Wizard Pro or a higher edition to help you convert NTFS to FAT32 without data loss.
MiniTool Partition Wizard DemoClick to Download100%Clean & Safe
Way 2. Install d2x cIOS
If you want to use the USB Loader GX normally, you must use a custom IOS, short as cIOS. If you haven’t installed cIOS or the cIOS you’ve installed is outdated, you will run into the “USB Loader GX not showing games” issue as well.
To do that, you just need to download d2x cIOS Installer from the official website, enter the Homebrew Channel, and follow the on-screen instructions to install the recommended cIOS versions. After that, restart your USB Loader GX and check if the issue is fixed.
Way 3. Check and Adjust Filters in USB Loader GX
If you don’t choose the right sources for your games in the “Select titles sources” menu of USB Loader GX, you can run into the USB Loader GX not loading games issue easily, including GameCube/Wii games not showing up in USB Loader GX. Here’s how to check and adjust Filters in USB Loader GX:
Step 1. Open USB Loader GX, find “Select title sources” banner from the top, and then select it.
Step 2. In the Select title sources window, make sure to select all the relevant game sources, like Wii Games, GC Games, Nand Channels, and EmuNand Channels.
Step 3. After that, select OK to save all the changes.
Step 4. Once done, restart your device and check if the issue has been resolved.
Way 4. Check Homebrew Channel Setting
Sometimes, the Homebrew Channel settings may also cause the “USB Loader GX not showing games” issue. In this situation, you can go to your Homebrew Channel settings page to check all the settings. Here’s the guide:
- Launch your Wii, and go to Homebrew Channel.
- Check for any settings that might prevent USB Loader GX from accessing the USB drive.
- After that, save changes and restart USB Loader GX to fix the “USB Loader GX not showing games” issue.
Way 5. Check If Game Files Named Correctly
The name of game files can also cause the “USB Loader GX not showing games” issue. If you suspect the issue on your device is triggered by this reason, you can go to check all your game files. The following are the right game names and directories you can take a reference:
- wii-/wbfs/gamename[titleID]/titleid.wbfs
- Gamecube-/games/gamename[titleID]/game.iso
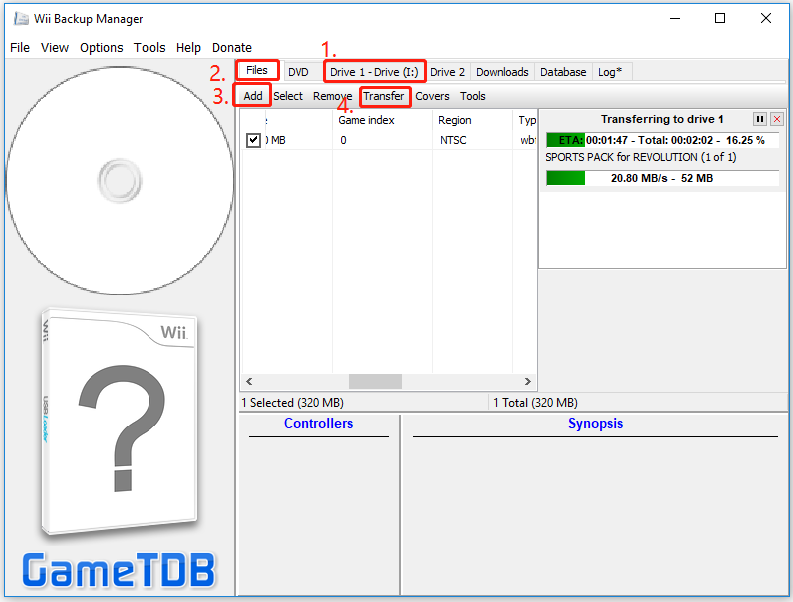
Way 6. Put All Wii ISO/WBFS Files into USB
A WBFS (Wii Backup File System) file is a disk image for Nintendo Wii games. It contains a Wii game that can be loaded for play. If the Wii ISO/WBFS files aren’t in the correct directory, USB Loader GX may not detect the game files, and this results in the games not showing in USB Loader GX issue.
To resolve this issue, you need to ensure all Wii ISO/WBFS files are placed into the USB drive. Here’s the way to organize your game files:
- Install and run the Wii Backup Manager program on your computer.
- Choose Drive 1 and select your USB drive.
- Then, go to the File tab, and click Add > Files.
- Then, select your Wii ISO file/ WBFS file from the pop-up window, and click Open.
- Next, tap the Transfer option, and select Drive 1 in the pop-up window.
- Wait for the Transferring to Drive 1 process to end.
- Once done, activate Wii and then HBC. Unplug the USB from your computer and plug it into the Wii console.
- Launch USB Loader GX, and it will refresh the game list.
Way 7. Update USB Loader GX
Outdated USB Loader GX may also lead to compatibility issues, such as games not showing in USB Loader GX. In this case, you can try updating USB Loader GX to fix the issue. Here’s how to do that:
Step 1. Launch your browser on your computer, and navigate to the USB Loader GX official website.
Step 2. Download the latest version of USB Loader GX from the website.
Step 3. Use the new files to overwrite the files in your SD card.
Step 4. After that, the application should restart and possibly the problem will be resolved.
In Conclusion
This post analyzes what triggers the “USB Loader GX not showing games” issue and offers some useful solutions to fix the issue. You can try the mentioned solutions one by one no matter if you encounter the GameCube/Wii games not showing up in USB Loader GX issue on your PC.
Furthermore, if you encounter any issues or have any suggestions while using MiniTool Partition Wizard, you can contact us by sending emails to [email protected]. We will reply to you as soon as possible.
About The Author

Position: Columnist
Charlotte is a columnist who loves to help others solve errors in computer use. She is good at data recovery and disk & partition management, which includes copying partitions, formatting partitions, etc. Her articles are simple and easy to understand, so even people who know little about computers can understand. In her spare time, she likes reading books, listening to music, playing badminton, etc.
User Comments :