In this post, MiniTool Partition Wizard introduces how to update Minecraft, a popular video game developed by Mojang Studio in Windows 11. If you want to play the game on Windows 11, you should not miss this post.
Will Minecraft Support Windows 11?
Minecraft is a popular video game developed by Mojang Studios. It was created in the Java programming language and released in 2011, about 10 years ago. Now, it’s available on three platforms, including Microsoft Windows, macOS, Linux.
As for the Windows operating system, Minecraft requires 64-bit Windows 7 or later versions, and Windows 10 is recommended. Therefore, there are a lot of Windows 10 users playing the game. Click to know Minecraft system requirements.
You must know that Microsoft reveals the new operating system, Windows 11, recently. It will be officially released to the public later this year, but some insiders and enthusiasts are experiencing it now.
You might wonder “will Minecraft support Windows 11”. The developer Mojang Studios hasn’t announced any news about Minecraft Windows 11 yet. But as one of the most popular video games on Windows PCs, it is highly possible that Minecraft will release related updates once Windows 11 is released. You can get Minecraft Windows 10 on Windows 11 via Microsoft Store.
How to Update Minecraft in Windows 11?
Updates are important to programs and games. They can bring new content and fixes for some bugs. Therefore, you are recommended to keep your Minecraft up-to-date.
Usually, Minecraft will update automatically. If it doesn’t, you need to check for updates manually. To update Minecraft in Windows 11, here are some different ways and you can choose one according to your needs.
Method 1: Update Minecraft via Microsoft Store
As mentioned, you can get Minecraft in Microsoft Store, and you can also get related updates in it. Here is how to update Minecraft via Microsoft Store.
Step 1: In Windows 11, click the Microsoft Store icon from the taskbar. You can also use the Windows 11 Search utility to search for Microsoft Store and open it.
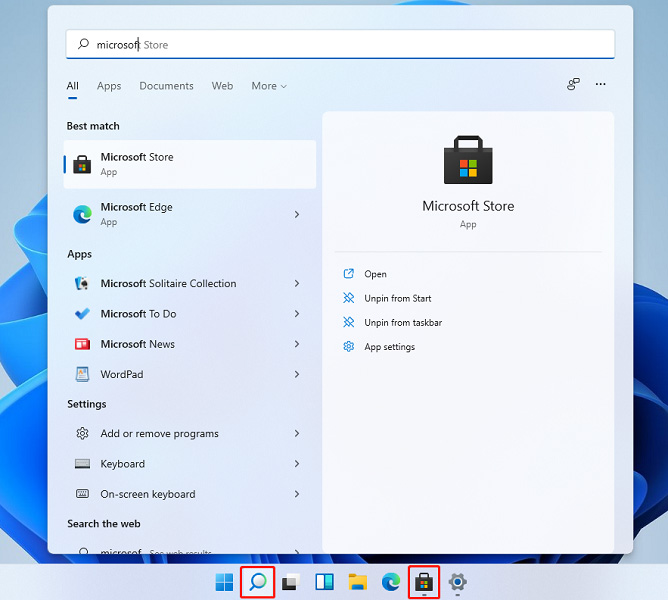
Step 2: In Microsoft Store, click the three-dot icon and select Downloads and updates from the pop-up menu.
Step 3: In the following window, click the Get updates button.
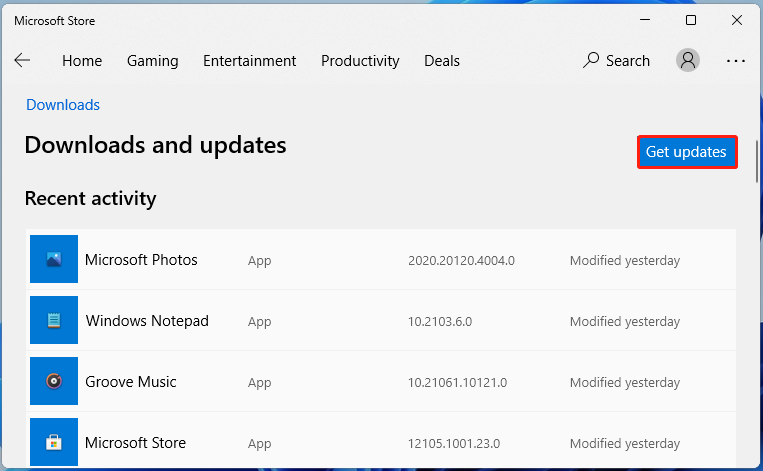
Then Windows will check updates for all the installed apps including Minecraft and install them automatically through Microsoft Store. You just need to wait until the process is finished.
Method 2: Reinstall Minecraft
Another way to update Minecraft in Windows 11 is to reinstall the game. If you don’t know how to do it, you can follow the steps below.
Step 1: Press Win + I to open Windows Settings.
Step 2: Select Apps in the left pane. Then select Apps & features in the right pane.
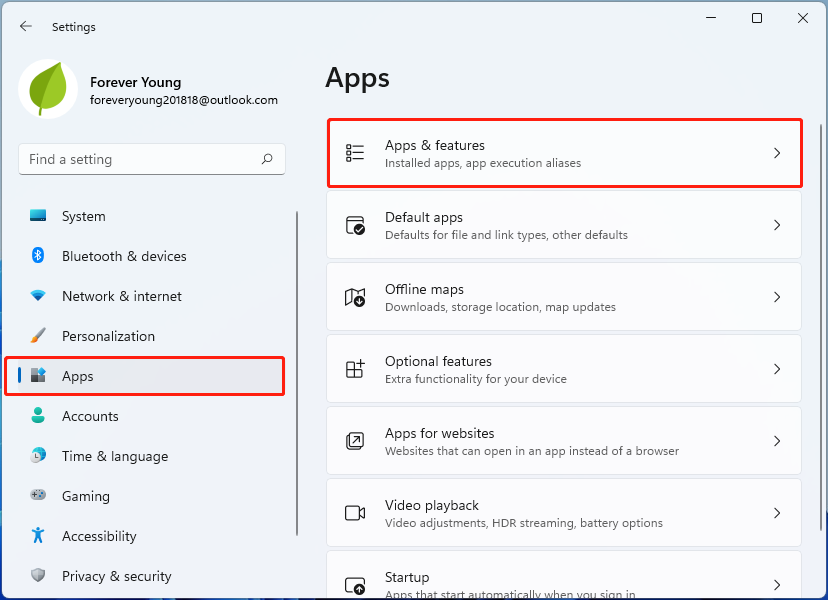
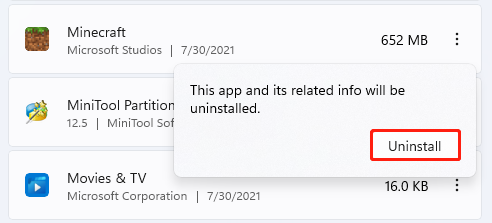
Step 3: In the following window, scroll down to locate Minecraft. Then click the three-dot icon for your game and select Uninstall from the pop-up menu.
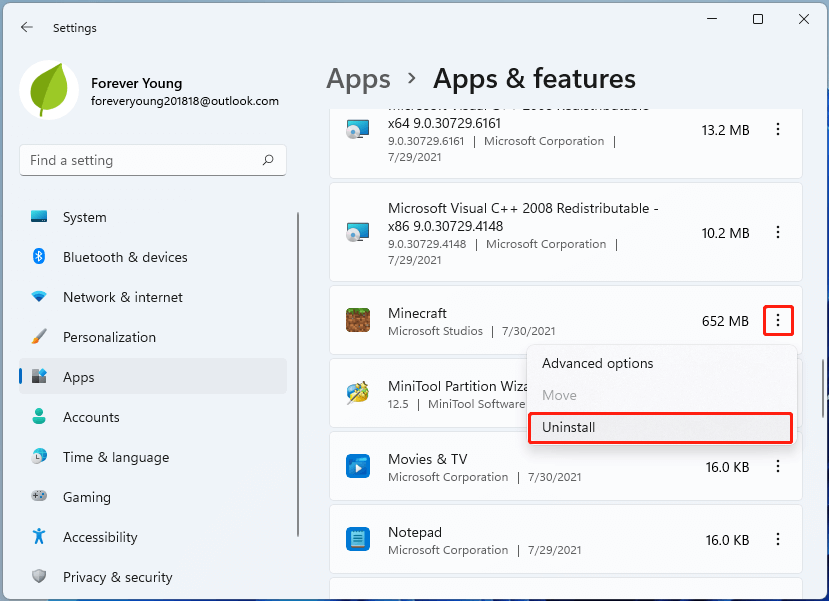
Step 4: In the pop-up window, click Uninstall to confirm the operation. Then follow the on-screen instructions to finish the uninstallation.
Step 5: Go to Microsoft Store to download and reinstall Minecraft.
Then you will get the latest version of Minecraft.

User Comments :