Uninstalling programs is useful for freeing up space, solving issues with themselves, and etc. How to uninstall programs on Windows 11? Here, MiniTool shows you how to delete apps on Windows 11 via Settings, Control Panel, CMD, PowerShell, Start Menu, etc.
Apps on the system mainly are pre-installed or manually installed by users. After some time, you may find that there are too many apps on the computer. Then consume your PC space. In this case, you can delete apps on Windows 11 by yourself to free up space.
You need to reinstall apps when they don’t work properly. For that, you also need to uninstall programs. Here comes the question – how to uninstall apps on Windows 11.
In this post, we illustrate how to remove programs on Windows 11 via Start Menu, Settings, Control Panel, CMD, PowerShell, Registry Editor, third-party uninstallers. Pick one according to your demand now!
Also read: How to Uninstall Programs on Windows 10? Here Are Methods
#1. Uninstall Programs on Windows 11 via Start Menu
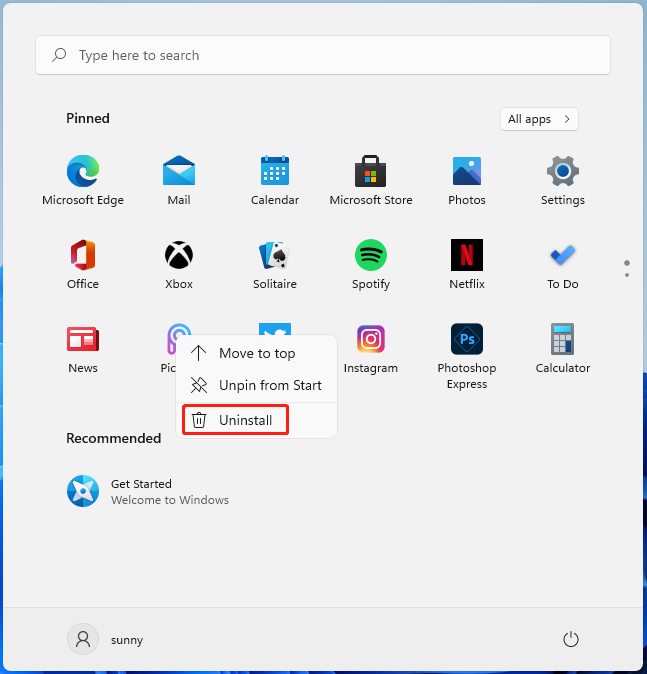
An easy way to delete apps on Windows 11 is to using the Start menu. For doing that, you can follow these steps.
Step 1: Open the Start menu by clicking on the Windows icon on the desktop.
Step 2: In the elevated window, find the app to uninstall and right-click on it.
Step 3: Click on the Uninstall option in the pop-up menu. After that, follow the prompted instruction to complete the uninstallation.
#2. Uninstall Programs on Windows 11 via Settings
Windows Settings allows you to remove programs on Windows 11 as well. Here’s the step-by-step tutorial for you.
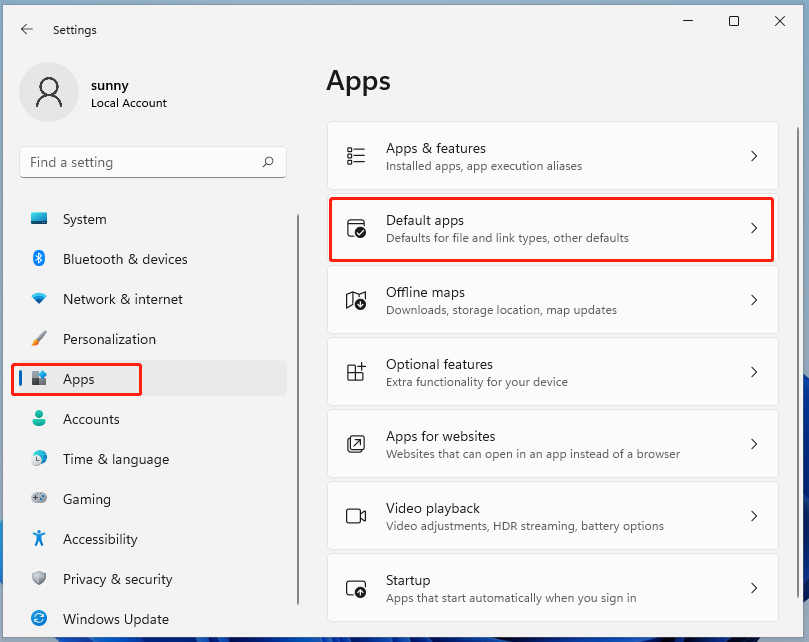
Step 1: Open the Settings by holding Windows and I keys and then click Apps.
Step 2: Tap Default apps under the Apps menu.
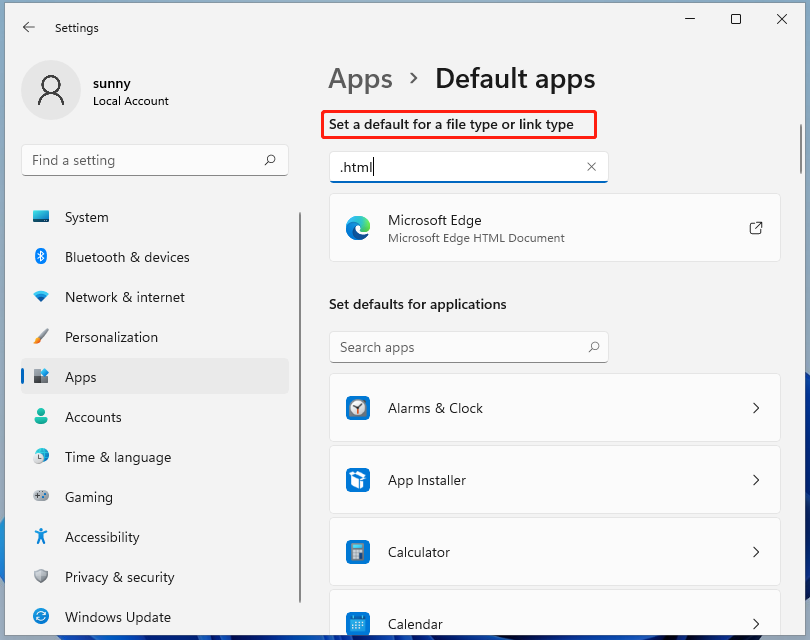
Step 3: Set the default program based on the file type or link type.
Step 4: Restart your computer and the change will take into effect.
Step 5: Open the Settings again and click Apps.
Step 6: Tap Apps & features and scroll down the list to find the program to be uninstalled.
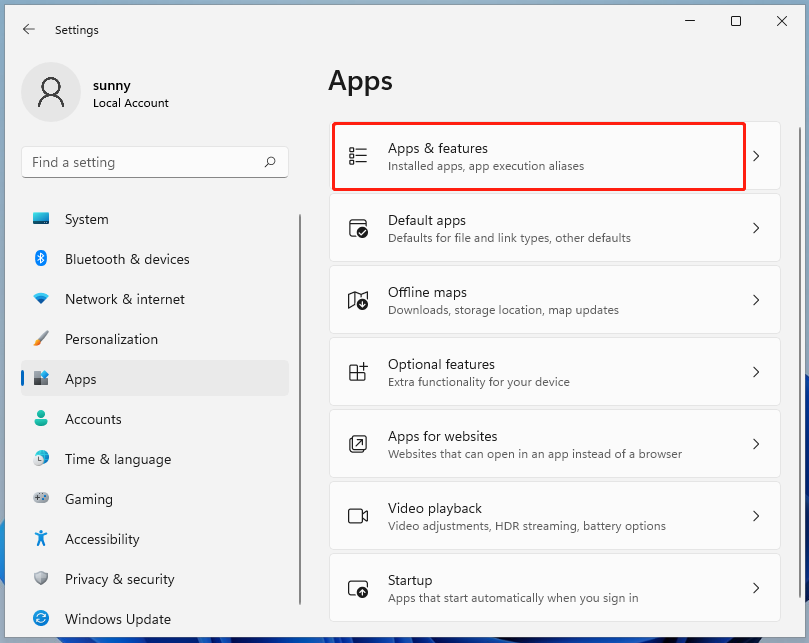
Step 7: After finding the target, click on the vertical three dots behind the program and click Uninstall.
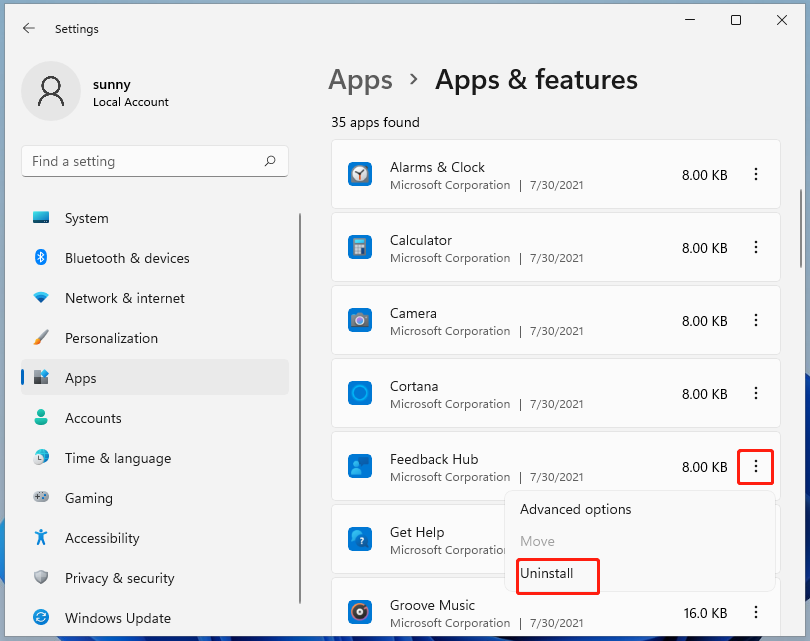
Step 8: Follow the on-screen instruction to finish the uninstallation.
#3. Uninstall Programs on Windows 11 via Control Panel
Since not all installed apps will appear in Control Panel, you are only recommended to use it to uninstall legacy and modern programs.
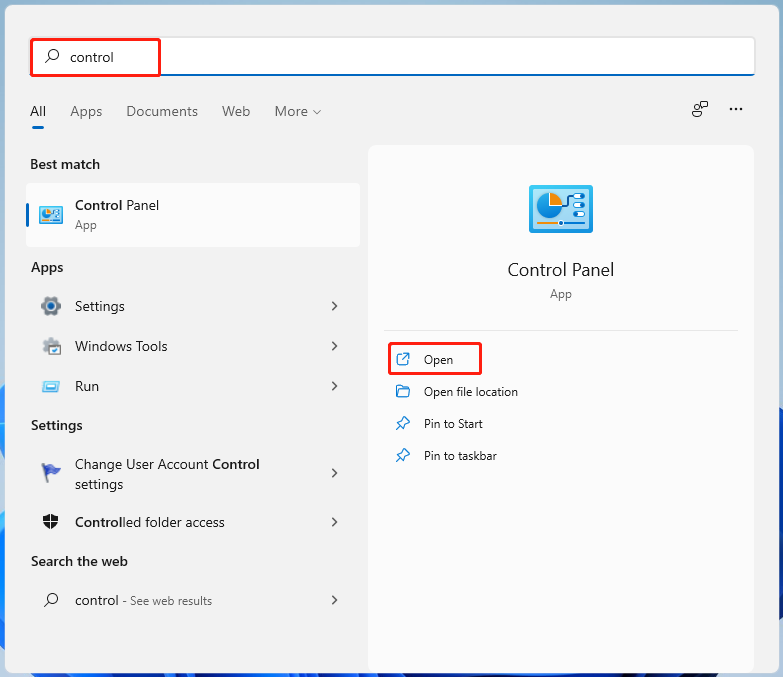
Step 1: Click on the Search icon on the desktop and search for Control Panel. Click on the Open option below the Control Panel icon.
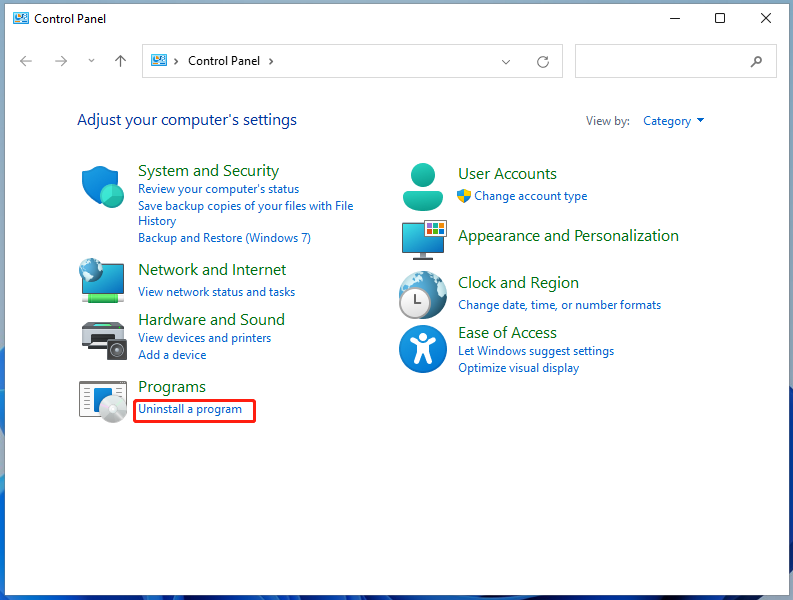
Step 2: In the Control Panel window, click the Uninstall a program option under the Programs.
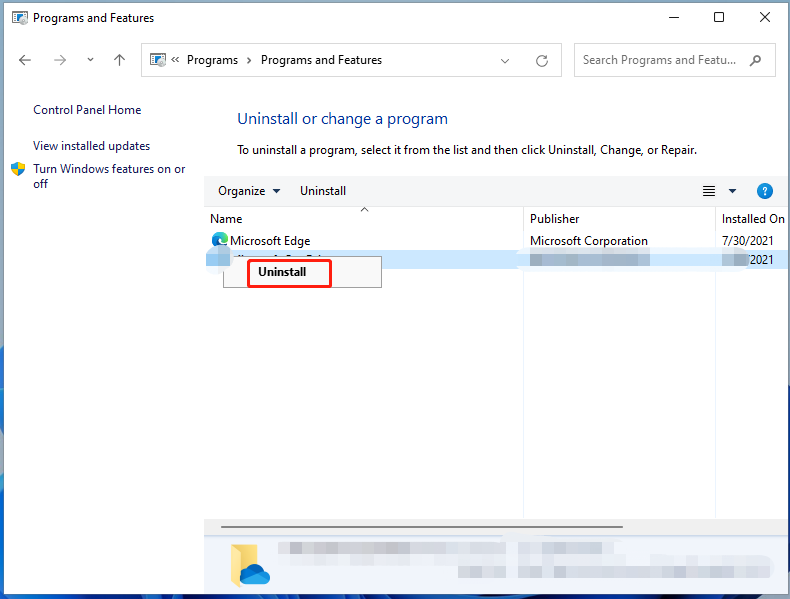
Step 3: Find and right-click on the program in the list, and then click Uninstall. Then confirm and finish the uninstallation.
#4. Uninstall Programs on Windows 11 via CMD
You can also delete apps on Windows 11 through some command lines. Open Command Prompt and type & execute commands to remove the apps. The following steps show you how to uninstall program on Windows 11 via CMD.
Step 1: Click on the Search icon on the desktop and input cmd. Click the Run as administrator option under the Command Prompt. If you are prompted with the UAC window, click Yes to confirm.
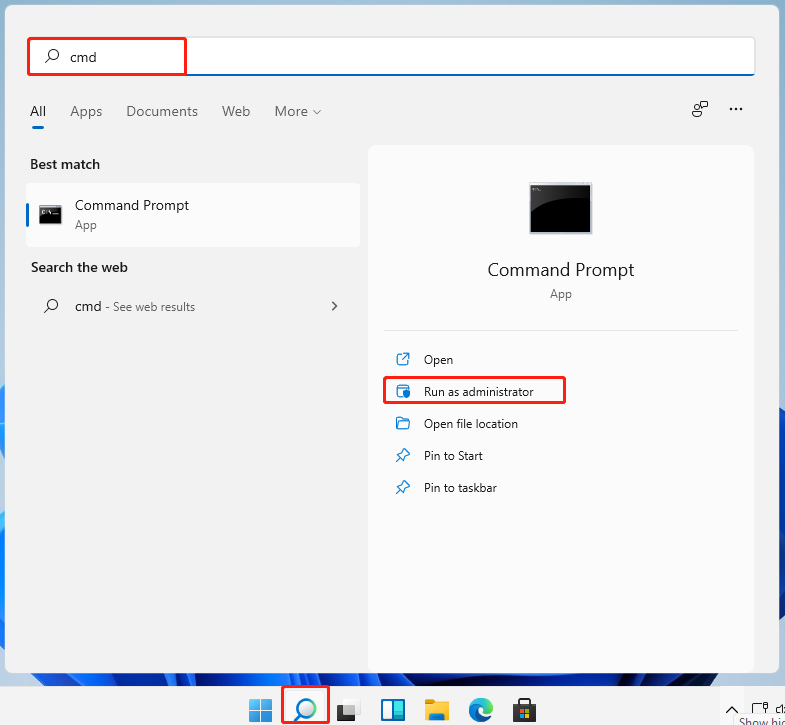
Step 2: In the prompted window, type the following commands and hit the Enter key after each.
1. After getting the results after executing the second command, find and remember the entire name of the program that you want to uninstall.
2. You should replace AppName with the name that you have noted before.
3. Don’t remove the quotes from the command.
- wmic
- product get name
- product where name=”AppName” call uninstall/nointeractive
Step 3: All you need to do is to wait patiently until the process ends.
#5. Uninstall Programs on Windows 11 via PowerShell
Like Command Prompt, PowerShell also enables you to delete apps on Windows 11. Here are detailed steps for you.
Step 1: Likewise, click on the Search icon on the desktop and type powershell. Then click Run as administrator under the Windows PowerShell option.
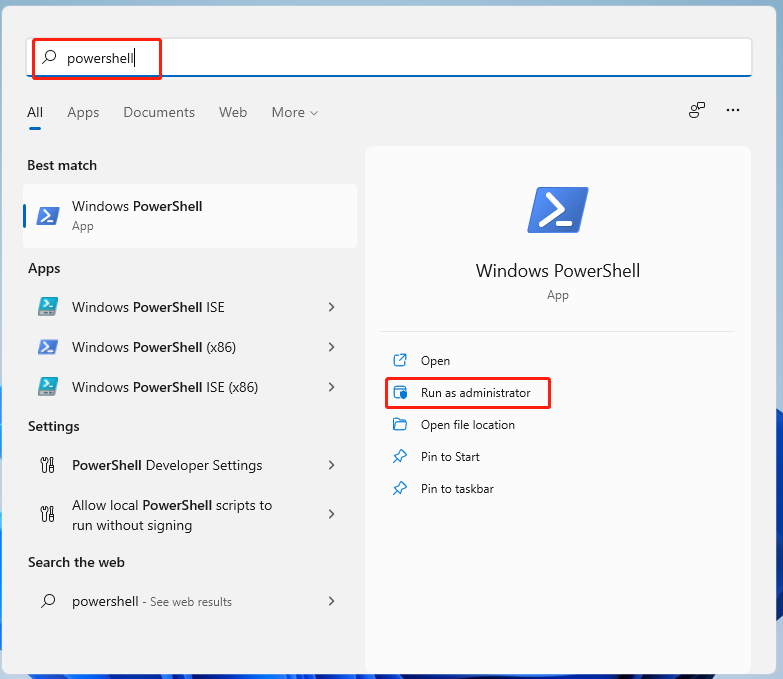
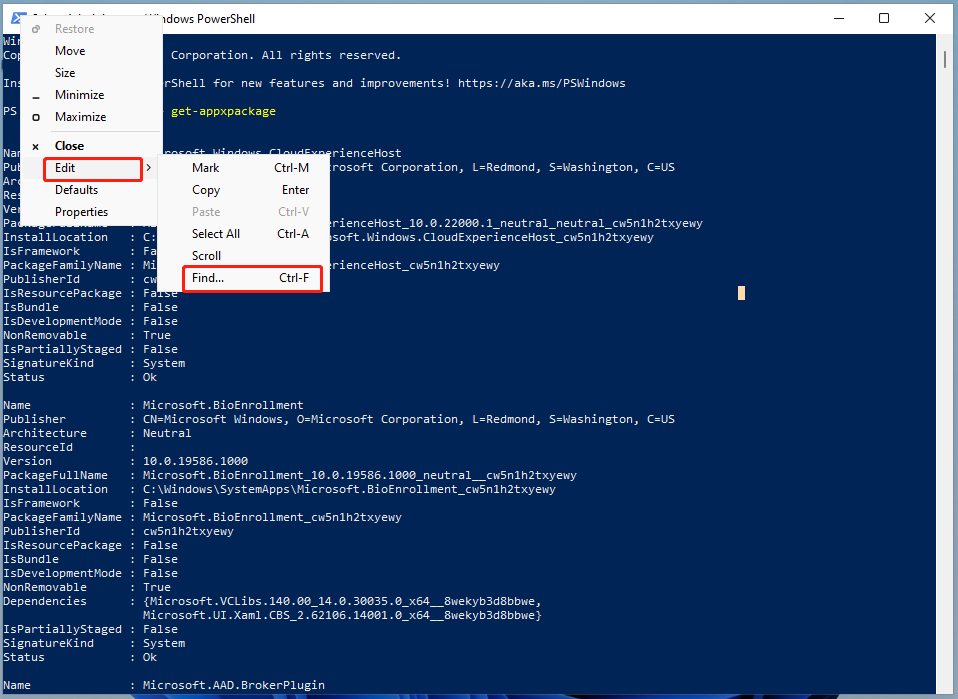
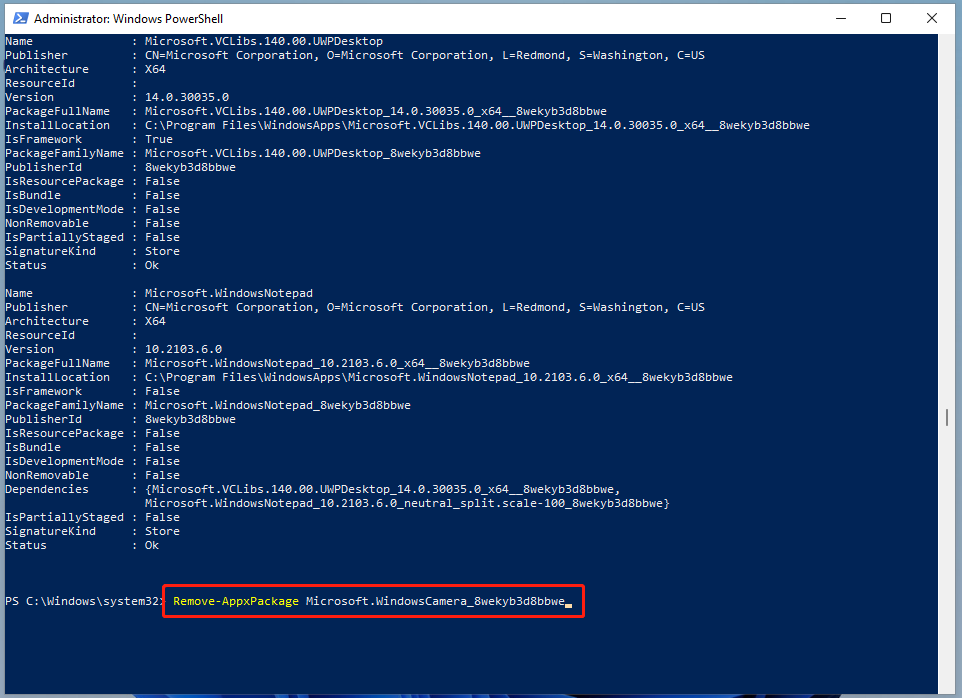
Step 2: Type get-appxpackage and hit Enter. Then PowerShell will show you all the installed programs on your PC. You may find it is hard to find your app. To solve that, right-click on the title bar of Windows PowerShell and move your mouse on Edit. Then click Find option in the sub-menu.
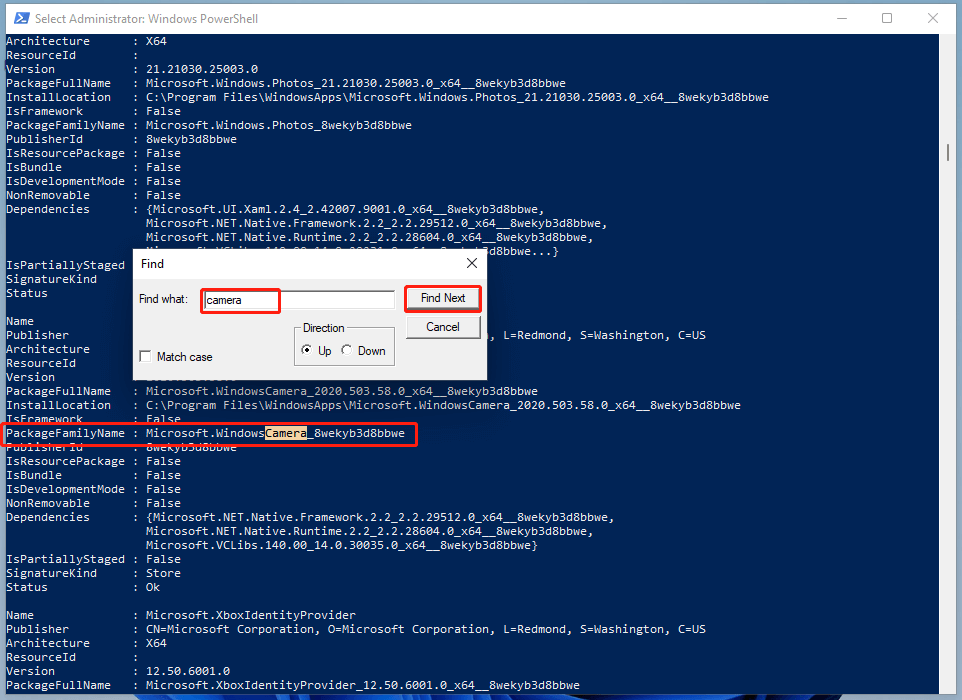
Step 3: In the Find window, type the general name of the program and click Find Next. After that, PowerShell will quick navigate your program. Copy the FullPackageNmage of the target app and move to the end of the result.
Step 4: Type Remove-AppxPackage [Name] and hit Enter. If this method fails, try other solutions.
#6. Uninstall Programs on Windows 11 via Registry Editor
You can remove programs on Windows by modifying Registry Editor too. Here are steps for you.
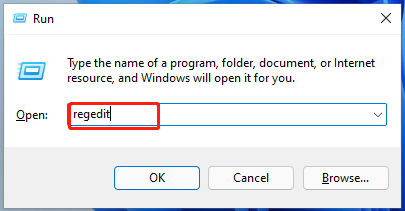
Step 1: Open the Run window by pressing Windows and I keys, and then input regedit and hit Enter.
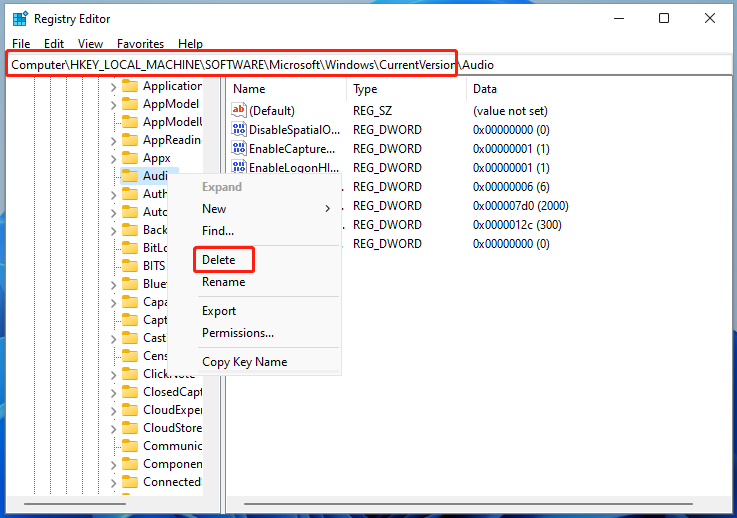
Step 2: In the Registry Editor window, navigate to the destination by following the path below. After that, right-click on the app you want to remove and click Delete.
HKEY_LOCAL_MACHINE > SOFTWARE > MICROSOFT > WINDOWS > CURRENT VERSION
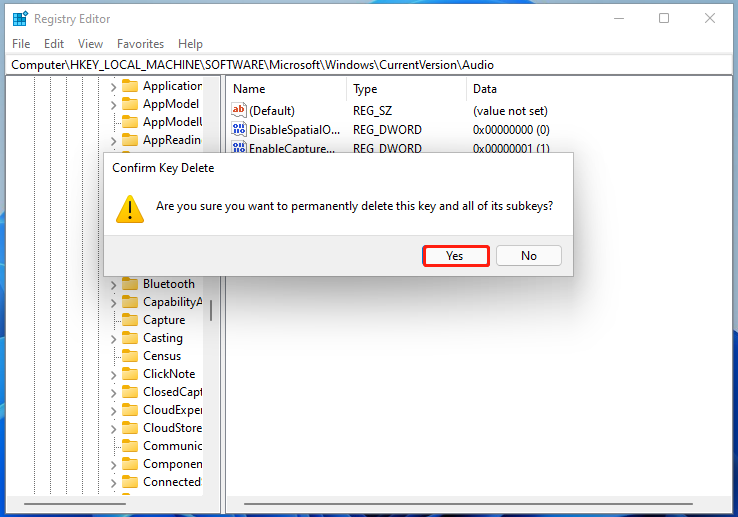
Step 3: In the next window, click Yes to confirm the operation. Then wait for the finish of the process.
#7. Uninstall Programs on Windows 11 via Third-Party Tools
In addition to the above Windows built-in programs, you can also delete apps on Windows 11 with the help of third-party tools. For instance, Eraser and Freeraser are great choices. With professional uninstallers, you can uninstall some undeletable programs with ease. Besides, they do the uninstallation automatically and you don’t have to pay much attention.

![[Detailed Steps] Change the Default Audio Output on Windows 11](https://images.minitool.com/partitionwizard.com/images/uploads/2021/07/change-default-audio-ouput-on-win11-thumbnail.jpg)
User Comments :