Windows 11's animation effects make the UI look smoother. However, enabling animations on slower machines can cause the app to take some time to open or close. Well, this article from MiniTool Partition Wizard shows you how to turn on or off animation effects in Windows 11.
There are 3 quick and easy ways we can enable or disable animation effects in Windows 11 and they are shown below.
Turn on or off Animation Effects via Windows Settings
The easiest way to turn on or off animation effects in Windows 11 is through Windows Settings.
Step 1: Open the Start menu and click the gear icon to open Settings. Alternatively, you can press Win + I key to quickly launch the Settings app.
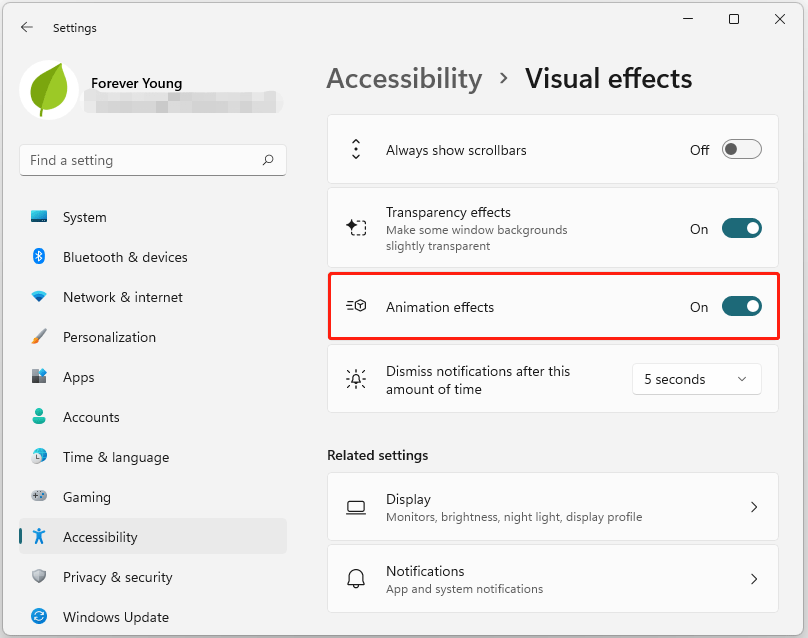
Step 2: Navigate to the Accessibility > Visual effects option, and toggle the button to On (default) or Off to turn on or off Animation effects.
Turn on or off Animation via Control Panel
To turn animation effects on or off from the Control Panel in Windows 11, refer to the following steps:
Step 1: Press Win + R key to open the Run dialog. Then type control.exe and press Enter to open Control Panel.
Step 2: In the Control Panel window, click Ease of Access > Ease of Access Center.
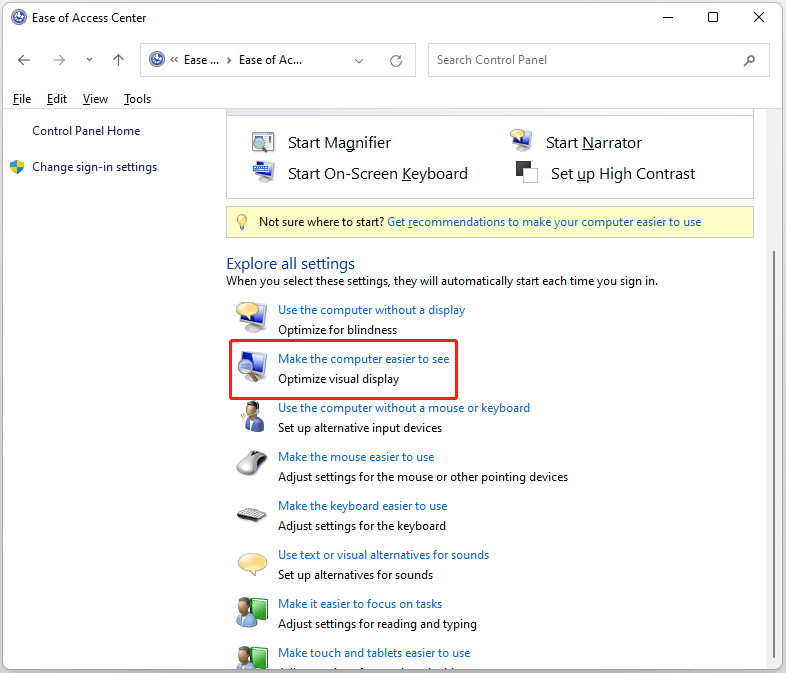
Step 3: Click Make the computer easier to see under the Explore all settings section.
Step 4: Scroll down to the Make things on the screen easier to see section and check (off) or uncheck (on-default) Turn off all unnecessary animations (when possible).
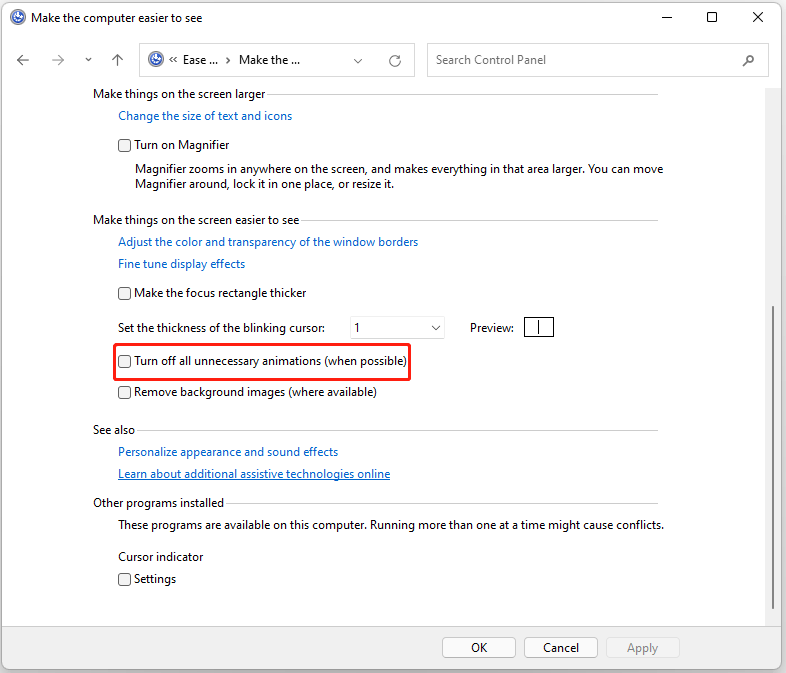
Step 5: Click Apply to save the changes and your screen may freeze for a few seconds. When it comes back up, click OK to complete the process.
Turn on or off Animation via Performance Options
In addition to the Settings app and Control Panel, Windows 11 offers a dedicated menu of performance options that you can use to turn on or off animations and other visual effects.
Step 1: Open the Start menu. Then type view advanced system settings and press Enter to open the Performance Options panel.
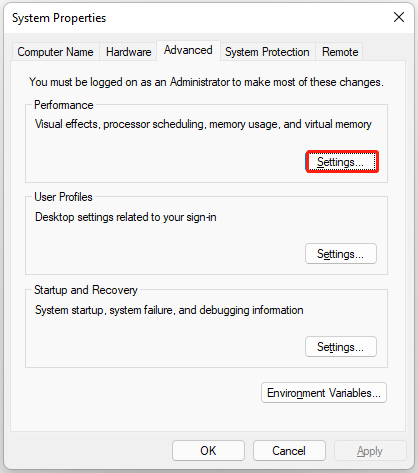
Step 2: In the System Properties window, switch to the Advanced tab and click the Settings button under Performance.
Step 3: In the Visual Effects tab, check or uncheck these options to turn on or off animation effects:
- Animate controls and elements inside windows
- Animate windows when minimizing and maximizing
- Animations in the taskbar
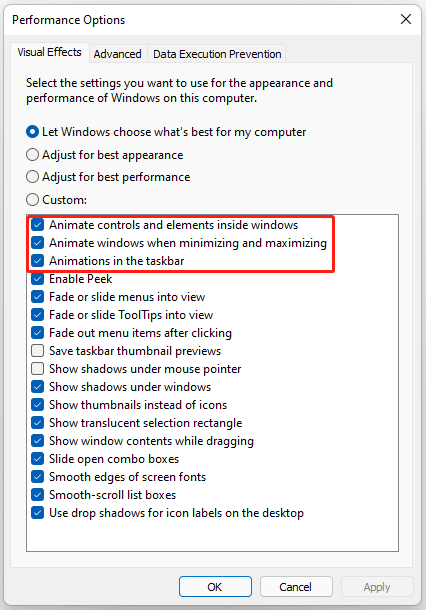
Step 4: Click the Apply button and then click OK.
That’s it on the three ways on how to turn on or off animation effects in Windows 11.
Bonus: Change the Menu Animation Speed in Windows 11
The above methods only allow you to turn on or off animation effects, but by tweaking the Registry Editor, you can speed up or slow down menu animations on Windows 11.
Step 1: Press Win + R key to open the Run dialog. Then type regedit and press Enter to open Registry Editor.
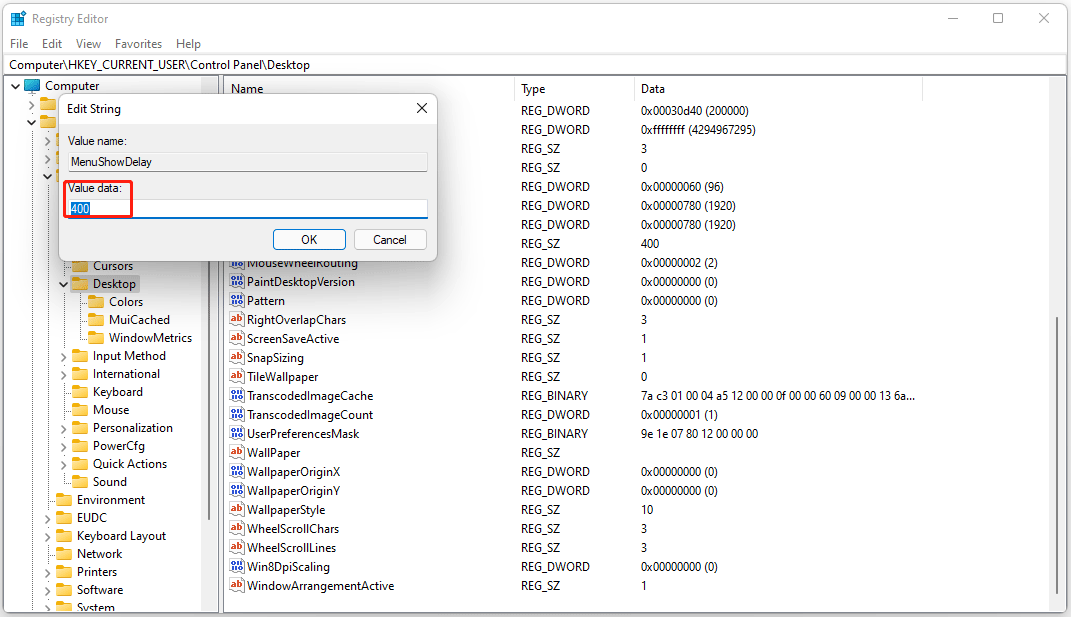
Step 2: In the Registry Editor window, go to the following path: HKEY_CURRENT_USERControl PathDesktop.
Step 3: On the right side of the window, double click the MenuShowDelay key. Here you can enter a new delay value in milliseconds to define the menu animation speed on Windows 11.
By default, this value is set to 400. You can set it to 200 or even 100 to reduce animation time. Conversely, increasing this value will slow down the animation.
Bottom Line
The above content is about how to turn on or off animation effects in Windows 11 and change animation speed. We hope this guide can help you. If you are confused about the tutorial in this post, please let us know and we will get back to you as soon as possible.

User Comments :