What Is Windows 10 System File Checker?
System File Checker (SFC) is a kind of Windows built-in utility that enables user to scan and restore corrupted system files. In Windows 10, this utility works with Windows Resource Protection (Hereinafter referred to as WRP) that can be used to protect registry keys and folders as well as critical system files.
If there are some incorrect, damaged, changed or corrupted system files in your Windows 10, you can run sfc /scannow command to scan the integrity of all protected operating system files and repair some errors with the correct version.
So how to use Windows 10 System File Checker? Let’s see the detailed information in the following part.
How to Use Windows 10 System File Checker?
Note: Before you do, please make sure you have installed the latest updates for Windows 10.
Step 1. Type “Command Prompt” in the search box on the taskbar. And then right-click the app in the list to select Run as administrator.
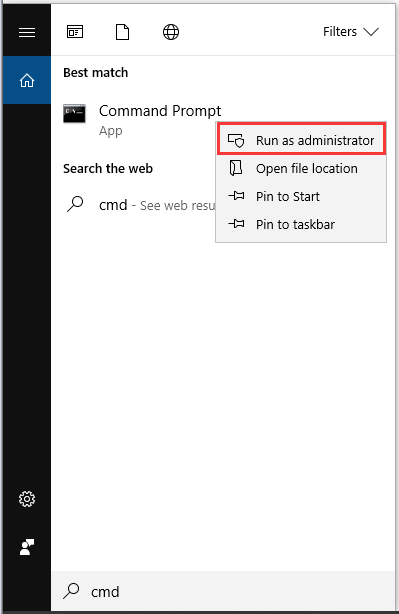
Step 2. Type sfc /scannow command in the command prompt. This process may take your much time to scan, please wait patiently.
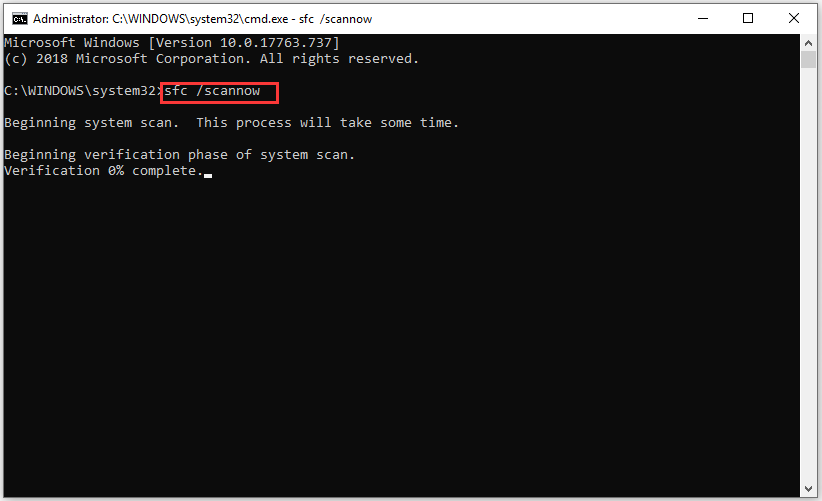
Step 3. It’s a good thing if Windows did not find any integrity violation or WRP found corrupt files and repaired them. Then you can restart your computer to confirm whether there are still corrupted system files.
Cases of the System File Checker Windows 10 Not Working
Although Windows 10 File System Checker is a useful utility, many users often complain that they cannot use this utility to scan and repair the corruption in Windows 10. Most of the time, they receive the following error messages when sfc /scannow fails to work.
Case 1. Not Enough Memory Resources Are Available to Process This Command
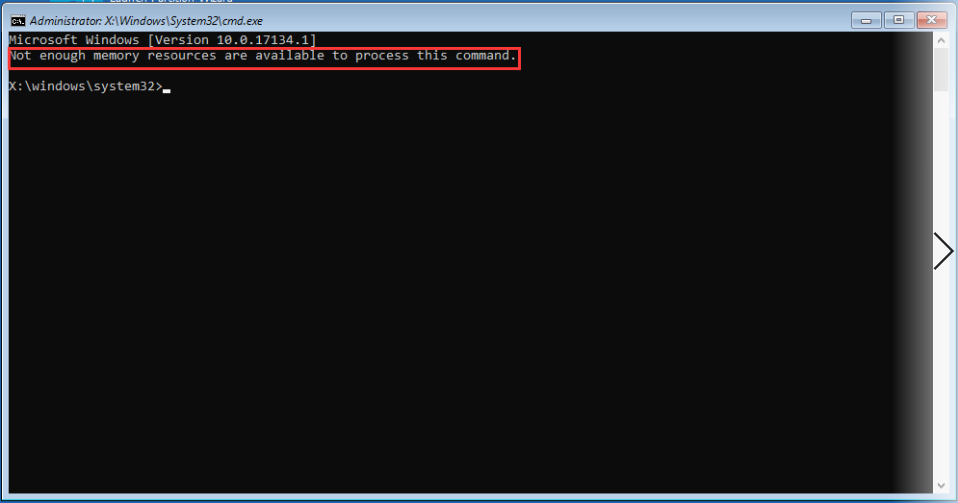
In fact, the reason causing this issue is that the resource file is not included in the components that are used to keep these copyright strings. When this command tries to read the string, it cannot find the string and provide that the reason is a low-memory condition.
You need to know there is no low-memory condition, and this problem can be ignored because it won’t impact on any features.
Case 2. Windows Resource Protection Could Not Perform the Requested Operation
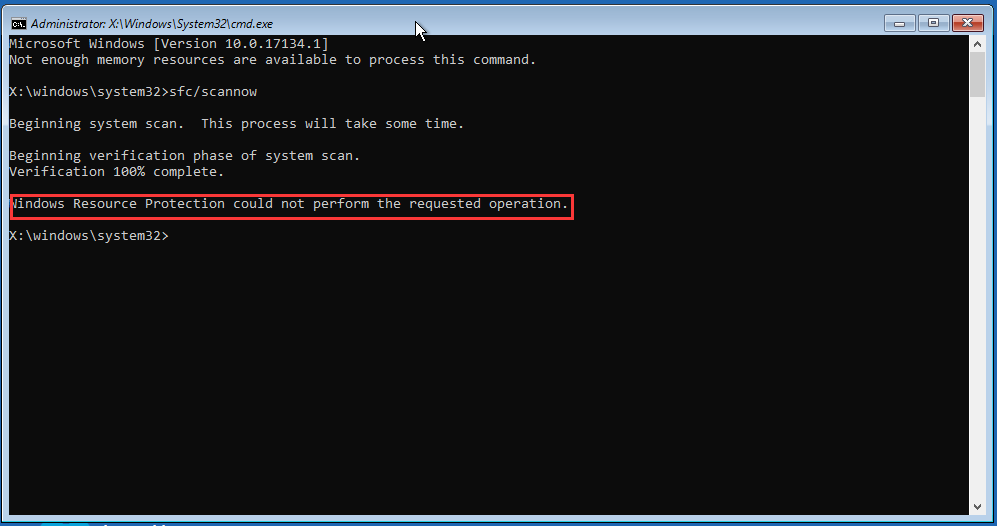
This problem usually occurs at the end of this scanning or when sfc /scannow gets struck.
Case 3. Windows Resource Protection Could Not Start the Repair Service.
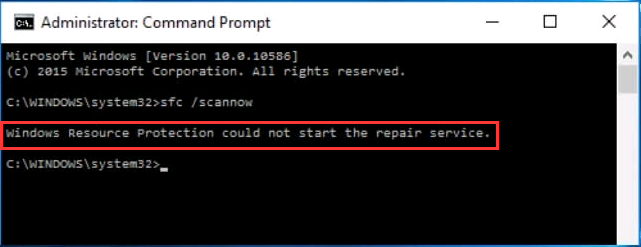
This error may emerge when Windows Modules Installer services are disabled. Such services have access to Windows Resource Protection files and registry keys.
As mentioned in the above part, WRP protects registry keys and folders as well as critical system files. In other words, if you want to run the sfc /scannow command to repair WRP resources, Windows Modules Installer services should be able to run.
Case 4. Windows Resource Protection Could Not Repair some of Corrupted Files
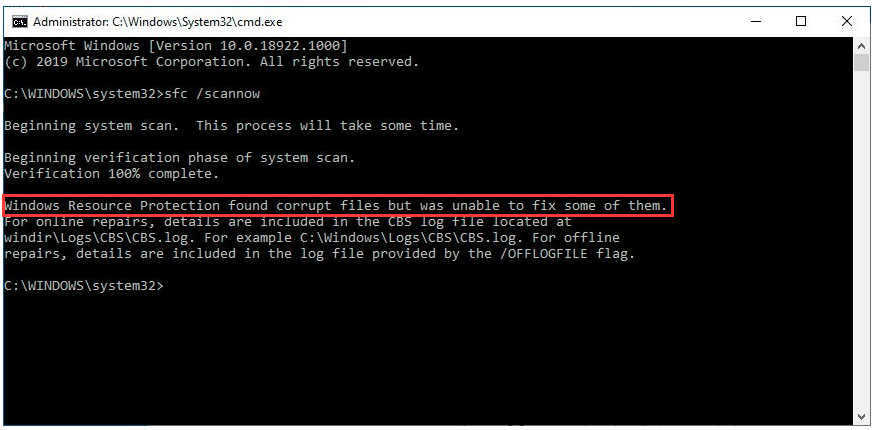
This error message means corrupted files have been found but were unable to repair some of them. And you need to view the details in the CBS log file for online repairs or in log files provided by the /OFFLOGFILE flag for offline repairs.
Do we have any alternative solutions for these different error messages? The answer is YES! In the following part, 7 accessible solutions with detailed steps will be discussed. I believe there is always the best method for you.
How to Solve System File Checker Windows 10 Not Working?
Solution 1. Run sfc /scannow Command in Safe Mode
If you come across WRP could not perform the requested operation, running sfc /scannow command in Safe Mode may be a good try. Next, we will walk you through with step-by-step guide to operate.
Step 1. Press Win + R on the keyboard simultaneously to open Run box.
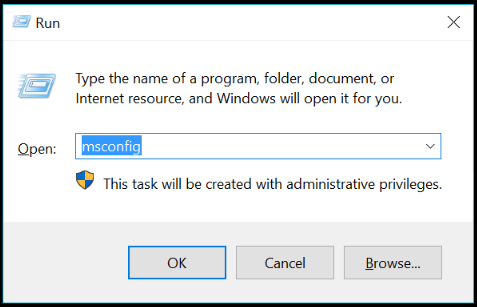
Step 2. Input msconfig in the box and hit Enter to continue.
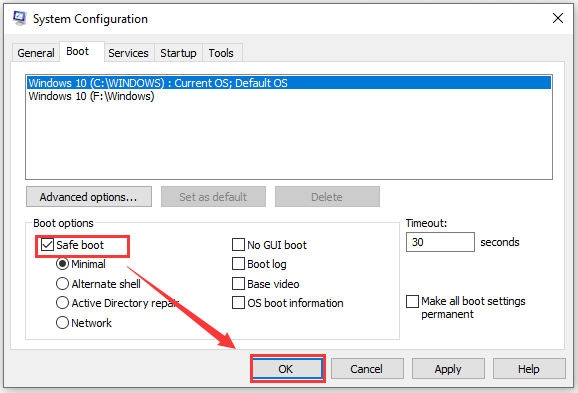
Step 3. Then navigate to Boot tab. Check Safe boot and hit OK button to continue.
Step 4. Then you receive the system configuration. You need to restart the computer to execute this change, so click the Restart button.
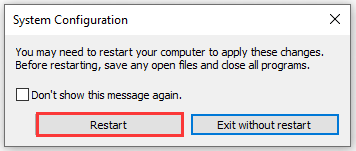
Then your computer will enter into Safe Mode, and you can input sfc /scannow command in the search box again to check whether this problem still exists.
If this problem is still not solved, perhaps you may consider it results from the errors on your hard disk. You can try to check the hard disk. There are three major solutions to check hard disk errors. Let’s see the following part.
Solution 2. Use the Check File System Feature of MiniTool Partition Wizard
MiniTool Partition Wizard, a professional partition management software, boasts many powerful features such as rebuild MBR, and check the file system. More important, users can enter WinPE to perform these features by creating a USB bootable disc or CD/DVD bootable disc when Windows fails to boot.
Now, let see the detailed steps to check the file system.
Step 1. Open this powerful software to get its main interface
MiniTool Partition Wizard DemoClick to Download100%Clean & Safe
Step 2. Select the target partition and click the Check File System feature from the left action panel.
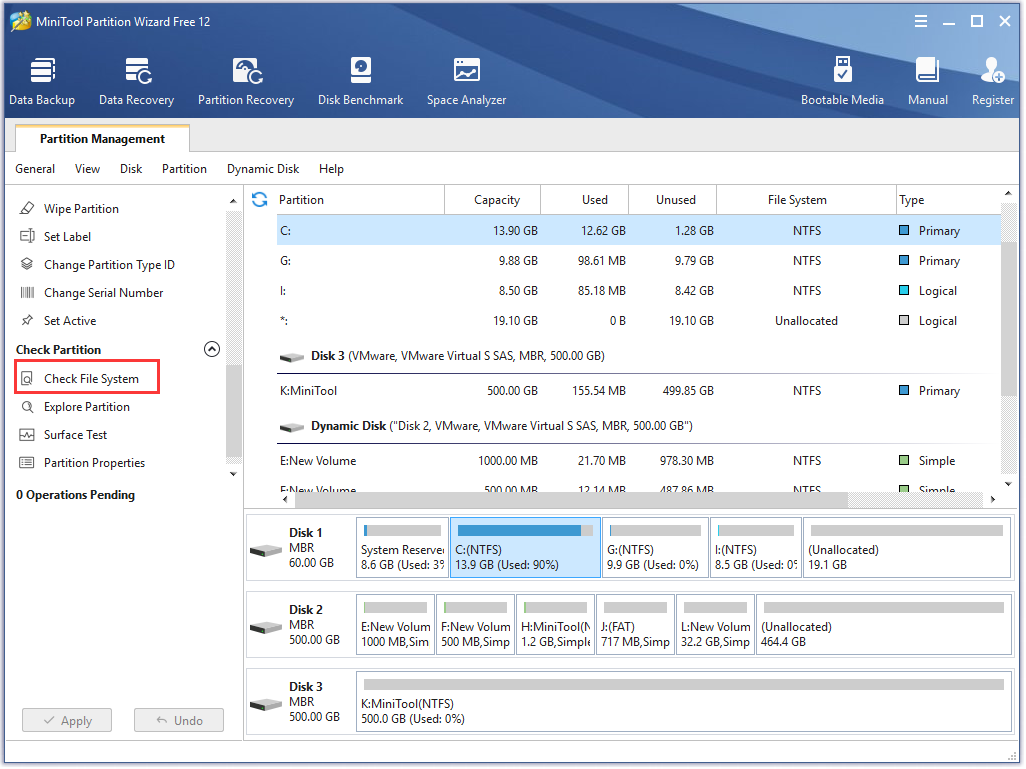
Step 3. Then there are two options listed: Check only and Check & fix detected errors. Users can choose one option based on the need. Here we take the second option for example.
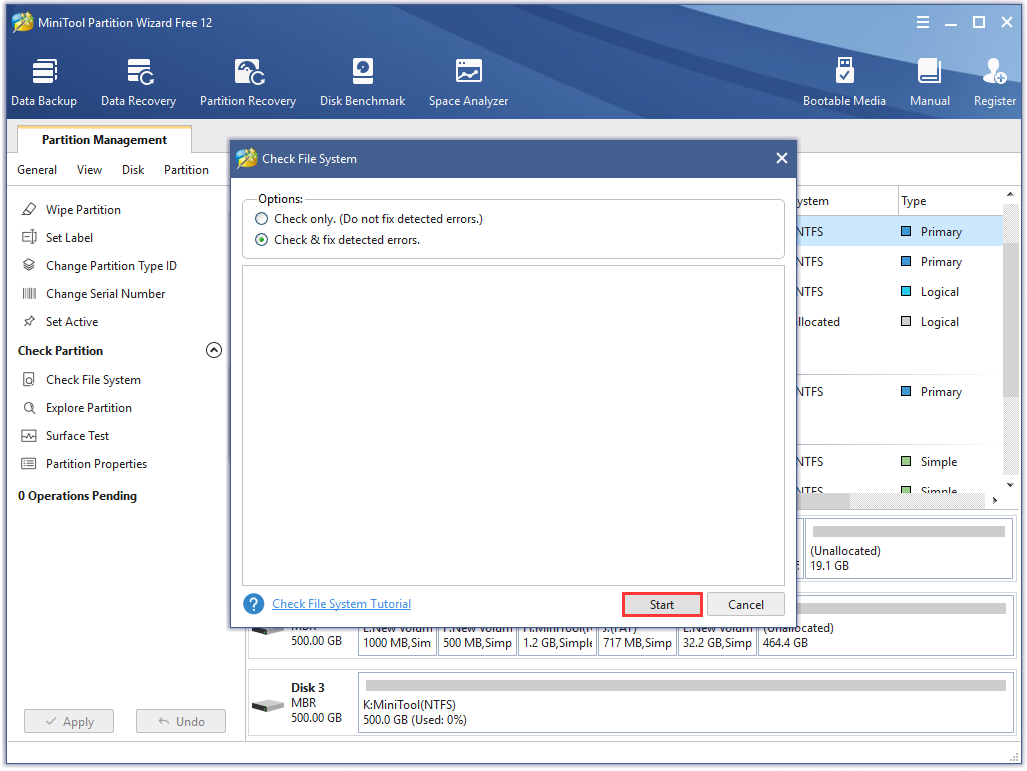
If you select the system partition, you will receive the Question note after hitting the Start button, which means the detected error will be repaired in the process of computer restart.
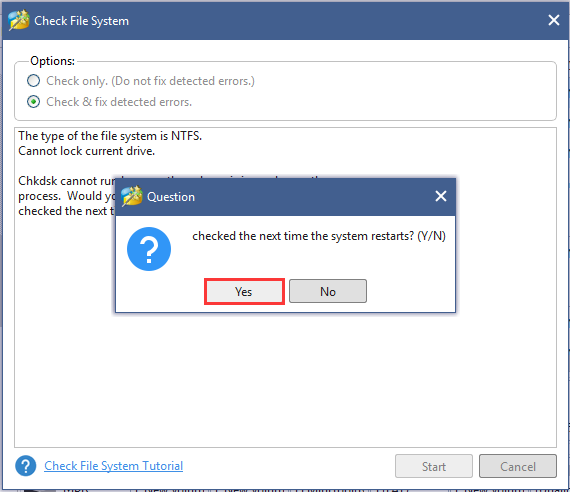
After finishing all the above steps, you can try to run the sfc /scannow command again to see whether the issue WRP could not perform the requested operation is solved.
In addition to using this third-party software, you can also choose windows snap-in CHKDSK utility to check and repair disk errors.
Solution 3. Use CHKDSK Utility to Check Hard Disk Errors
Step 1. Input cmd in the search box of Windows 10 and right-click the Command Prompt to select Run as administrator.
Step 2. Input chkdsk /r command in the Command Prompt and press Enter.
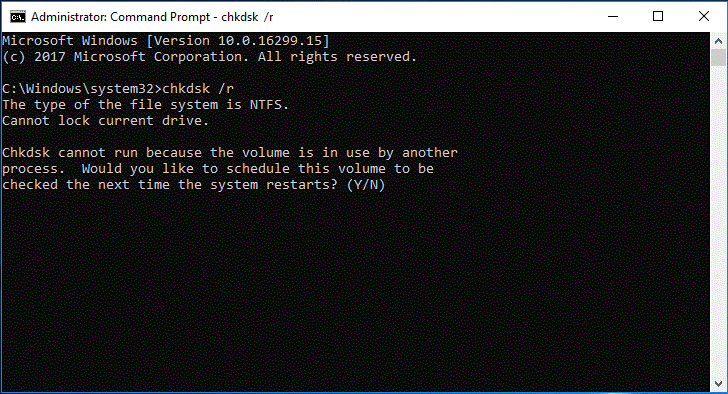
Step 3. Then type Y to continue. Later, the errors on hard disk will be fixed automatically during the process of restarting.
Step 4. Then exit the command prompt and restart your computer.
In the same way, you can run the sfc /scannow command to check whether this issue is solved.
Solution 4. Run Startup Repair
Step 1. You need to connect your Windows 10 installation disc with your computer and boot your Windows from it. Then you will enter the welcome interface and click Next to continue.
Step 2. In the pop-up window, click Repair your computer in the bottom left corner to continue.
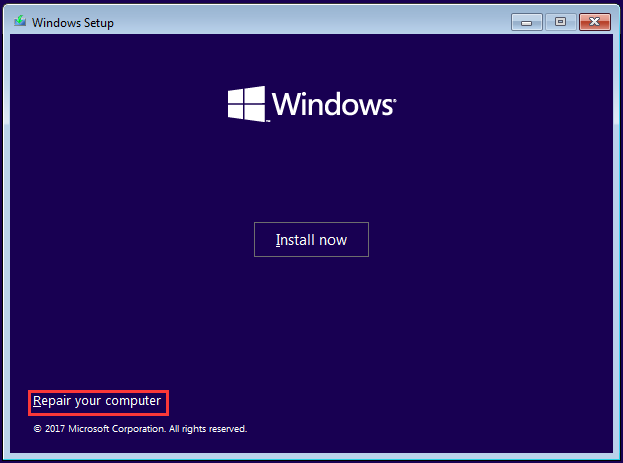
Step 3. Then in the boot menu, click Troubleshoot, Advanced options, Startup Repair one by one. Then you need to wait a few minutes patiently to repair your computer.
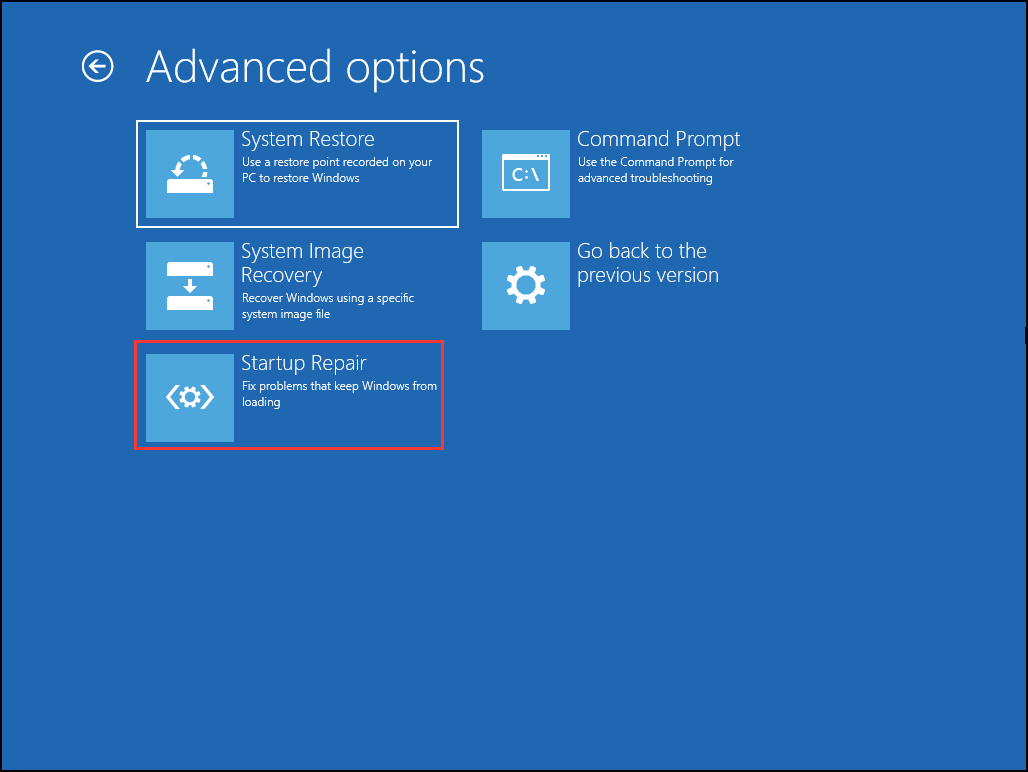
After this process is finished, you can restart your computer to check whether this issue is solved and try to run sfc /scannow again.
Solution 5. Change the Security Descriptors on the Winsxs Folder
One of the possible causes for System File Checker Windows 10 failing is that this utility cannot access the winsxs folder, which exists some errors with the folder’s security descriptors. You can have a try to get rid of the errors through the following steps.
Step 1. Input cmd in the search box and right-click this app to select Run as administrator.
Step 2. In the Command Prompt, type ICACLS C:Windowswinsxs and hit Enter.
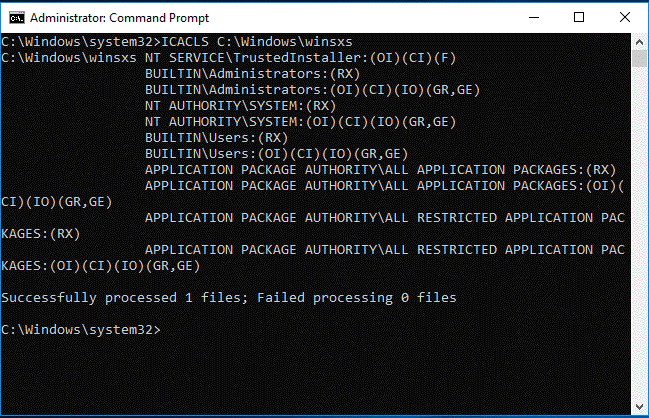
Step 3. After executing this command successfully, exit the elevated Command Prompt. Then restart your computer and run the sfc /scannow command again to check whether this issue is solved.
Well, if all above solutions are still not working, perhaps you can try to run Startup Repair.
How to deal WRP could not start repair service? Please keep reading the following steps to solve this issue.
Solution 6. Enable Windows Modules Installer
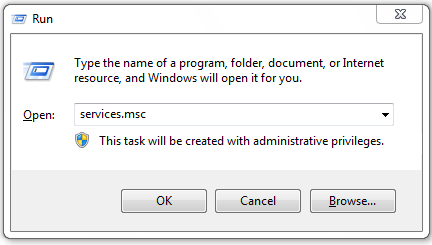
Step 1. Press Win + R on the keyboard simultaneously to open the Run dialog. Then input services.msc in the box and hit Enter to continue.
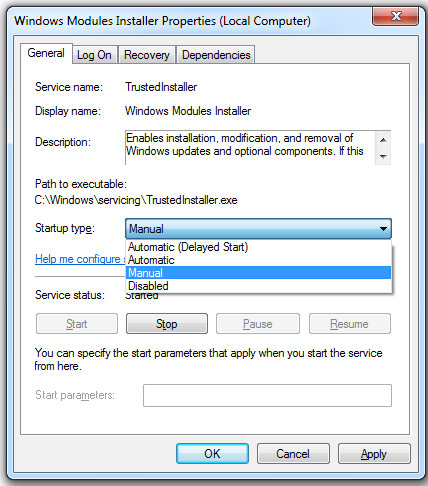
Step 2. Find Windows Modules Installer and double click it in the pop-up window.
Step 3. In the Windows Modules Installer Properties window, set Startup type as Manual, then click Apply and OK to confirm this change.
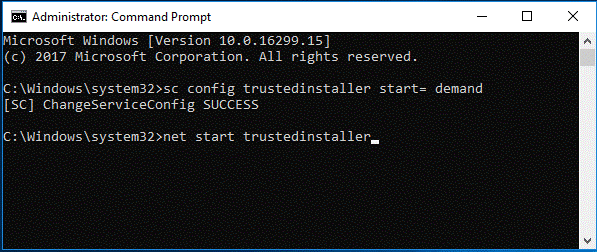
Step 4. After that, open the Command Prompt and type cmd in the search box. Then right-click this app to choose Run as administrator.
Step 5. In the pop-up window, type sc config trustedinstaller start= demand command and hit Enter. After changing service config successfully, type net start trustedinstaller command and hit Enter.
Now, you can restart your computer and try to run sfc /scannow command again.
Solution 7. Run DISM Restorehealth Command
What should you do if you encounter WRP found the corrupt file but could not repair some of the corrupted files? It a good try to run the DISM Restorehealth command.
Step 1. Type cmd in the search box and right-click this app to select Run as administrator.
Step 2. In the pop-up window, input DISM.exe /Online /Cleanup-Image /Restorehealth command and hit Enter.
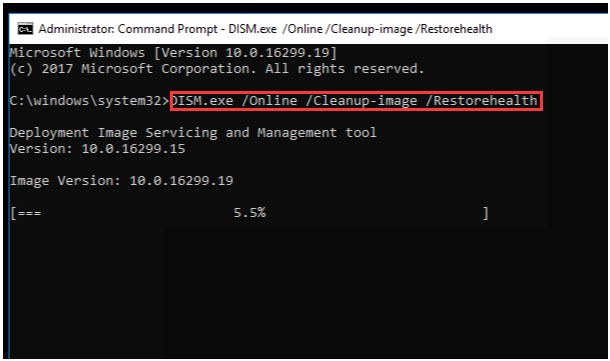
After finishing this command, you can re-run sfc /scannow command to make sure all corrupted system files are fixed.
Right now, all accessible solutions about Windows 10 System File Checker not working are told to you. If these issues are still not solved, you may consider whether there are bad sectors on the hard disk. You can make a surface test for this hard drive.
Bottom Line
In a word, this article mainly talks about how to use System File Checker in Windows 10. And if System File Checker Windows 10 Not Working occurs, how to quickly fix it. Now, it is your turn to have a try.
Besides, welcome to leave your ideas in the comment area. If you have any questions, please contact us via the email [email protected].

User Comments :