Many Steam users report their Steam store page not loading. How to fix? This post from MiniTool will show you how to fix the Steam store not loading issue with detailed steps and screenshots.
The reasons for Steam store not loading issue are various. It can be caused by a slow Internet connection, corrupted web browser cache and so on. When you encounter the Steam not loading issue, don’t worry. The solutions in this article can help you resolve the Steam store page not loading issue easily.
Let’s have a look one by one.
Fix 1. Update Steam
Updating Steam is an effective way to fix the Steam store not loading issue. If you come across Steam not loading store, you can try this fix first.
Step 1. Right click the Windows taskbar and choose task manager from the menu. You can also use the shortcut Ctrl+Shift+Esc to open Task Manager.
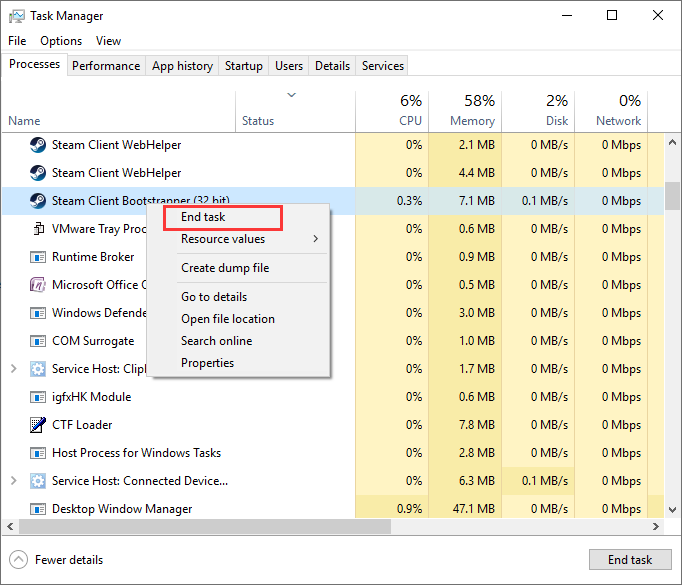
Step 2. Click on Steam Client BootStrapper(32 bit) and then click End task.
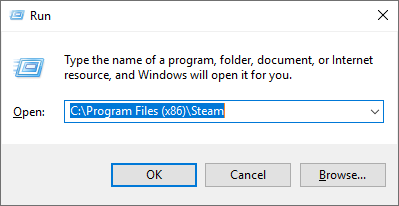
Step 3. Right click Windows Start menu and choose Run to open the Run box. You can also press Windows +R keys on your keyboard to bring up the Run box.
Step 4. Copy and paste C:Program Files (x86)Steam to the Run box and press Enter.
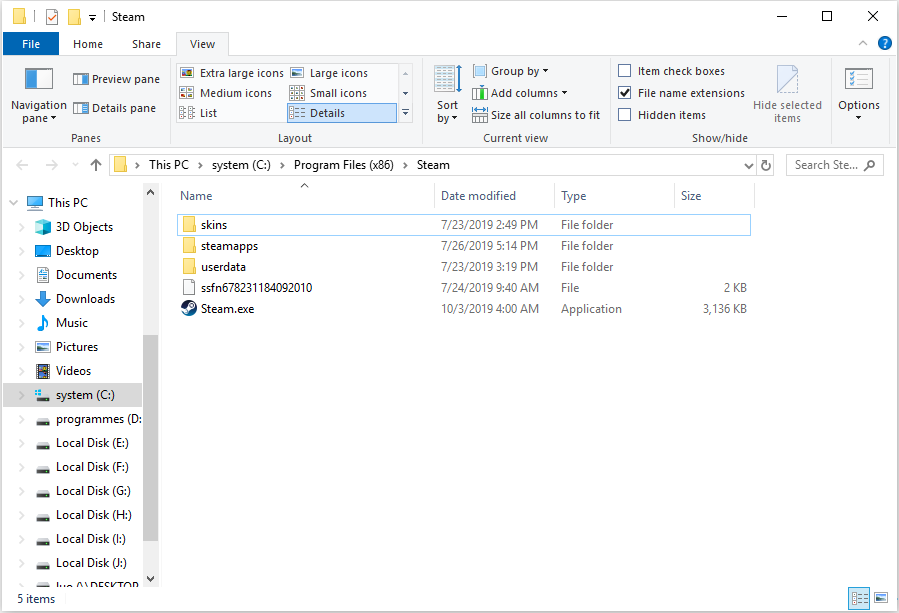
Step 5. Delete all except steamapps folder, userdata folder, Skins folder, Steam.exe file and Ssfn files (It could be more than one). The following shown in the screenshot should be left.
Step 6. Then click the Steam desktop shortcut to launch it. It will update itself automatically.

When the update is finished, you can log in Steam and see if Steam store not loading issue has been resolved.
Fix 2. Clear HTML Cache
The HTML cache can lead to the Steam store not loading issue. If you have not cleared the HTML cache in Steam, you can follow the steps below to clear HTML cache and resolve the Steam store not loading issue.
Here are detailed steps.
Step 1. Input file explorer options or Folder option in the Windows 10 Cortana search box and click the best match to open it.
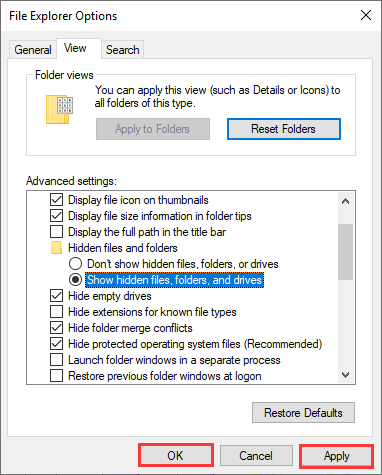
Step 2. Switch to the View tab and choose Show Hidden files, folders and drives.
Step 3. Then click Apply and OK to allow the change.
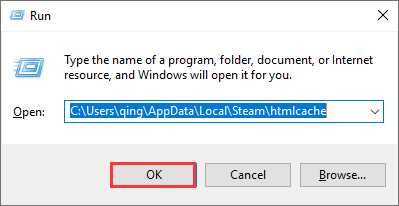
Step 4. Press Windows + R keys on the keyboard to open the Run dialog box.
Step 5. Input C:Users<Username>AppDataLocalSteamhtmlcache in the Run box. You need to replace the <Username> with your Windows account username.
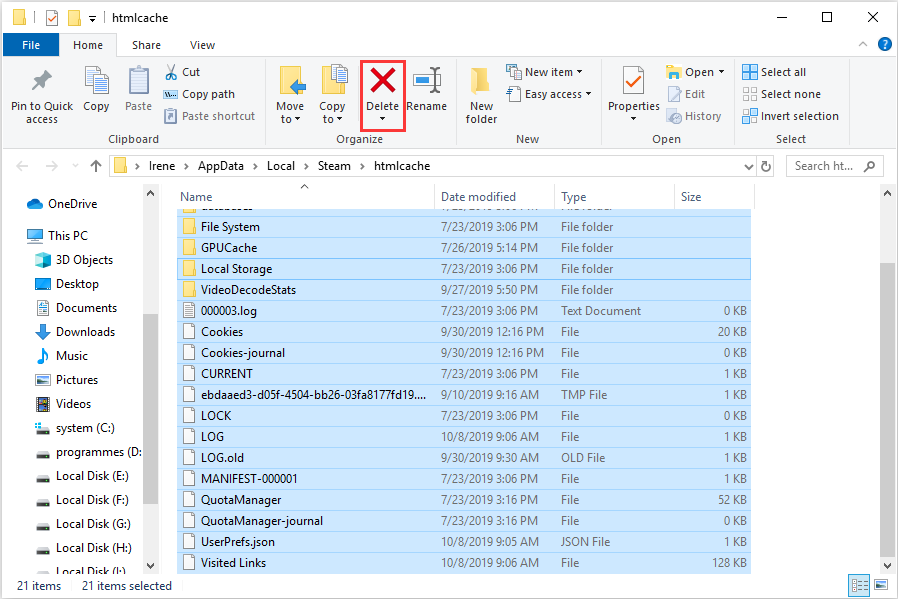
Step 6. Select all items in this folder and choose Delete to delete all.
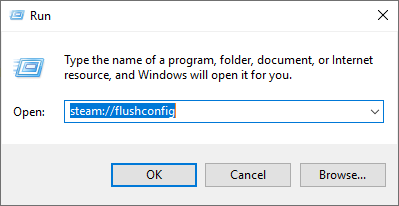
Step 7. Then press Windows + R keys on the keyboard to bring up the Run dialog box again. And type steam://flushconfig in the box and hit Enter.
Step 8. Then a new window will pop up to remind you that this action will clear your local download cache and you need to re-login to Steam. Click OK if you remember your Steam username and password.

Then you can re-login to Steam and the Steam store not loading issue should be fixed.
Fix 3. Clear Steam Web Browser Cache
Corrupted Steam web browser’s cache can also lead to Steam store not loading issue. If the web browser cache is corrupted, there is a possibility that the store cannot load properly.
If this is the case, you can fix the Steam store not loading issue by deleting the web browser cache. Here are detailed steps on how to delete them.
Step 1. Launch Steam client. Click on the Steam tab on the top left.
Step 2. Choose Settings from the drop-down menu.
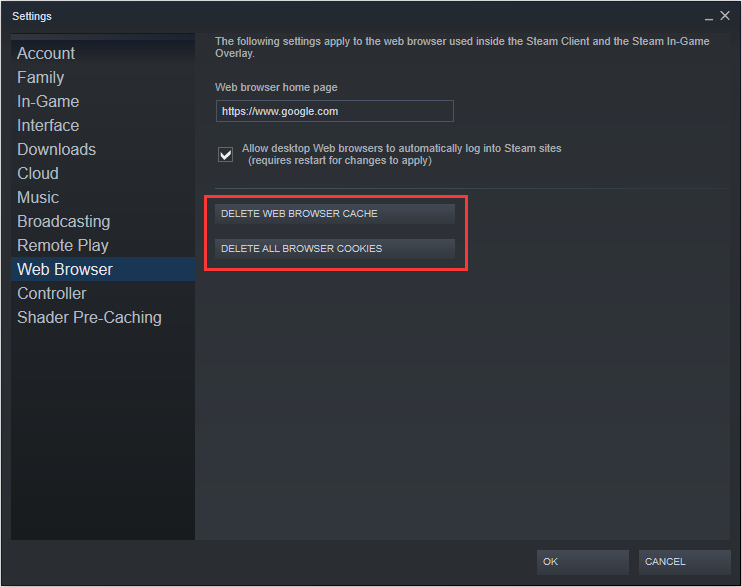
Step 3. Choose Web Browser from the left pane.
Step 4. Then click on Delete Web Browser Cache and Delete Web Browser Cookies.
Step 5. Click OK when a window pops up to confirm your action.
Then you can re-launch Steam and check if the Steam store not loading issue has been resolved.
Conclusion
After trying above fixes, I believe that the Steam not loading store issue has been resolved. Which method works for you? You can share your opinion in the following comment zone. We are glad to have you share it with us.


User Comments :