A lot of users don’t know how to start Disk Cleanup with all items checked automatically in Windows 10/11. If you are also trying to figure it out, this post of MiniTool is worth reading. It walks through detailed steps to create Disk Cleanup all items checked shortcut.
Disk Cleanup, also known as Cleanmgr.exe, is a Windows built-in cleanup tool developed by Microsoft. This utility can help you free up disk space by searching and analyzing the drive for files that are no longer needed, and then automatically removing them from your PC.
Sometimes you may want to start Disk Cleanup with all items checked automatically if you use this tool regularly, which can make the cleanup process more efficient. So, how to run Disk Cleanup with all items checked automatically on Windows 10/11? Let’s keep reading.
How to Start Disk Cleanup with All Items Checked in Windows 10/11
There are 3 simple ways to run Disk Cleanup with all items checked automatically on Windows 10/11. Let’s choose one from them.
# 1. Open Disk Cleanup with All Items Checked Shortcut via the Run Box
The first and simplest method to start Disk Cleanup with all items checked automatically is to use the Windows Run box.
Step 1. To do this work, press Win + R keys to open the Run dialog box, and then type cleanmgr.exe /LOWDISK and hit Enter.
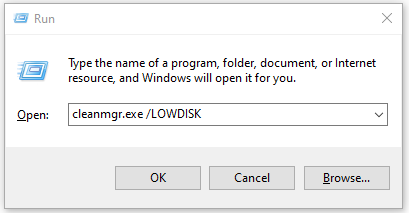
Step 2. Select a drive from the drop-down menu and click on Next. Then wait for the scanning process to complete and you will find Disk Cleanup starts with all items checked automatically. But this method won’t the Clean up system files option selected by default.
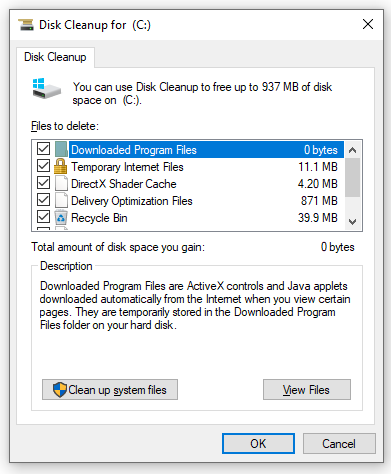
# 2. Open Disk Cleanup with All Items Checked Shortcut via CMD
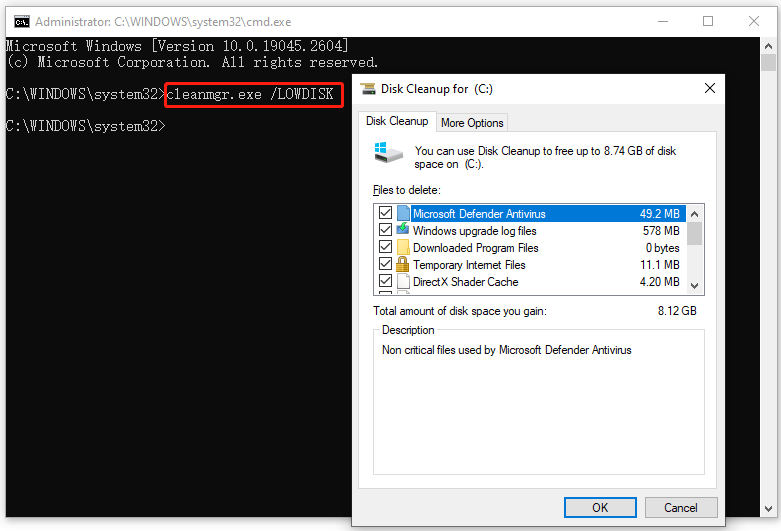
Another simple method is to use Command Prompt. To open Disk Cleanup with all items checked shortcut automatically, open the elevated Command Prompt window, type the cleanmgr.exe /LOWDISK and press Enter. Then select a drive and click OK. It will start Disk Cleanup with all items checked automatically, including the system files clean-up.
# 3. Create Disk Cleanup All Items Checked Shortcut
To run Disk Cleanup with all items checked automatically, you also can create Disk Cleanup all items checked shortcut on Windows 10/11. This Disk Cleanup shortcut includes the LOWDISK parameter, which enables you to run Disk Cleanup automatically with all items checked already when starting the utility.
Step 1. Right-click the empty space on your desktop and select New > Shortcut.
Step 2. In the Create Shortcut window, type the cleanmgr.exe /LOWDISK in the box and click on Next. Here you can click on Browse and select a location to save the Disk Cleanup shortcut.
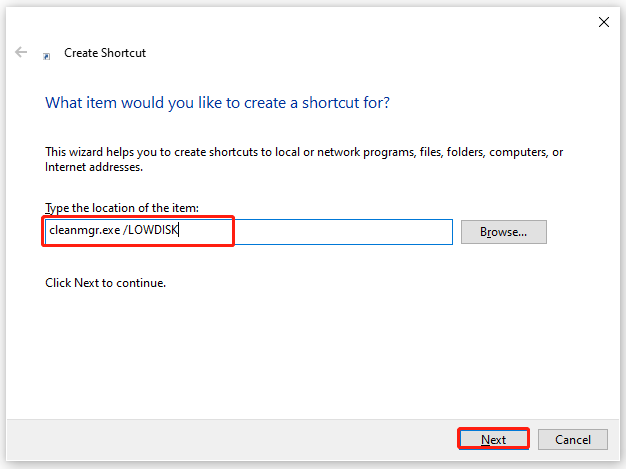
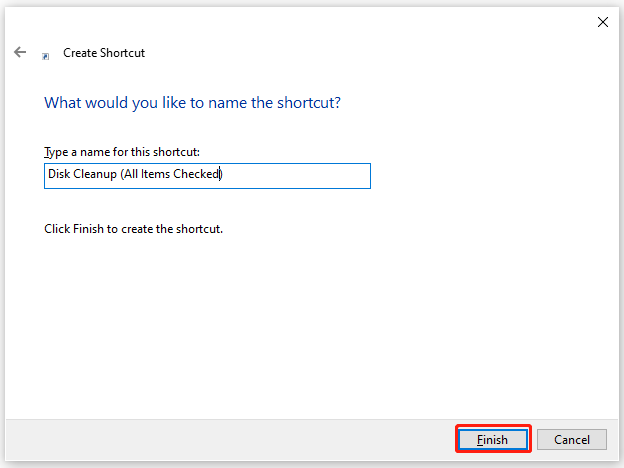
Step 3. Type a name for the shortcut and click on Finish.
Step 4. If you want to start the Disk Cleanup all items checked shortcut with the Clean up system files selected by default, you can right-click the shortcut and select Properties. In the Shortcut tab, click on Advanced, tick the checkbox next to Run as administrator, and click on OK.
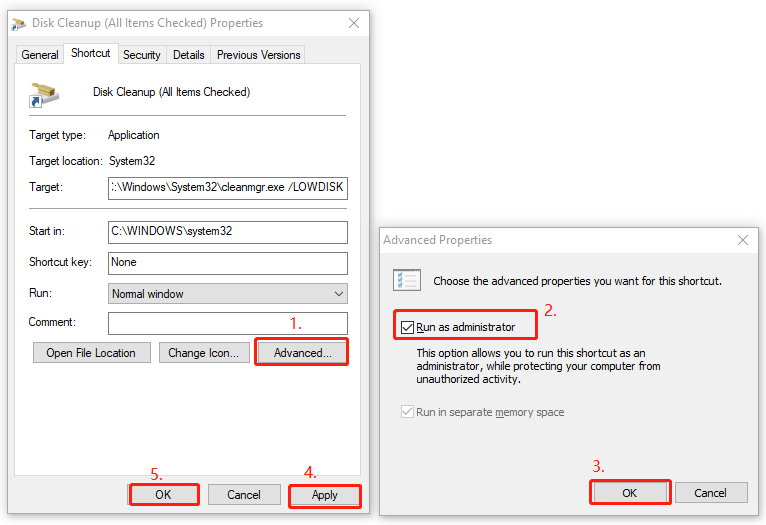
Step 5. Click on Apply and then OK in the Disk Cleanup properties window.
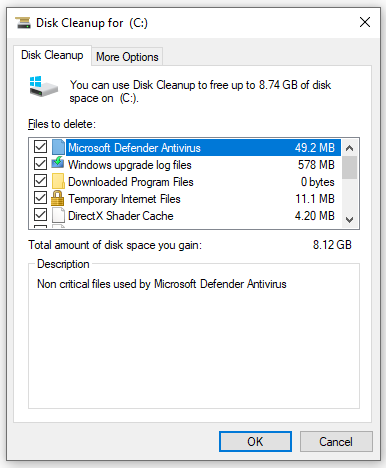
Step 6. Double-click the Disk Cleanup shortcut, select the drive that you want to free up, and click on OK. Then you can run Disk Cleanup automatically with all items checked.
Best Alternative to Disk Cleanup to Free up Disk Space
Although Disk Cleanup can be used to free up disk space on Windows 10/11, it can’t show detailed information about the drive. Sometimes the tool even runs into some errors like “Disk Cleanup stuck on Windows update cleanup”, “Disk Cleanup not working”, etc.
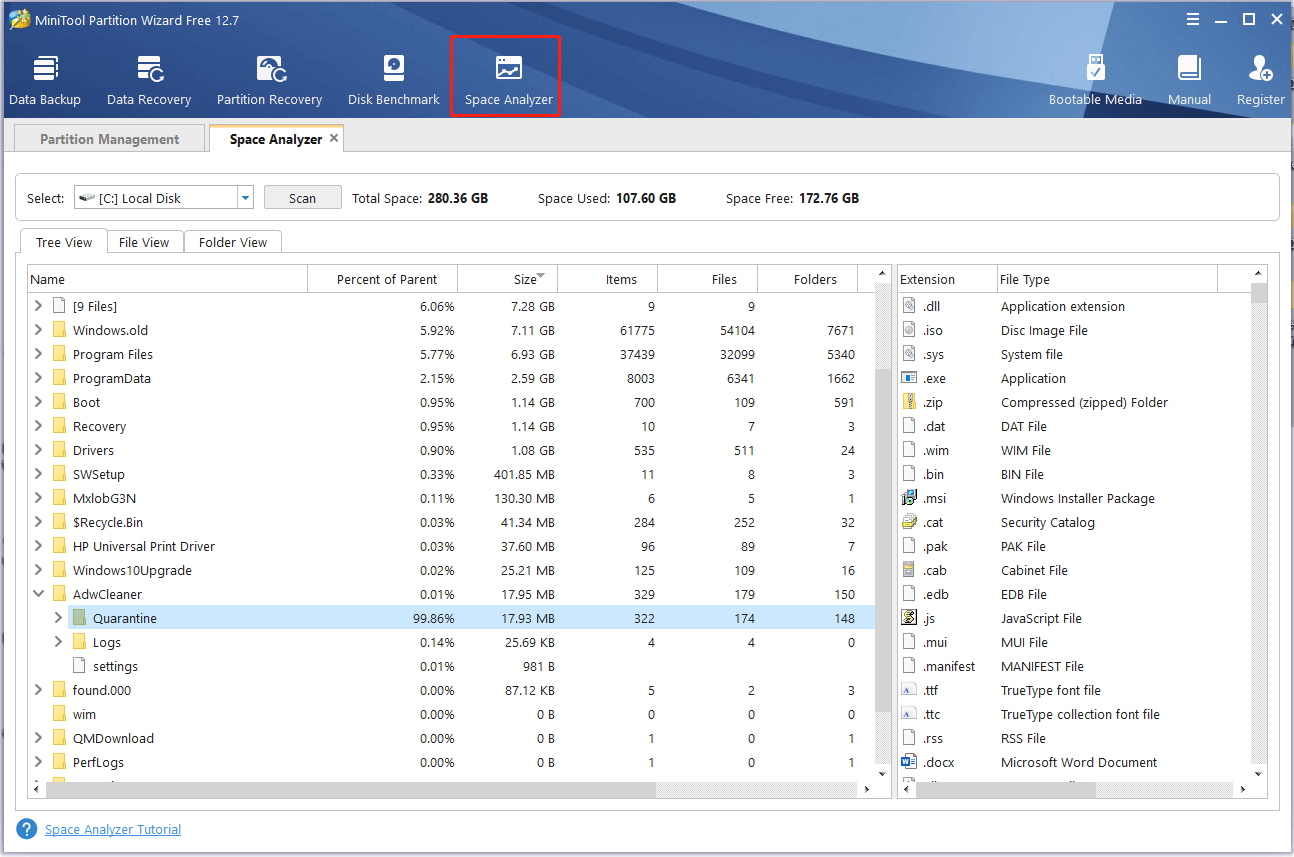
If you want to know what is taking up your disk space in detail, MiniTool Partition Wizard is a good choice. Its Space Analyzer can analyze your disk space and clean up all unnecessary files. Besides, it can help you increase disk space by extending partitions, upgrading to a larger SSD/HDD, etc.
MiniTool Partition Wizard FreeClick to Download100%Clean & Safe

![Disk Column Missing from Task Manager Windows 11/10/8/7? [Fixed]](https://images.minitool.com/partitionwizard.com/images/uploads/2023/03/disk-column-missing-from-task-manager-thumbnail.jpg)
User Comments :