What is splwow64.exe? How to fix splwow64.exe error effectively? If you are not clear about them, then you come to the right place. This post of MiniTool will focus on splwow64.exe, including its basic information like definition, file size, and location, and solutions to splwow64 exe error.
An Overview of Splwow64.exe
Thunking of Spooler APIs is a Windows core process that makes 32-bit applications compatible with 64-bit system, while Splwow64.exe is an executable component of Thunking of Spooler APIs. Hence, splwow64.exe can be viewed as a Windows core system file as well.
Splwow64.exe acts like a bridge between a 32-bit application and a 64-bit Windows operating system. It usually runs as a background process in the system.
Splow64.exe shows in the Task Manager with the name – Printer host for 32-bit application. It can be found through the path – C:Windows. On average, the file size of Splwow64.exe is about 130KB on most Windows OS versions.
Obviously, Splwow64.exe is not a virus and doesn’t pose a threat to your device. In addition, errors associated with operating system will occur if splwow64.exe is removed. For instance, you may encounter errors like missing operating system, operating system not found, and something like that.
However, splwow64.exe error sometimes occurs during the execution of a certain action on the computer. This error can happen to Windows 7/8/8.1/10. How to fix this error? The section below explores the possible causes behind the error and then provides you with some fixes based on that.
How to Fix splwow64.exe Error
After analyzing multiple cases, we found some reasons for the splwow64.exe error.
- Printer port is corrupted.
- Client-side rendering is enabled.
- Printer environment keys are corrupted.
- There are generic printer glitches.
- Xerox global print driver is outdated.
Here are 3 methods to fix splwow64 exe error. Pick one to resolve the error now.
Fix 1: Run Printer Troubleshooter
Step 1: Open Settings by pressing Windows + I key, and then click on Update & Security on its main interface.
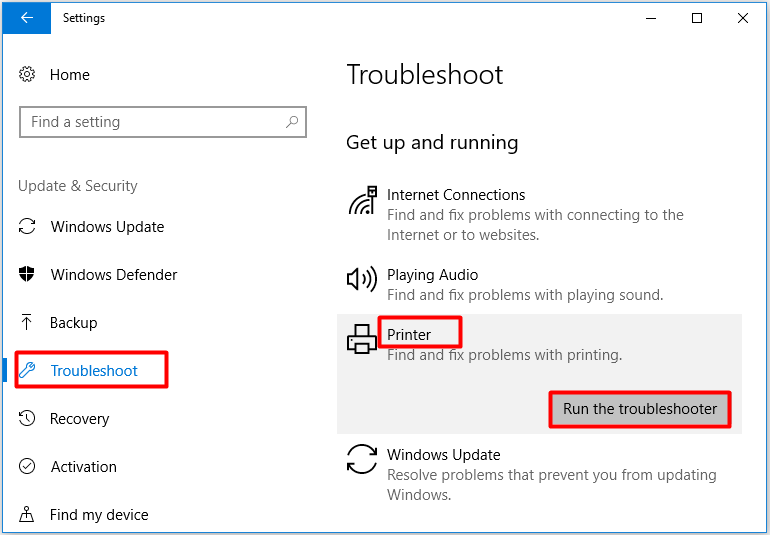
Step 2: Click on the Troubleshoot option and then move to the right side of the window. Scroll down the content until you find Printer. Click on Printer and click Run the troubleshooter to continue.
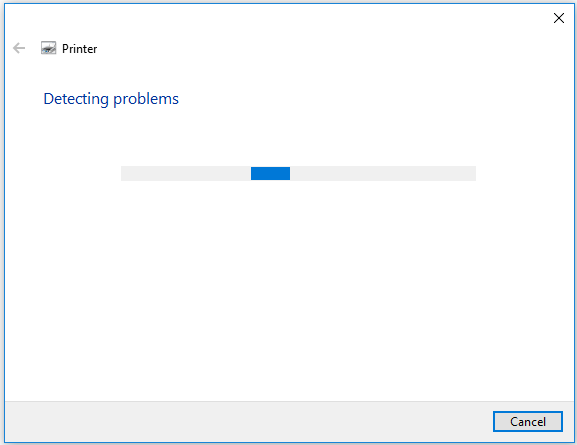
Step 2: Then the program will detect problems with printer automatically.
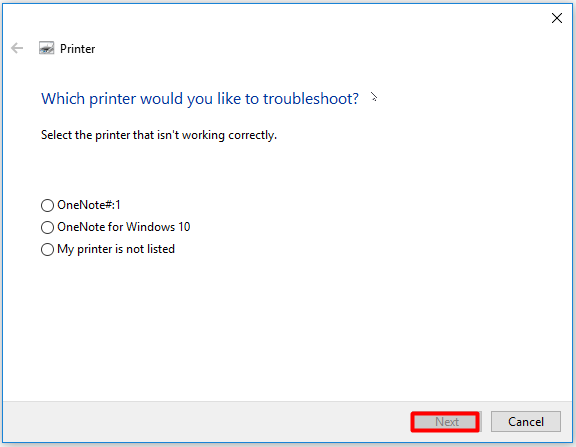
Step 3: In the pop-up window, choose the printer that isn’t working properly and click Next. If it is listed, click My printer is not listed option and click Next.
Step 4: Apply the give fix to solve the issue. If there’s nothing wrong with the printer, try other fixes immediately.
Fix 2: Disable Client-Side Rendering
Step 1: Press Windows and I keys to open Settings, and then click Devices.
Step 2: Click the Printers & scanners option and move to the right side of the window. Find the printer that you suspect for the issue and then click on it. Click Manage option from the prompted menu.
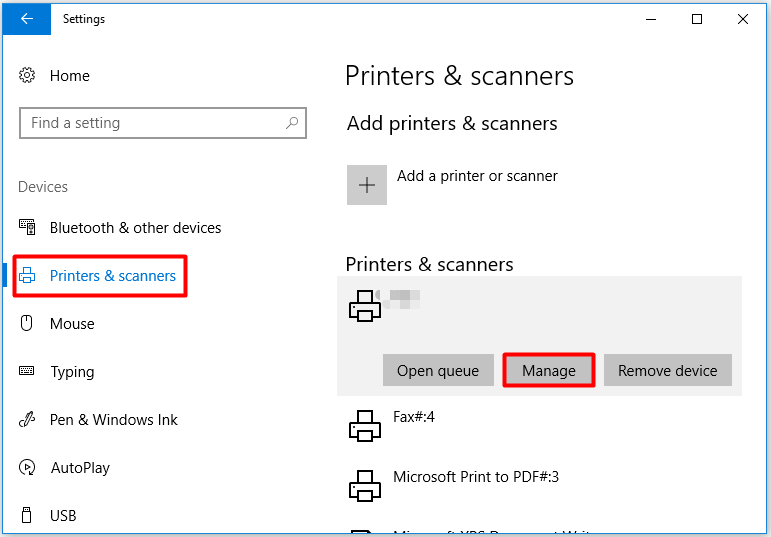
Step 2: In the next window, click Printer properties.
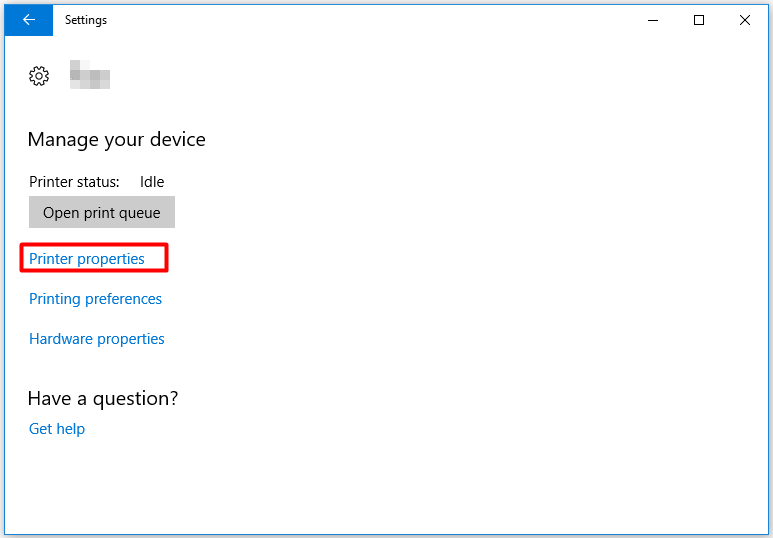
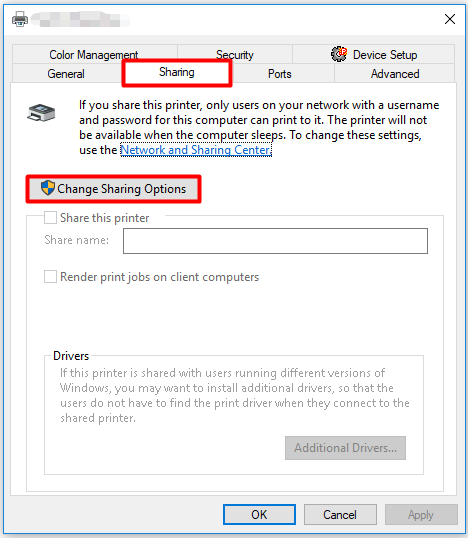
Step 3: Navigate to the Sharing tab, then click Change Sharing Options.
Step 4: Check the Share this printer checkbox and click Apply. Don’t check the Render print jobs on client computers option.
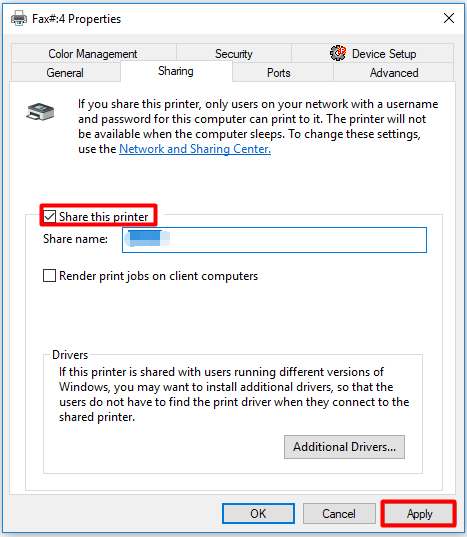
Step 5: After disabling client-side rendering, restart your device and repeat the action that causes the error to see if it works.
Fix 3: Update Printer Drivers
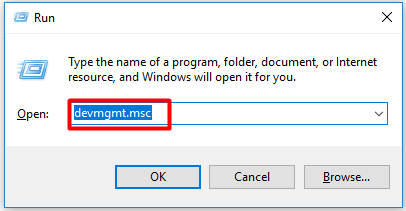
Step 1: Open the Run window by pressing Windows and R keys, and then input devmgmt.msc and hit Enter.
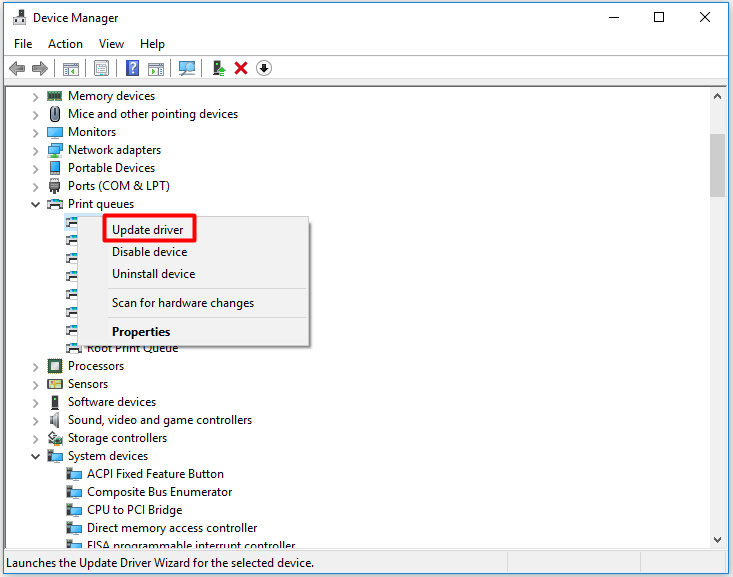
Step 2: After expanding Print queues, right-click on your printer driver and click Update driver.
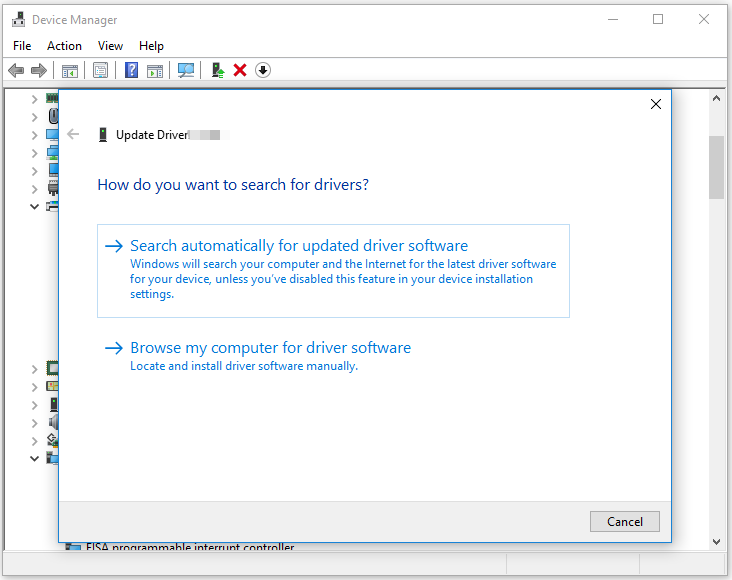
Step 3: In the next window, choose a method to update your printer driver. As implied by the name, the Search automatically for updated driver software option can update the driver automatically, while the Browse my computer for driver software option requires you update the item manually. After selecting the option, follow the on-screen instruction to finish the process.

User Comments :