About Sony VAIO Boot Menu
Introduction to Sony VAIO Laptop
VAIO was originally a brand of Sony, introduced in 1996. However, due to poor sales performance, Sony sold its PC business to the investment firm Japan Industrial Partners in February 2014. From then on, Sony would not plan, design and develop computer products. But it would still offer aftercare customer services for VAIO laptops sold by it.
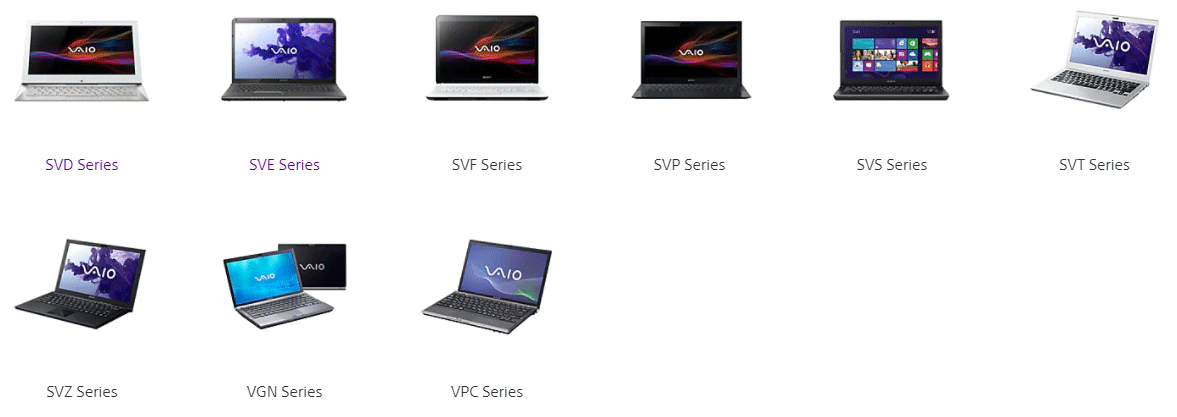
Nowadays, there are still VAIO laptops for sales, but these laptops are not Sony laptops. If you bought your VAIO laptops after 2014, they may be not Sony laptops.
Introduction to Boot Menu
Boot menu can determine where to boot the PC. If you set a wrong boot menu, your PC may fail to boot into the expected operating system.
When you power on a PC, it will do POST (Power On Self Test), initialize system hardware, check for a bootable device in the order of boot device sequence you set in BIOS, and then load OS from the first bootable device it finds. Then, you can boot into the system smoothly.
Usually, if you want to change the boot device sequence, you should use the BIOS key to enter firmware, and then go to boot page to change the boot order. However, some PC models allow you to use Boot Menu key to change boot order more easily. In addition, in most PCs, this change is a one-time thing. If you restart the PC later, it will boot in the original boot order again.
Sony VAIO BIOS Key and Boot Menu Key
Sony VAIO BIOS key and boot menu key are as follows:
| Manufacturer | Models | Boot Menu Key | BIOS Key |
| Sony | VAIO Duo, Pro, Flip, Tap, Fit | Assist Button (Use the Assist Button when the computer is off, not when it is booting) | |
| VAIO, PCG, VGN | F11 | F1, F2, F3 | |
| VGN | Esc, F10 | F2 | |
Do you know the model of your Sony VAIO PC? If not, you can check that through the following steps:
- Press Windows Key + R to open the Run.
- Type “dxdiag” into the Run box and then press Enter to open DirectX Diagnostic Tool.
- In the System tab, you can check the System Model.
This method is applicable to Windows 7/8/10. You can try it.
If the above hot keys are not suitable for you, you can try the following method: restart your PC and you may find the BIOS or boot menu key in the fleeting startup screen. This method can be applied to most PCs.
After knowing the Boot Menu key, you can refer to the following step to open the boot menu window: power on your PC and then press the Boot Menu key during startup when the computer logo is displayed. Please note that if the Boot Menu key is the Assist Button, you should press this button when the PC is off.
What to Do If the Boot Menu Key and BIOS Don’t Work?
I have a laptop Sony VAIO SVE1511g1eb. My problem is that I can’t access Boot Menu or even BIOS. By default, this laptop should be entered by pressing the “ASSIST” button. But a few months ago I changed the drive to SSD myself and installed windows 10 with a pendrive. Since then, the “ASSIST” button mentioned above does not work… — elektroda.com
Some people have reported that the Sony VAIO boot menu key doesn’t work. Are you also facing this problem? If so, you may try the following methods to fix it.
1. Boot into BIOS through another way (Windows 8 or later versions).
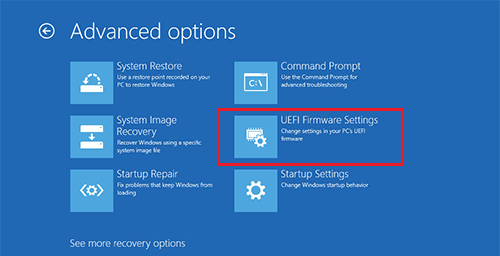
Since Windows 8, Microsoft has added an option to allow users to enter the BIOS from WinRE, which solves the problem of not knowing the BIOS keys or the BIOS keys are not working. Here is the guide on how to enter BIOS through WinRE:
Step 1: Enter WinRE through one of the following ways:
- Click the Start button at the lower left corner of the screen, then go to Settings > Update & security > Recovery > Advanced startup, and then click the Restart now
- Click the Start button > Power icon, then hold sown the Shift key and click Restart
- Use command line “exe /r /o“.
Step 2: In the WinRE window, go to Troubleshoot > Advanced options > UEFI Firmware Settings. Click the Restart button and then you can enter the BIOS window.
2. Have you enabled Fast Startup mode?
Fast startup is a startup method offered in Windows 8 and 10, which combines the sleep mode and logout function. Its implementation is to log out the system first, and then enter the hibernation state. In hibernation mode, the data in the memory will be stored into the hard disk.
When the power is connected, press the Power button, the system will read the temporarily stored memory data from the hard disk after completing the self-check and then restore them to the memory.
Apparently, fast startup is not a real shut down. Therefore, if it is enabled, you can’t enter BIOS smoothly. In this case, you can turn off this feature. Here is the guide:
- Open Control Panel and then go to System and Security > Power Options.
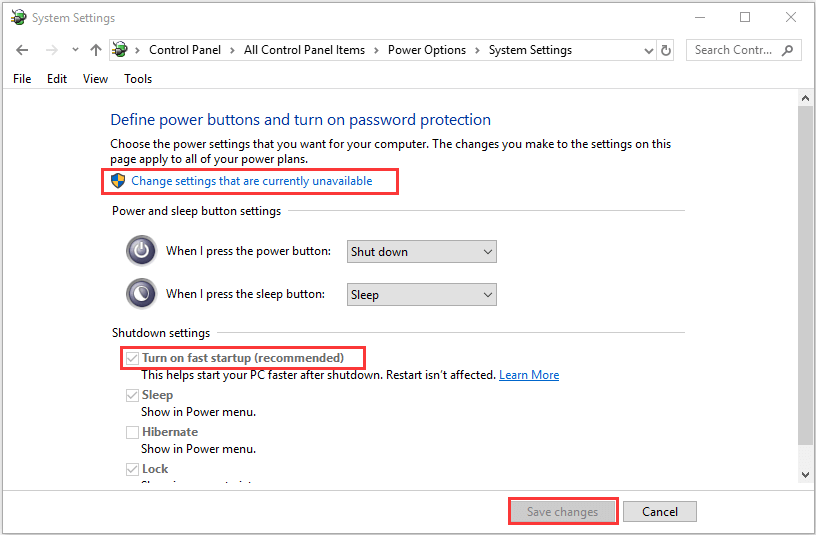
- Click Choose what the power button does.
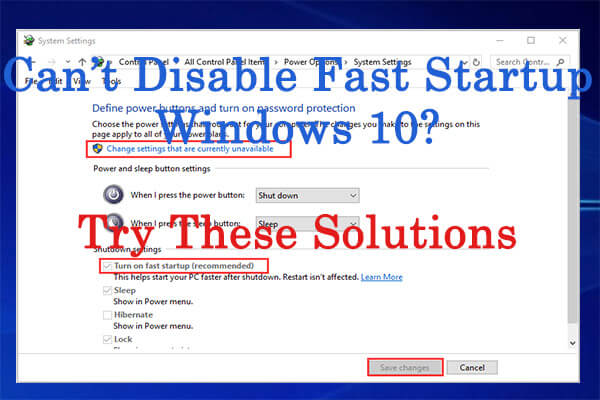
- Click Change settings that are currently unavailable, uncheck Turn on fast startup option and then hit Save changes.
After making sure the PC is not in sleep or hibernation mode, you can then try entering BIOS again.
3. Use PS/2 Keyboard.
The USB keyboard may be not recognized by the computer until the OS starts to load. Then, you can try switching to PS/2 keyboard to solve this problem.
How to Boot Sony VAIO from USB Drive
To make Sony VAIO boot from USB drive, you can refer to the following guide.
Stage 1. Make a Bootable USB Drive.
In most cases, you will need to make a Windows installation media. With it, you can install or repair Windows. To make a Windows 10 installation media, you can refer to this post: A Complete Guide to Windows 10 Media Creation Tool: How to Use.
In some cases, you may need to make a data recovery USB drive or an antivirus USB drive, so that you can do some PC rescue work when PC is not booting. Take MiniTool Partition Wizard as an example. This software can help you repair hard drive and recover data when PC is not booting. Here is the guide on how to make a bootable MiniTool Partition Wizard USB drive:
MiniTool Partition Wizard DemoClick to Download100%Clean & Safe
Step 1: Connect a USB drive to a normal-running computer. Then, launch MiniTool Partition Wizard and go to its main interface. Click Bootable Media at the upper right corner.
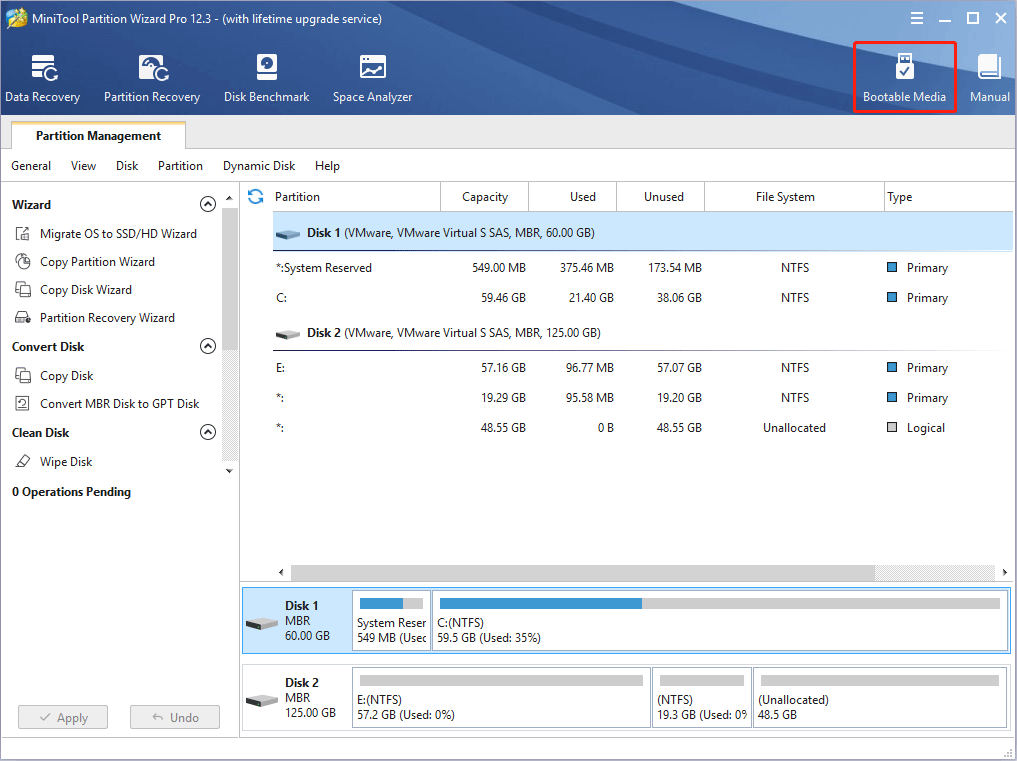
Step 2: Click WinPE-based media with MiniTool plug-in. Then, click USB flash drive to make a MiniTool bootable media. Please note that the data on the USB drive will be destroyed.
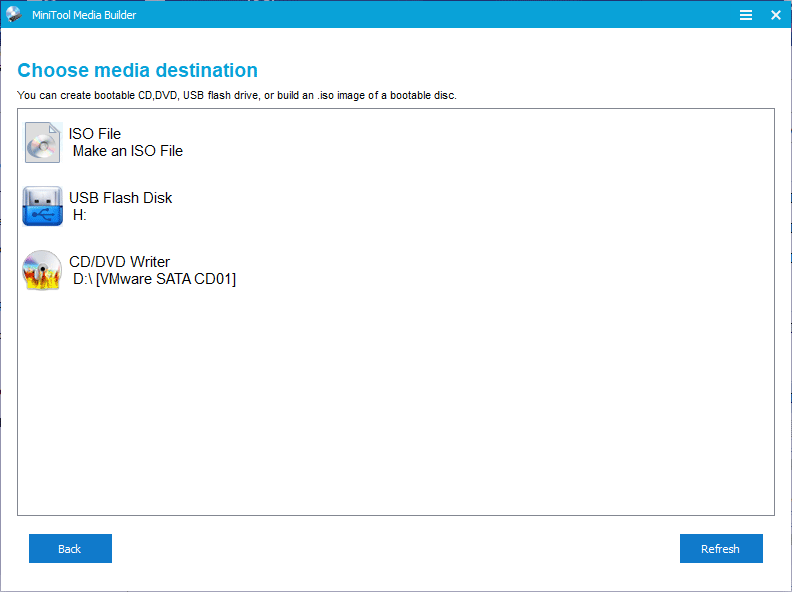
Also in some cases, you may need to create an installation media for other operating systems. Whatever cases you are in, please make sure you have created a correct bootable media. Then, you can go to the next stage.
Stage 2. Change BIOS to Make Sony VAIO Boot from USB Drive
- Connect the bootable USB drive to the Sony VAIO laptop and then boot into BIOS through the boot menu or BIOS key, or through the UEFI Firmware Settings feature.
- In the VAIO Care interface, choose Start from media (USB device/optical disc).
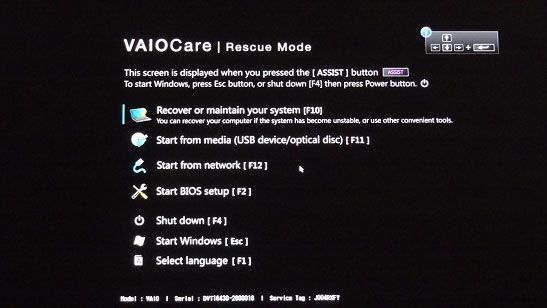
Then, if all is OK, the Sony VAIO laptop will boot from the USB drove.
1. The BIOS window may vary but you should find the similar option.
2. If the PC fails to boot from the USB, you can try disabling Secure Boot in BIOS setup or checking the USB connector.
Bottom Line
Is this post useful to you? Do you have other ideas about Sony VAIO boot menu? What will you do if the Sony VAIO doesn’t boot from USB? Please share your ideas with us in the following comment zone. In addition, if you have difficulty in making MiniTool Partition Wizard bootable media, please contact us via [email protected]. We will get back to you as soon as possible.
Sony VAIO Boot Menu FAQ
- Connect a bootable USB drive to the Sony VAIO laptop.
- Power off the PC and then press the Assist button to enter the boot menu window. Or restart the PC and then press the boot menu key like F11, Esc, or F10 to open the boot menu window.
- Choose Start from media (USB device/optical disc) option.



User Comments :