Are you using Windows SmartScreen to prevent your computer from the malicious application attacks? Are you stuck in the issue ‘Windows SmartScreen can’t be reached right now’? In this post, MiniTool shows you the top 4 solutions to this issue.
What Is Windows SmartScreen
Introduced in Windows 8 and Windows 10, SmartScreen is a useful Windows feature that is used to block the suspicious file or application you try downloading from Microsoft Edge or Internet Explorer.
The SmartScreen process (with the filename of smartscreen.exe) displayed in Task Explorer should be responsible for this feature.
How does it work? For example, when you try downloading an application from Microsoft Edge, Windows SmartScreen will check it against a Microsoft database. There are three cases.
Case 1: If the application has been seen before and regarded to be safe, the feature will allow it to run.
Case 2: If the application has not been seen before and Windows is not sure whether it is safe, the feature will prevent it from starting and prompt a warning message, but you can bypass this warning.
Case 3: If the application has been seen before and regarded to be malicious, the feature will block it.
But some Windows users reported that they ran into the error ‘SmartScreen can’t be reached right now’.
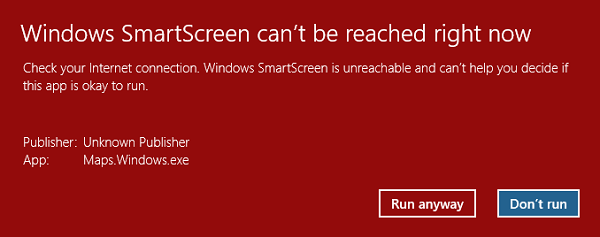
This error makes that they cannot download anything through official or unofficial channels. How to get rid of this error? Try the following solutions.
Solution 1: Make Sure Whether SmartScreen Is Enabled
One of the possible reasons behind the ‘Windows SmartScreen can’t be reached right now’ is that the Windows SmartScreen feature is disabled from Windows Defender Security Center by yourself or a third-party application.
How to check whether SmartScreen is enabled? Please refer to the tutorial below.
Step 1: Type Windows Defender in the Cortana’s search bar and then click the best-matched result.
Step 2: Select App & browser control from the right pane from the Windows Defender Security Center.
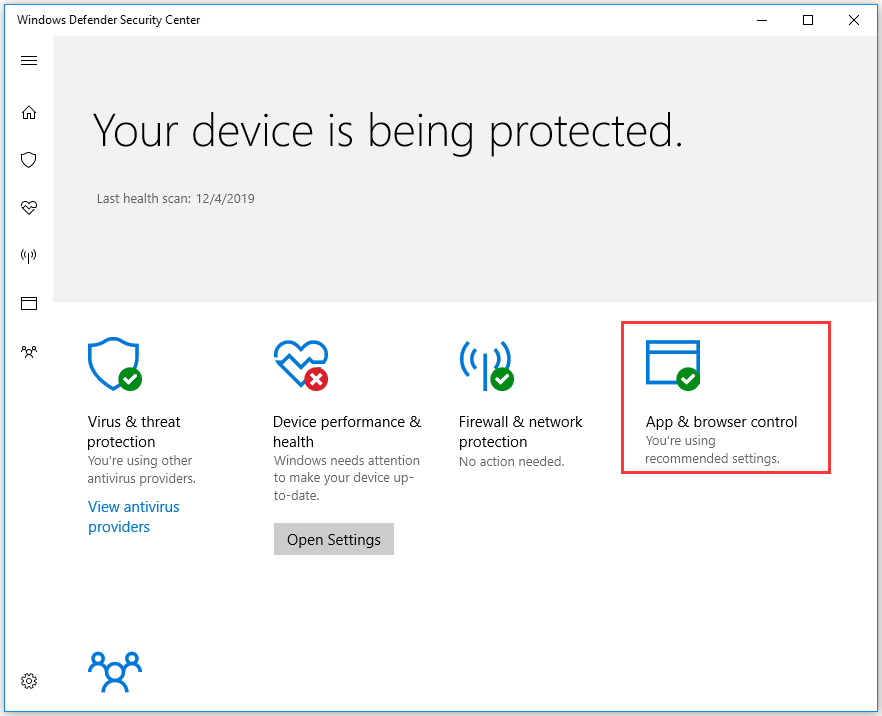
Step 3: Make sure the following three options are set to Warn (try the second solution if the three options have been set to Warn).
- Check apps and files;
- SmartScreen for Microsoft Edge;
- SmartScreen for Microsoft Store apps.
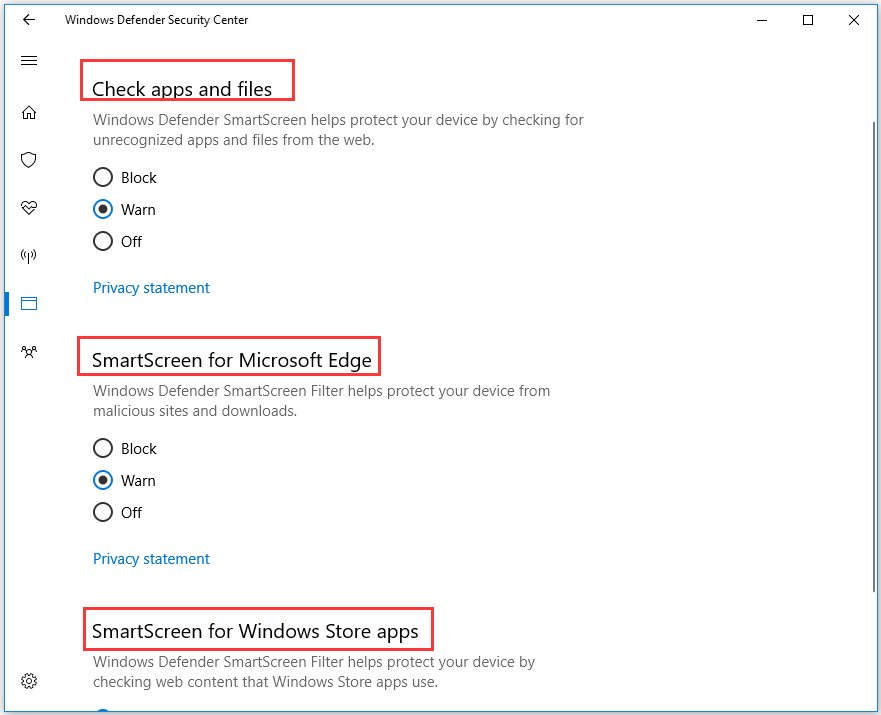
Step 4: If SmartScreen was disabled, restart your PC after settings the mentioned three options to Warn.
After rebooting your PC, ‘Windows SmartScreen can’t be reached right now’ error still occurs, please try the following solution.
Solution 2: Check Internet or Wi-Fi Connection
The issue that Windows SmartScreen is unreachable can be ascribed to the Internet or Wi-Fi connection not working fine. As we know, SmartScreen requires your computer to be connected to the Internet to work. If the connection is not working fine, the ‘Windows SmartScreen can’t be reached right now’ will appear.
Solution 3: Disable Proxy Server
Some Windows users reported that disabling proxy server is helpful to fix ‘Windows SmartScreen can’t be reached right now’. The reason is that certain proxy servers will interfere with the SmartScreen component and cause it to become unreachable.
But note that this solution is not feasible if you are not using a proxy server.
How to disable Proxy Server? Follow the steps below.
Step 1: Click the Windows icon and then select the Settings icon.
Step 2: Select Network & Internet on the Settings window.
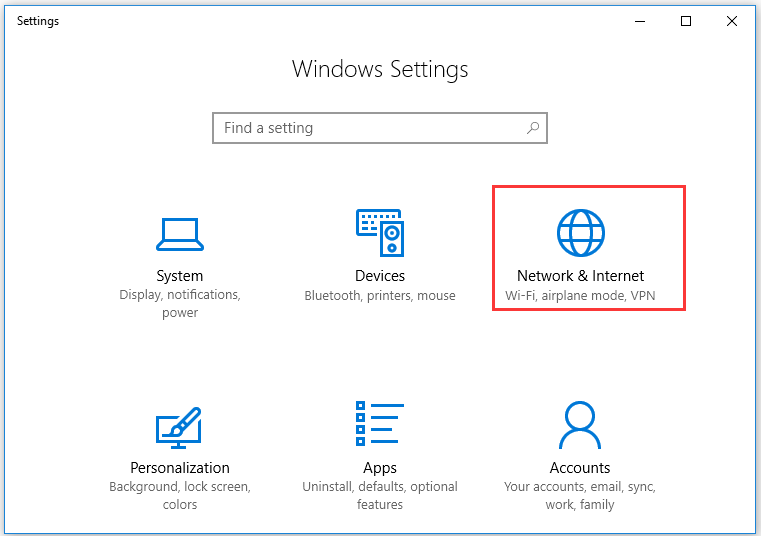
Step 3: On the left pane of the Network & Internet window, select Proxy. Scroll down the right pane and set the Use a proxy server option to Off.
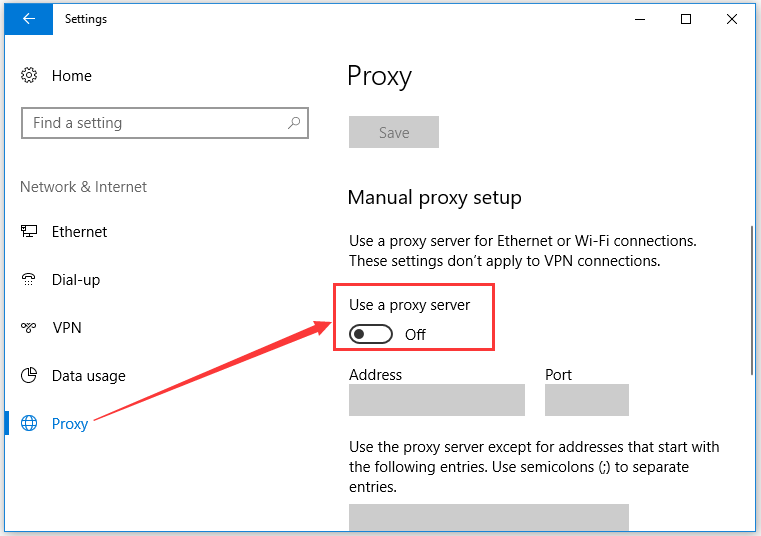
Step 4: Reboot your PC and check the issue ‘Windows SmartScreen is unreachable’ has been solved.
Solution 4: Create A New Windows User Account
It is possible that certain inconsistencies with your Windows account can trigger ‘Windows SmartScreen can’t be reached right now’. Some Windows users successfully fixed this issue by creating a new Windows user account for themselves.
Try this solution now.
Step 1: Access the Settings window. On this window, please click Accounts.
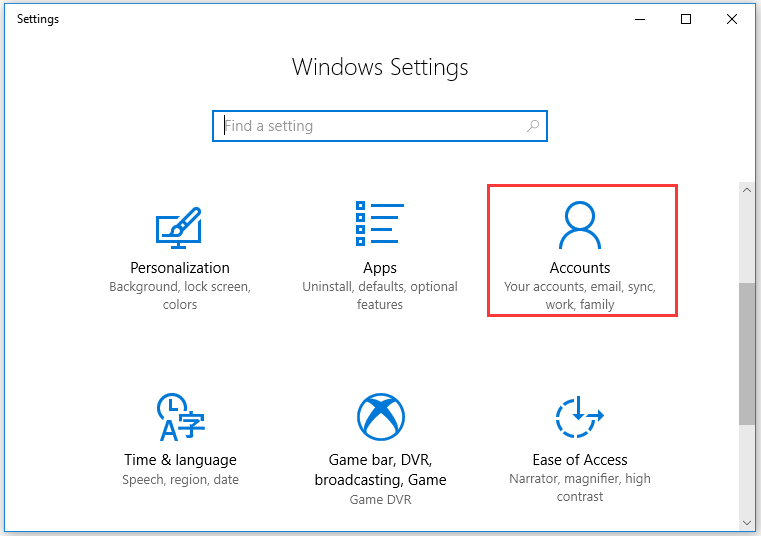
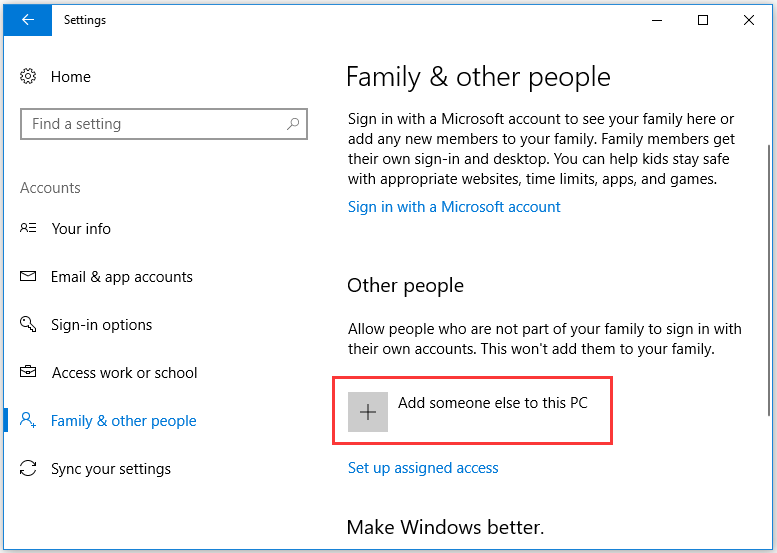
Step 2: Select Family & other people tab and then choose Add some else to this PC > I don’t have this person’s sign-in information.
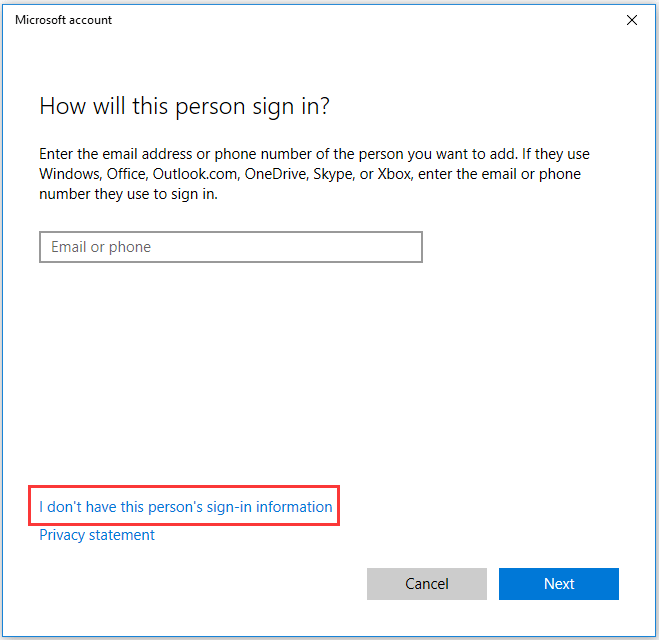
Step 3: Type the user credentials, including email, password, country, and birth date, and then hit the Next button to continue (click Add a user without a Microsoft account if you want to create a new local user account).
Step 4: Once finishing creating your new account, you should click the Start icon and then the account icon to sign out the current account.
Step 5: From the Sigh-in screen, select the new account to log in with it. Then, check the issue has been solved.

User Comments :