A great many players complain that Skyrim SE won’t launch. If you are also trying to fix the Skyrim SE crash on startup issue, then you come to the right place. This post of MiniTool explores some effective troubleshooting methods.
Many people encounter Skyrim special edition not launching after clicking play. According to a survey, the Skyrim SE black screen can occur if some crucial drivers are missing from the latest patches. In addition, other factors like insufficient permission, corrupted game files, and low GPU performance can trigger the Skyrim SE black screen issue.
Fix 1. Restart the Game
The first and simplest troubleshooting method for Skyrim Special edition won’t launch to restart your game or computer.
Step 1. Press Ctrl + Shift + Esc keys at the same time to open the Task Manager.
Step 2. In the Processes tab, right-click the Skyrim associated process and select End task.
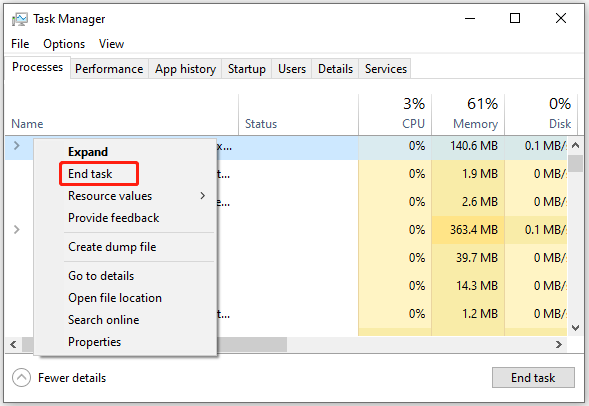
After that, you can relaunch the game and see if the Skyrim SE black screen persists. If it is, you can try restarting your computer.
Fix 2. Disable Any Unnecessary Programs
Sometimes Skyrim SE won’t launch if other third-party programs are consuming too much CPU and Disk resources. To make full use of your computer resources, we recommend you disable any unnecessary programs while playing the game by following the steps in Fix 1. Also, you can perform a clean boot to use a minimum set of drivers and programs.
Fix 3. Run the Game and Steam as Administrator
As mentioned above, insufficient permission is also responsible for Skyrim Special edition won’t launch. To fix it, you can try running the game and Steam as administrator.
Step 1. Right-click the Steam shortcut on your desktop and select Properties.
Step 2. In the Properties window, navigate to the Compatibility tab and tick the checkbox next to Run this program as an administrator. Then click on OK to save the change.
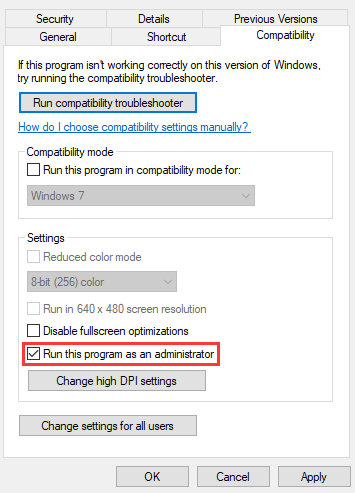
Step 3. Open your Steam client, and navigate to the Library tab, then right-click The Elder Scrolls V: Skyrim Special Edition from the left sidebar it and select Properties.
Step 4. Go to the Local Files tab in the Properties window and click on Browse Local Files.
Step 5. Right-click the executable game file and select Properties, and then select the Compatibility tab and check the Run this program as an administrator box and click on Apply.
Now, you can restart Steam and check if the Skyrim SE crash on startup issue is fixed.
Fix 4. Verify Integrity of the Game Files
If the game files are installed improperly or corrupted, you may encounter Skyrim special edition crash on startup. In this case, you can verify the integrity of the game files in Steam. Here’s how:
Step 1. Right-click the Steam launcher and select Run as administrator.
Step 2. Navigate to the Library tab, and then right-click The Elder Scrolls V: Skyrim Special Edition from the left pane and select Properties.
Step 3. In the pop-up window, navigate to the Local Files section and click on Verify Integrity of Game Files.
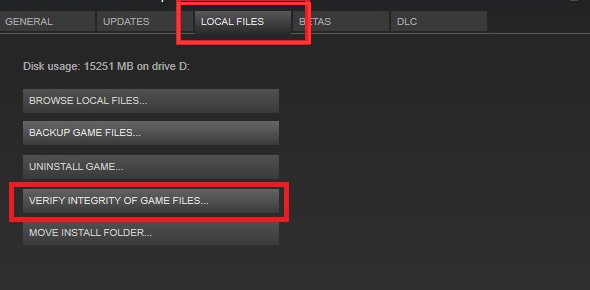
Once the process ends, restart your computer and launch the game to see if the Skyrim SE won’t launch issue still exists.
Fix 5. Update Your Windows to the Latest Version
As you might know, many new updated GPU drivers will be released by manufacturers as soon as a game is updated. If your current GPU driver is not compatible with the game, you may encounter Skyrim special edition not launching after clicking play.
Here you can install the latest GPU drivers by updating Windows or install them directly from the manufacturer’s website.
Step 1. Press Win + I keys to open the Settings app and navigate to the Update & Security section.
Step 2. Click on Check for updates button to start updating Windows 10. If there are any available Windows 10 updates, you can install them manually.
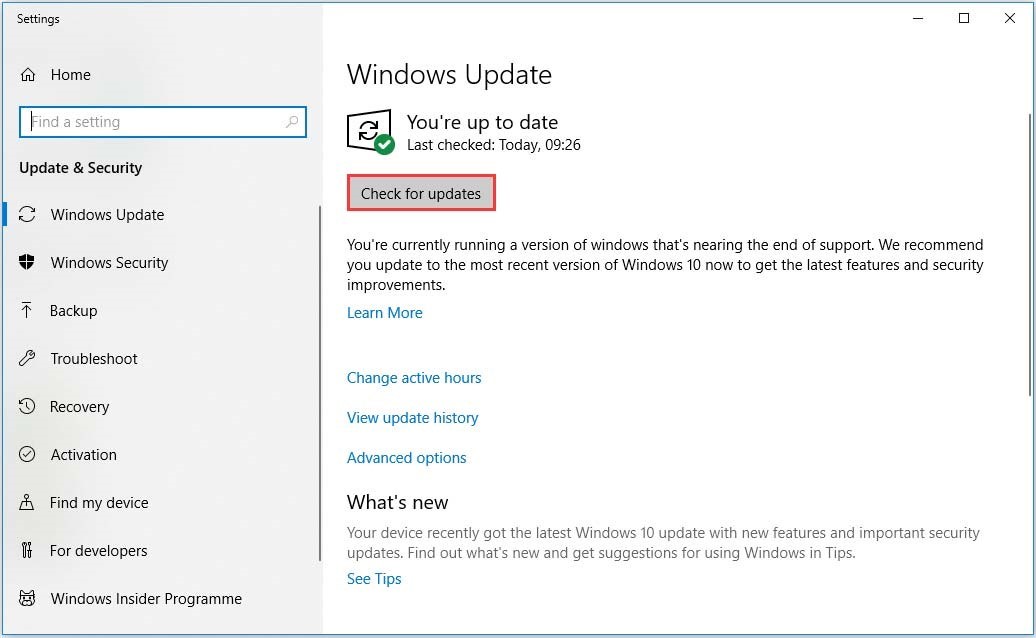
Once installed, restart your computer and see if the Skyrim SE won’t launch issue is resolved.
Fix 6. Enable the High-Performance GPU
Many users reported that they fixed Skyrim SE black screen by enabling the high-performance GPU. If you are using an NVidia graphics card, you can follow the steps below to set GPU to high performance.
Step 1. Right-click any empty area on your desktop and select NVidia Control Panel from the displayed options.
Step 2. Select Manage 3D settings from the left pane, and then click on Power management mode and select Prefer Maximum Performance from the drop-down menu.
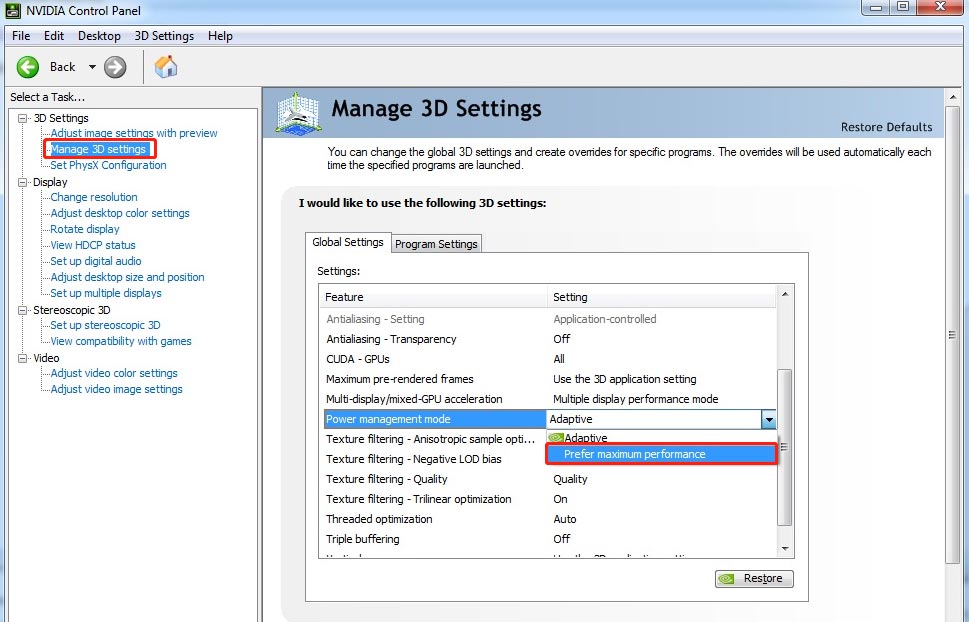
Step 3. Click on Apply to execute this change.


User Comments :