Some Windows 10 users report that their Skype won’t open and they don’t know what they can do. To solve the problem, MiniTool Partition Wizard puts together some solutions in the following contents.
Skype is a telecommunications application that specializes in providing video chat, voice calls and instant messaging services. It is available on computers, tables, mobile devices, Xbox One console and smartwatches.
As you know, it’s a quite popular application around the world. Therefore, it might be annoying to encounter Skype not opening issue. Why does this problem happen? How to solve it? Keep reading and you can get the answers.
Solution 1: Rename Skype Folder in Safe Mode
If your Skype won’t open Windows 10, the first thing you can try is to boot your computer in Safe Mode and rename the Skype folder and then try to open the application. Let’s see the detailed steps.
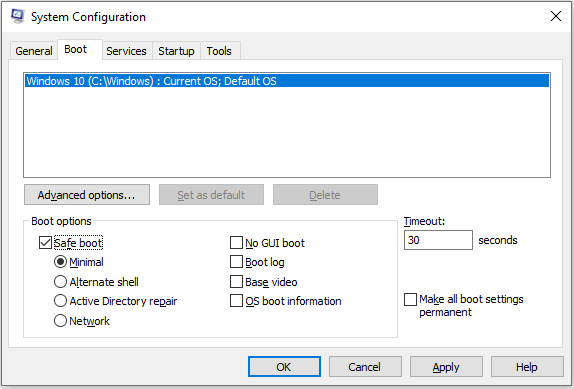
Step 1: Press Win + R to invoke Run window. Then input msconfig in the box and click OK to open System Configuration.
Step 2: Click Boot tab. Under Boot options, check Safe boot and select Minimal or Network.

Step 3: Click OK and then you will be asked to restart the computer. Make sure you have saved your work and click Restart. Then you can enter Windows 10 in Safe Mode.
Step 4: In safe mode, open Run window. Then type %appdata% in the box and press Enter to open File Explorer.
Step 5: Locate Skype folder and rename it to Skype_2 in File Explorer.
Then you can close File Explorer and run Skype. If the problem disappears, start your computer normally and run Skype to check if it works properly.
Solution 2: Run SFC Scan
System files corruption is a common reason why Skype won’t open on Windows 10. Fortunately, there is a built-in tool named System File Checker (SFC) in Windows 10. It is used to scan for corrupted or missing system files on the computer and then repair them.
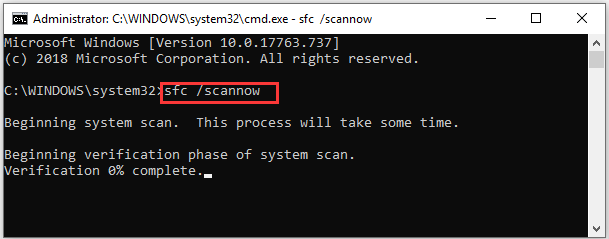
Step 1: Open Run window, type cmd in the box and press Shift + Ctrl + Enter to run Command Prompt as administrator.
Step 2: Input the command sfc /scannow and press Enter to execute it.

The System File Checker will scan your computer. Once any problematic files are found, it will replace them with new ones automatically. You just need to wait until the process is finished. Then restart the PC and launch Skype again to check if Skype not opening has been solved. If it still exists, you should move on to the next solution.
Solution 3: Reinstall Skype
Some users have solved the Skype not working issue by reinstalling the application. You can also have a try.
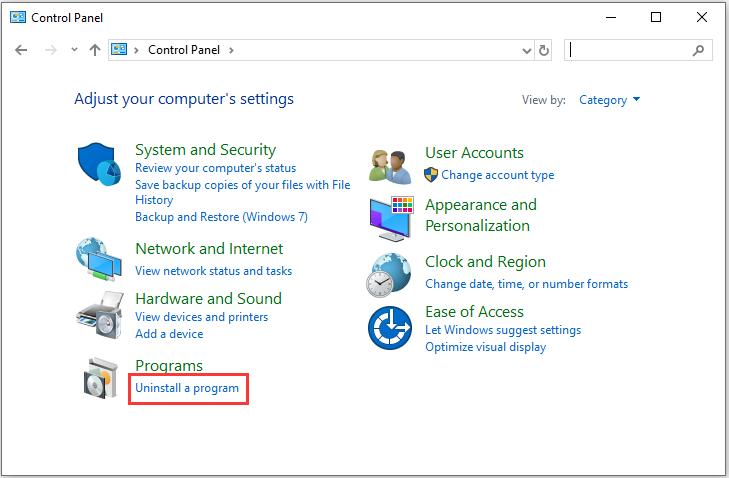
Step 1: Press Win + S to open Search. Then input control in the search box and select Control Panel from the search results.
Step 2: Select View: by Category from the upper right corner. Then click Uninstall a program.

Step 3: In the list of programs and features, right-click Skype and select Uninstall. Then follow the onscreen instructions to finish the operation.
Step 4: Download Skype application from the official website and then launch it to check if the app works without any problems.

User Comments :