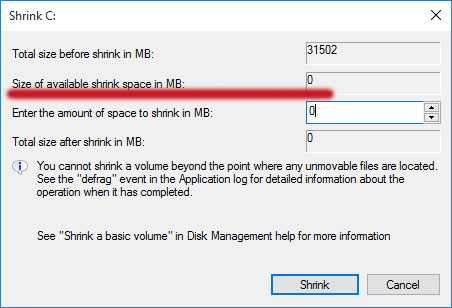
Today many users use Disk Management tool to help simple disk maintenance. As we all know, this tool is rather easy to use and can finish tasks without rebooting. However, while using it to shrink the C drive, sometimes the size of available shrink space in MB is 0 (see the following picture below). In this case, we are unable to continue shrinking C drive.

Have you ever encountered such a situation? Do you know how to overcome? If you are still working hard to find a solution, this post should be very helpful.
Cause and Solution to Size of Available Shrink Space 0
Cause
In fact, “size of available shrink space in MB 0” is caused by unmovable files. As we can see from the picture above, the built-in Windows Disk Management tool can only shrink a partition to the point it encounters an unmovable file. If such a file is located at the end of the partition, there is 0 MB available to shrink.
Solution
To avoid “size of available shrink space in 0 MB”, you would need to use a third-party partition manager to help you. Here MiniTool Partition Wizard is strongly recommended. This partition manager is able to expand/shrink partition flexibly without being interrupted by the unmovable files. Note that since you are going to resize the OS partition, we suggest using the bootable version of MiniTool Partition Wizard in case of any accidents.
Predatory job:
You need to create a bootable CD/DVD disc or USB flash drive by using MiniTool Bootable Media Builder and then set your computer to boot from the bootable media. Here are the tutorials for you:
- How to Build Boot CD/DVD Discs and Boot Flash Drive with Bootable Media Builder?
- How to Boot from Burned MiniTool Bootable CD/DVD Discs or USB Flash Drive?
When you see the main interface of MiniTool Partition Wizard Pro, you just follow the steps below to bypass the similar “shrink volume 0 MB available” message.
Step-by-step guide:
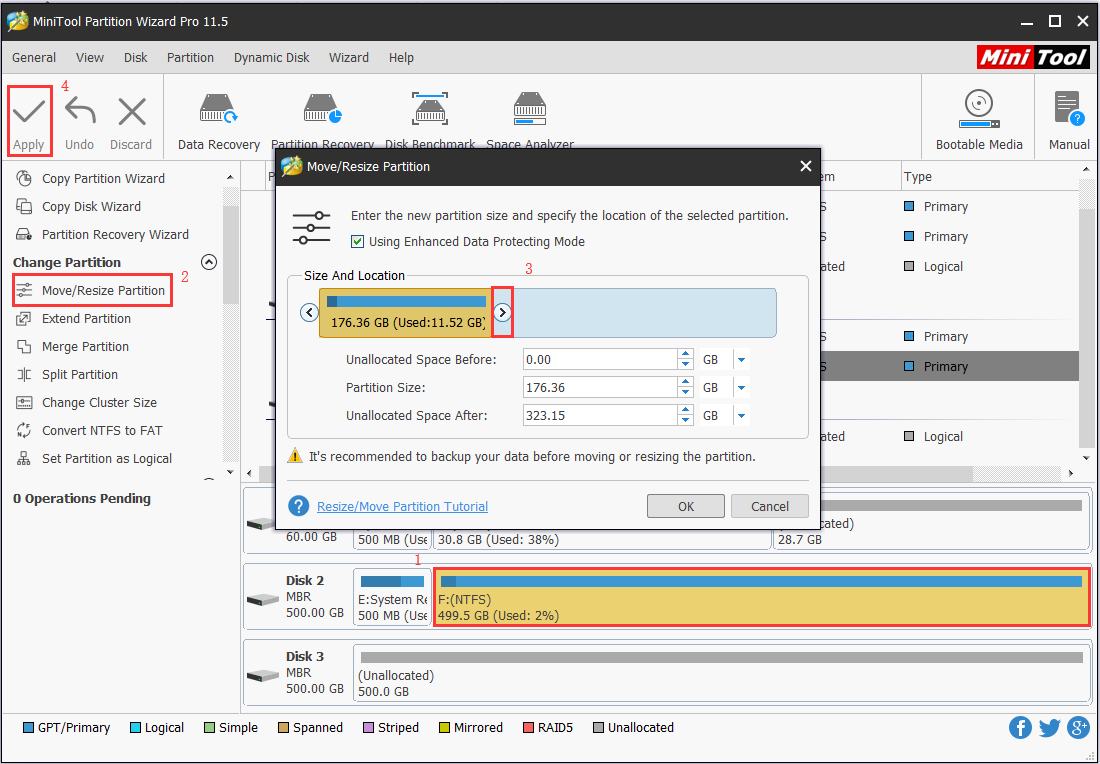
- Find the C drive by viewing hard drive properties in the disk map and click on it. Note that the drive letter may differ from what it should be in Windows. Just be careful.
- Select Move/Resize Partition feature from the action panel.
- In the pop-up window, drag the slider leftwards so as to shrink the system partition and then press OK button.
- Hit Apply on the tool bar to execute all pending operations.
The following picture gives you a more intuitive guide:

In a short while, it will complete the shrink process. Then you can make use of the released unallocated space to create new partitions or to extend other partitions.
You might also be interested in The Most Reliable Way to Extend Windows 7 System Partition.
Bottom Line
See! By using MiniTool Partition Wizard, you can easily shrink the system partition without encountering “size of available shrink space 0” error. Besides, it also helps to deal with all kinds if disk issues like upgrade hard drive to SSD, fix MBR, undo diskpart clean command, and more. We bet you will feel like using it to manage your hard drives. Why are you still hesitating to have a try?

User Comments :