Nowadays, more and more people transfer data over the local network. But how to transfer data safely? You can set up an SFTP server in Windows using OpenSSH. In this article, detailed steps are provided.
What Is SFTP Server
Perhaps most of you have heard of FTP connection, right? With an FTP connection, you can connect your device to another device to transfer data over the local network. But FTP protocol is not safe enough in the first place. So, you should switch to another safer platform.
There is a much better wireless transfer protocol and it’s called SFTP. SFTP is the abbreviation of the Secure File Transfer Protocol. As you can imagine from its literal meaning, this transfer protocol is much safer. It encrypts the data and connection’s login information in the process of transferring. No one can steal and tamper with the data.
How to Set up SFTP Server Windows Using OpenSSH SFTP Server
Method 1. Installing OpenSSH and Activating the Required Services
To make you set up an SFTP server smoothly, we assist you with the detailed steps as follow:
Step 1. Download OpenSSH from GitHub.
Step 2. Decompress the archive to the Program Files folder.
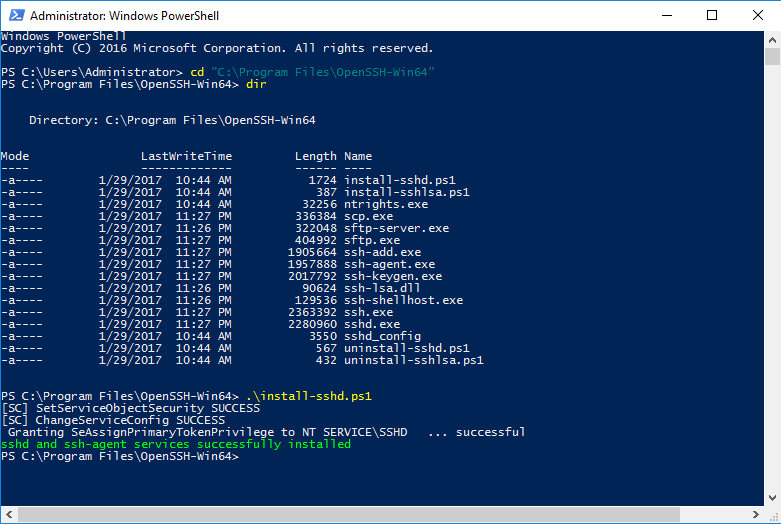
Step 3. Open PowerShell as an administrator, and run cd “C:Program FilesOpenSSH-Win64” command in the window to navigate this folder.
Step 4. OpenSSH needs sshd and ssh-agent to run. Paste the following command in the PowerShell window: powershell.exe -ExecutionPolicy Bypass -File install-sshd.ps1. Then you can receive a message saying: sshd and ssh-agent services successfully installed.

Step 5.After exiting the Powershell window, you can start this service by using Services.msc. Then the folder C:ProgramDatassh will be created with your host key, which is very important for the service to work.
In addition to this method, there is another simple way to set up SFTP Server Windows.
Method 2. Open the SSH Port in the Windows Firewall
Step 1. Using Port 22 for transfer/authentication, SSH is closed in Windows since it isn’t included by default. You can open it by opening the Windows Firewall from the Control Panel.
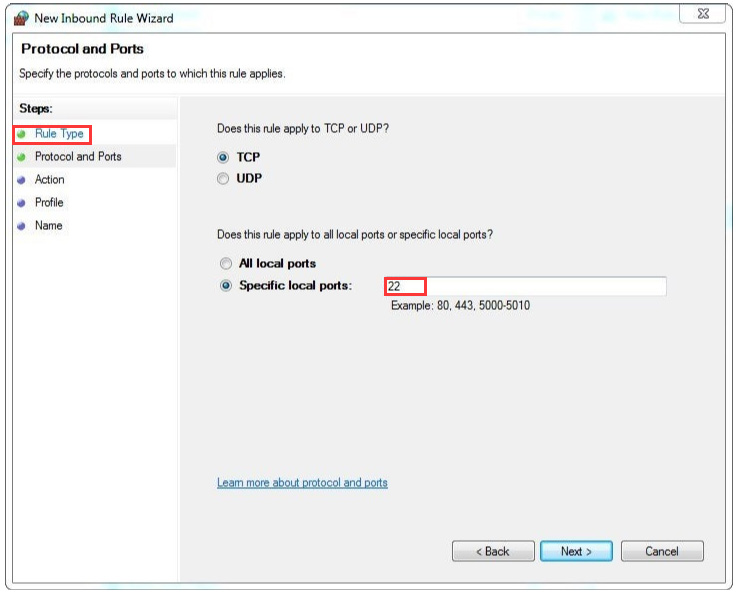
Step 2. Click on the inbound Rule Type in the left panel. And enter the number 22 in the specific local ports option and click Next to continue.

Step 3. Select Allow the Connection and click Next. Then select Private for the network option.
Step 4. Give the rule a name, and click on Finish.
Then, you can make a try to test on Windows
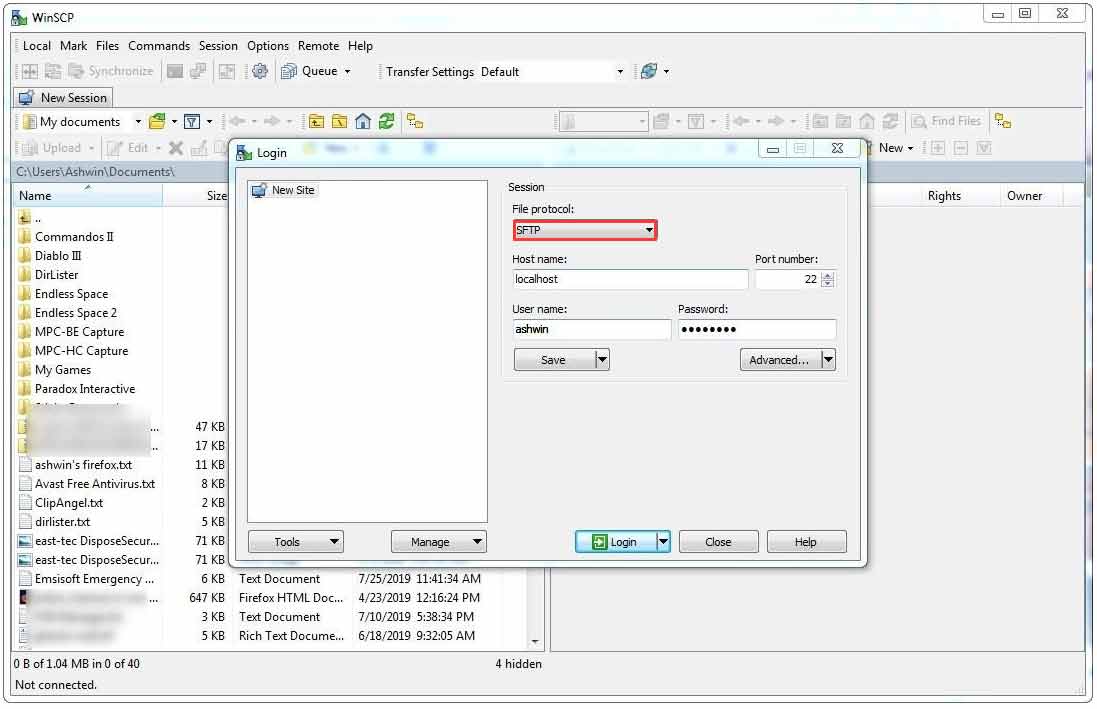
Step 1. Run WinSCP and select “SFTP” as the File protocol. Enter localhost in the host name field. Then you need to enter your Windows username and password to allow SFTP to connect to the Server. Hit save, and click on login.

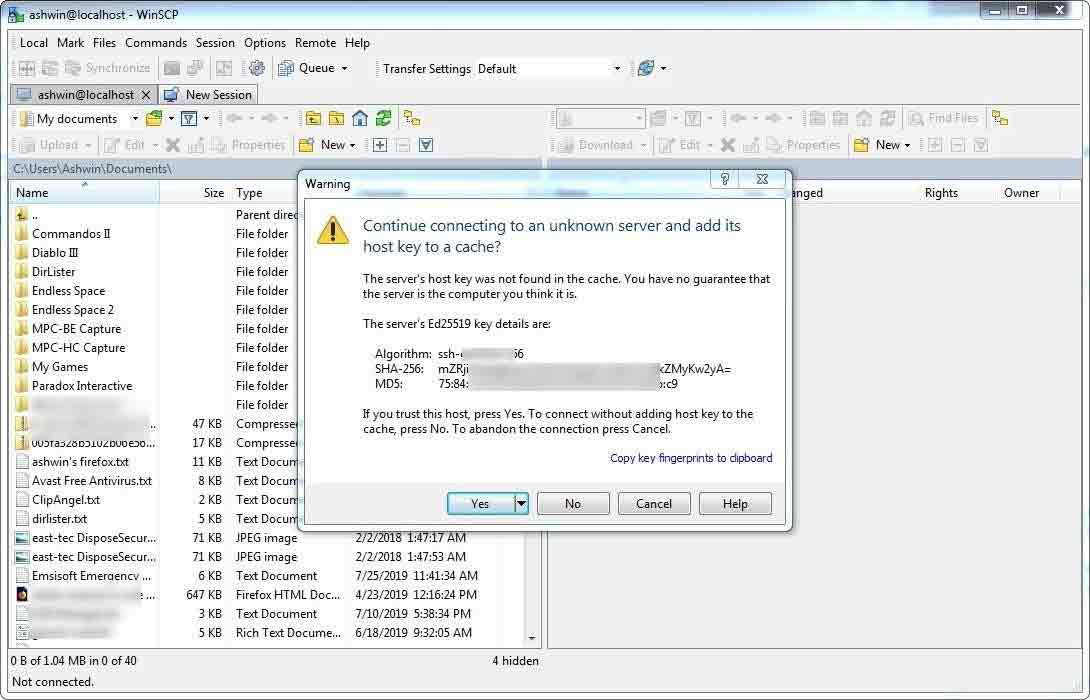
Step 2. In the pop-up window, you will receive a message asking you whether you trust the server. You can click on Yes since the Server is your own computer. It is the host key that justifies the connection made by the device. Then you can use the SFTP Server to transfer data from local network.

If your Windows user account does not have a password, you need to use a public key to justify the SFTP server. You can create a different account on the system for SFPT access, but that may need to make files outside the user directory.
Right now, 2 effective methods to set up SFTP Server Windows are told to you. Try it now!

User Comments :